Happy New Year!

From your ‘neighborhood’ CNC router :-)


CNC Working

[img src=https://tomstudwell.com/wordpress/wp-content/flagallery/cnc-working/thumbs/thumbs_img_4916.jpg]790Happy New Year!
The first REAL application of the router!
[img src=https://tomstudwell.com/wordpress/wp-content/flagallery/cnc-working/thumbs/thumbs_img_4914.jpg]620Hot off the cutting board!
[img src=https://tomstudwell.com/wordpress/wp-content/flagallery/cnc-working/thumbs/thumbs_img_4906.jpg]550First experiments with engraving using different bits and fonts.
Note that the characters to the right are not as deep as the ones on the left. Turns out the table was not flat!
[img src=https://tomstudwell.com/wordpress/wp-content/flagallery/cnc-working/thumbs/thumbs_cnc_test1b.jpg]510I decided to try using SketchUp to create a simple 3D Model...
[img src=https://tomstudwell.com/wordpress/wp-content/flagallery/cnc-working/thumbs/thumbs_img_4904.jpg]450And here it is in wood!
This is the first attempt and it shows that there are some issues with the Y axis. The holes were already in the scrap of wood that I used for the test, the router didn't make these.
[img src=https://tomstudwell.com/wordpress/wp-content/flagallery/cnc-working/thumbs/thumbs_img_4909.jpg]420Here I'm methodically flattening the table top and aligning the rails...
[img src=https://tomstudwell.com/wordpress/wp-content/flagallery/cnc-working/thumbs/thumbs_img_4912.jpg]410To get the system working I had to abandon the laptop in favor of this Linux computer.
Don't see it? It's that little device just to the left of the keyboard!
CNC Router, First Trial Run!

I’ve been busy getting the CNC Router assembled, aligned, powered, and controlled via software.  After MUCH learning, I was able to have my first trial run today!

Using CNC code that produces a 2D ‘sketch’ of the RoadRunner, the Router was run through its paces.  I ran the first couple runs ‘dry’, that is, the router bit wasn’t spinning and I just made sure the trajectory seemed correct.  Good thing, too, as I had a few loose items become ‘looser’ as the machine literally ground its way around the pattern.  But I was able to tighten things up, and, while still ‘temporary’ and needing some tuning, overall I was impressed with the results.  They were promising enough that I think I’ll try some 3D models next before I buckle down and fine tune the unit!

CNC Router, Day 5

There was a lot of machining and alignment today.  As a result, I now have the X Axis pretty much ready to be tested.  The lead screws, pulleys, timing belt, and motor are in place.  Now all I need is the Stepper Motor driver to run the motor.  The driver is quite literally on a slow boat from China…  sigh…

Click to view larger image.

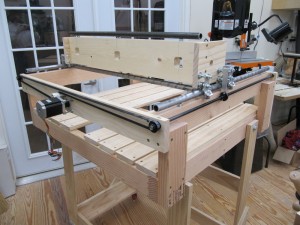
Y Gantry riding on top of the X Axis. The X Axis has the two lead screws, pulleys, timing belt, and motor installed.

CNC Router, Day 4

Today I was able to mount the Y Gantry onto the X Axis tracks and align the tracking bearings.  Happily, the gantry rolls very smoothly, without drag or observable play.

CNC Router, Day 3

Yesterday was busy, cutting pipes, etc, but not much to show for it.  Today, at least, there is some observable progress with the X Axis tracks and frame in position…

WordPress theme: Kippis 1.12