For the 2013 National Boat Building Challenge, which Clare enrolled us as a team as a Father’s Day gift to me, new this year, the Belfast committee decided to add a “Best Oar” competition. Since this was the ONLY opportunity in the competition to do any ‘real’ woodworking, I decided that this would be a fun and challenging wood working project in its own right.
Originally I considered making the oars out of Ash, but, on researching oars, I realized Ash is usually reserved for Paddles and very long racing oars (single person per oar). Typically, Spruce is used for the type of oar appropriate for this kind of boat. Unfortunately, by the time I learned this, I was not able to find any decent clear spruce and, also in my research, I had learned that laminated pine is often used and we have an excellent source of clear pine here in Maine. I was able to find some good ideas and designs from both the web and a few boat building books.
The result? WE WON!!!! These oars were deemed the “Best Oars” in the competition. I was pleased with the result regardless, but the award, makes this project especially memorable.
Here is the final result:
-
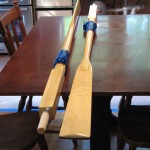
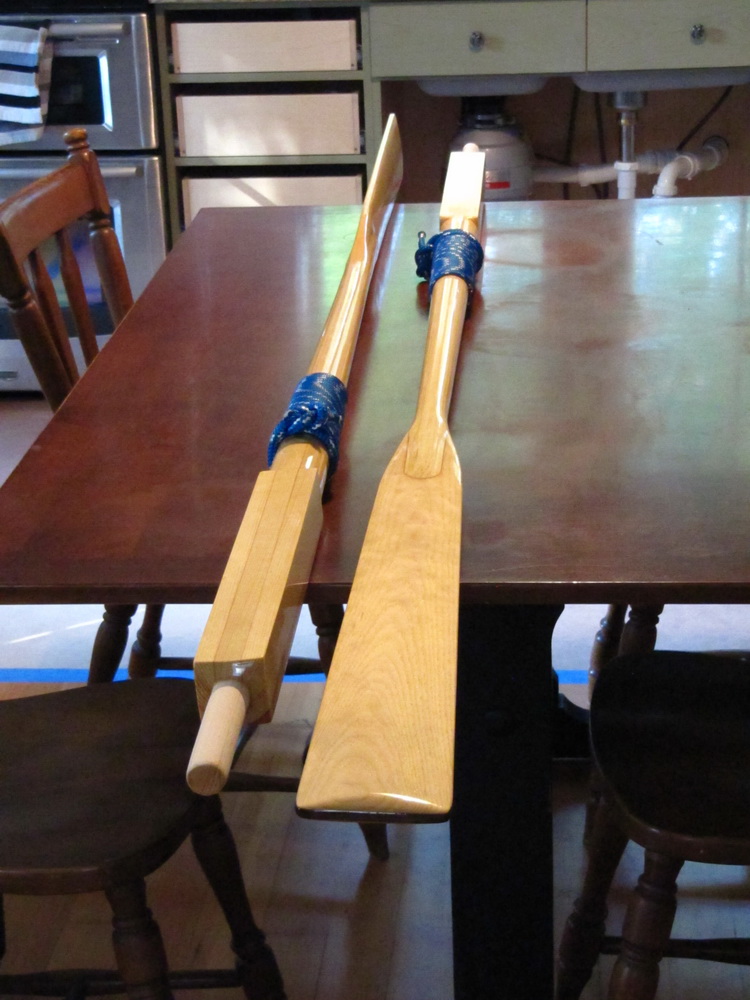
- Finished Pair of Oars.
-
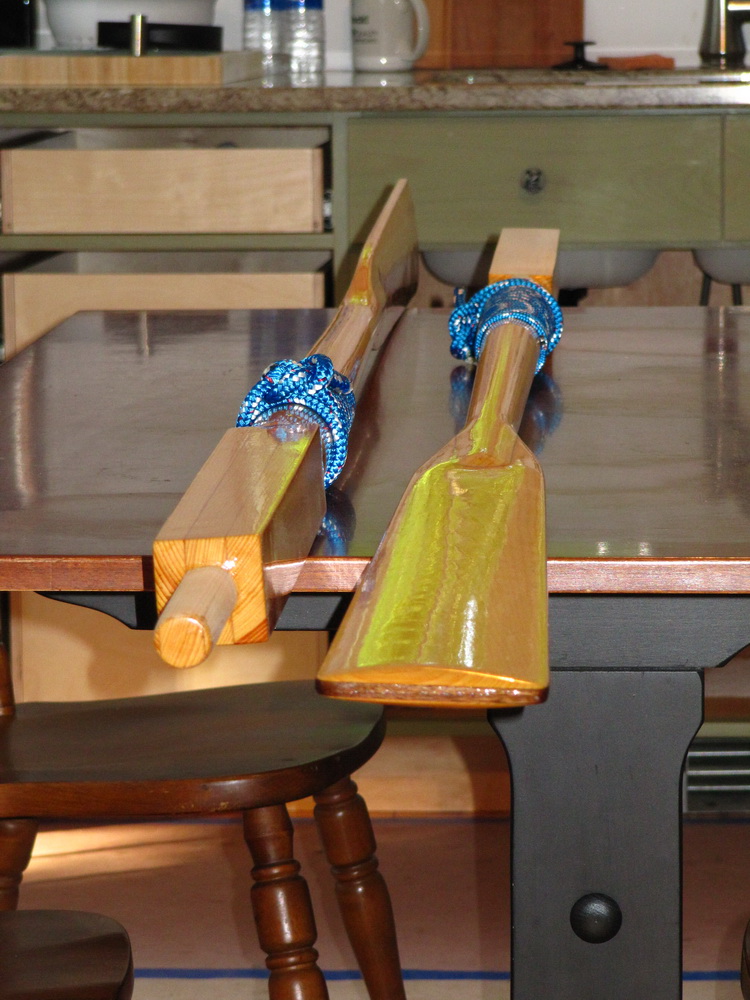
- Finished Ends, note the walnut spline used to keep the end grain of the blade from splitting and the unvarnished handles to prevent blisters.
-
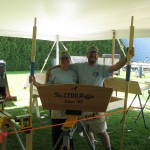
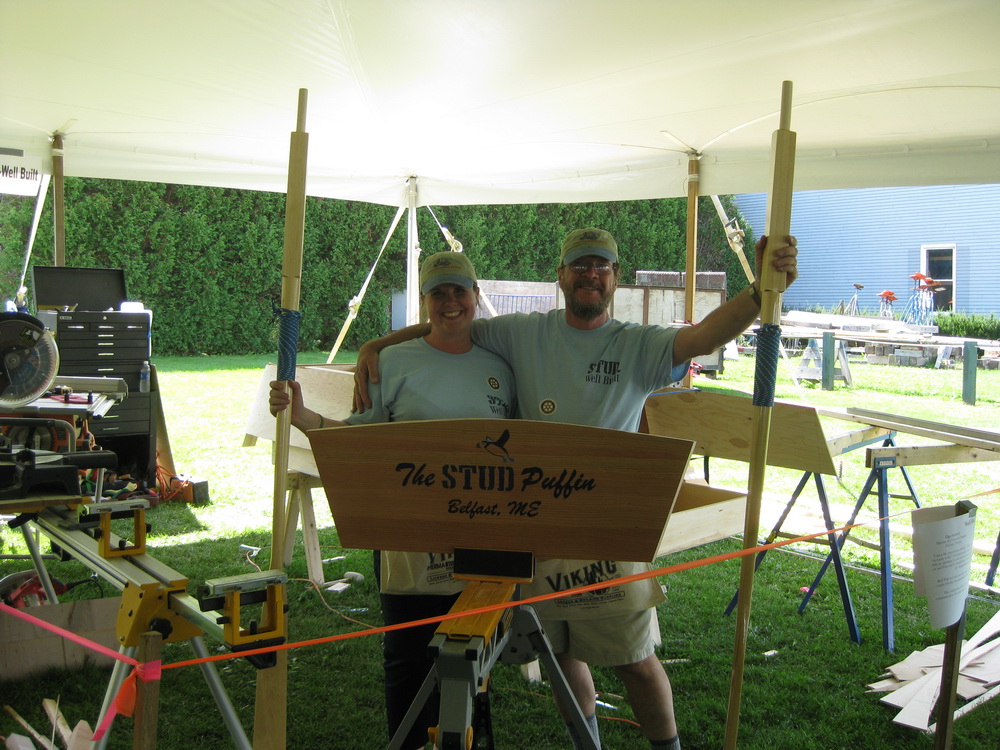
- Clare and me showing off the ‘Award Winning’ Oars and lovely Transom.
I enjoyed building these oars as it gave me a chance to try techniques and tools I haven’t used before (or only briefly). Below is the complete sequence, from start to finish of the oar project. Enjoy!
Oar Project
![[img src=https://tomstudwell.com/wordpress/wp-content/flagallery/oar-project/thumbs/thumbs_img_4577.jpg]1410Future Oars...A couple of nice clear pine planks to start with...](https://tomstudwell.com/wordpress/wp-content/flagallery/oar-project/img_4577.jpg)
A couple of nice clear pine planks to start with...[img src=https://tomstudwell.com/wordpress/wp-content/flagallery/oar-project/thumbs/thumbs_img_4574.jpg]810Marked up with basic oar pattern and layout.
![[img src=https://tomstudwell.com/wordpress/wp-content/flagallery/oar-project/thumbs/thumbs_img_4574.jpg]810Marked up with basic oar pattern and layout.Note that the outer layers are just for the shaft (or 'looms') of the oar.](https://tomstudwell.com/wordpress/wp-content/flagallery/oar-project/img_4574.jpg)
Note that the outer layers are just for the shaft (or 'looms') of the oar.[img src=https://tomstudwell.com/wordpress/wp-content/flagallery/oar-project/thumbs/thumbs_img_4575.jpg]710Closer view of markup.
![[img src=https://tomstudwell.com/wordpress/wp-content/flagallery/oar-project/thumbs/thumbs_img_4575.jpg]710Closer view of markup.](https://tomstudwell.com/wordpress/wp-content/flagallery/oar-project/img_4575.jpg)
[img src=https://tomstudwell.com/wordpress/wp-content/flagallery/oar-project/thumbs/thumbs_img_4579.jpg]670All the pieces cut out.
![[img src=https://tomstudwell.com/wordpress/wp-content/flagallery/oar-project/thumbs/thumbs_img_4579.jpg]670All the pieces cut out.These are really ROUGH cut, using a hand held jig saw to cut them (there wasn't enough space to cut them on my small bandsaw I have in Maine).](https://tomstudwell.com/wordpress/wp-content/flagallery/oar-project/img_4579.jpg)
These are really ROUGH cut, using a hand held jig saw to cut them (there wasn't enough space to cut them on my small bandsaw I have in Maine).[img src=https://tomstudwell.com/wordpress/wp-content/flagallery/oar-project/thumbs/thumbs_img_4580.jpg]630The inside sections were then shaved to the proper profile.
![[img src=https://tomstudwell.com/wordpress/wp-content/flagallery/oar-project/thumbs/thumbs_img_4580.jpg]630The inside sections were then shaved to the proper profile.I used hand planes and spokeshaves for this step. It was very satisfying work.](https://tomstudwell.com/wordpress/wp-content/flagallery/oar-project/img_4580.jpg)
I used hand planes and spokeshaves for this step. It was very satisfying work.[img src=https://tomstudwell.com/wordpress/wp-content/flagallery/oar-project/thumbs/thumbs_img_4587.jpg]580Set up to cut the slot for the Walnut spline in the ends of the blades.
![[img src=https://tomstudwell.com/wordpress/wp-content/flagallery/oar-project/thumbs/thumbs_img_4587.jpg]580Set up to cut the slot for the Walnut spline in the ends of the blades.I did this before gluing on the outer layers so it was easier to clamp to the workbench.](https://tomstudwell.com/wordpress/wp-content/flagallery/oar-project/img_4587.jpg)
I did this before gluing on the outer layers so it was easier to clamp to the workbench.[img src=https://tomstudwell.com/wordpress/wp-content/flagallery/oar-project/thumbs/thumbs_img_4592.jpg]530Glue up of all three layers.
![[img src=https://tomstudwell.com/wordpress/wp-content/flagallery/oar-project/thumbs/thumbs_img_4592.jpg]530Glue up of all three layers.I did one oar at a time since it took so many clamps and space on the bench. Clamp time only needed to be 30 minutes or so.](https://tomstudwell.com/wordpress/wp-content/flagallery/oar-project/img_4592.jpg)
I did one oar at a time since it took so many clamps and space on the bench. Clamp time only needed to be 30 minutes or so.[img src=https://tomstudwell.com/wordpress/wp-content/flagallery/oar-project/thumbs/thumbs_img_4594.jpg]480Another view of glue up.
![[img src=https://tomstudwell.com/wordpress/wp-content/flagallery/oar-project/thumbs/thumbs_img_4594.jpg]480Another view of glue up.](https://tomstudwell.com/wordpress/wp-content/flagallery/oar-project/img_4594.jpg)
[img src=https://tomstudwell.com/wordpress/wp-content/flagallery/oar-project/thumbs/thumbs_img_4619.jpg]450End view of glued up oar after shaving square and tapering outer layers.
![[img src=https://tomstudwell.com/wordpress/wp-content/flagallery/oar-project/thumbs/thumbs_img_4619.jpg]450End view of glued up oar after shaving square and tapering outer layers.The outer layers were first cut flush with a router bit on a router table and then the face of the outer layer was rough cut on the bandsaw and, finally, I used hand planes to trim to the correct taper. Note the markup of the taper lines to cut into an octagon shape.](https://tomstudwell.com/wordpress/wp-content/flagallery/oar-project/img_4619.jpg)
The outer layers were first cut flush with a router bit on a router table and then the face of the outer layer was rough cut on the bandsaw and, finally, I used hand planes to trim to the correct taper. Note the markup of the taper lines to cut into an octagon shape.[img src=https://tomstudwell.com/wordpress/wp-content/flagallery/oar-project/thumbs/thumbs_img_4702.jpg]440Tool to mark octagon face lines on taper.
![[img src=https://tomstudwell.com/wordpress/wp-content/flagallery/oar-project/thumbs/thumbs_img_4702.jpg]440Tool to mark octagon face lines on taper.The tool is twisted while the posts ride on the perpendicular tapered faces. The pencils are positioned such that they mark the intersection of a face 45 degrees from the square faces. Very clever device used often in boat building...](https://tomstudwell.com/wordpress/wp-content/flagallery/oar-project/img_4702.jpg)
The tool is twisted while the posts ride on the perpendicular tapered faces. The pencils are positioned such that they mark the intersection of a face 45 degrees from the square faces. Very clever device used often in boat building...[img src=https://tomstudwell.com/wordpress/wp-content/flagallery/oar-project/thumbs/thumbs_img_4621.jpg]470Close up of the Walnut spline glued into the end of the blade.
![[img src=https://tomstudwell.com/wordpress/wp-content/flagallery/oar-project/thumbs/thumbs_img_4621.jpg]470Close up of the Walnut spline glued into the end of the blade.](https://tomstudwell.com/wordpress/wp-content/flagallery/oar-project/img_4621.jpg)
[img src=https://tomstudwell.com/wordpress/wp-content/flagallery/oar-project/thumbs/thumbs_img_4622.jpg]430Another view.
![[img src=https://tomstudwell.com/wordpress/wp-content/flagallery/oar-project/thumbs/thumbs_img_4622.jpg]430Another view.I added extra spline to easily accommodate my shaping of the blade.](https://tomstudwell.com/wordpress/wp-content/flagallery/oar-project/img_4622.jpg)
I added extra spline to easily accommodate my shaping of the blade.[img src=https://tomstudwell.com/wordpress/wp-content/flagallery/oar-project/thumbs/thumbs_img_4626.jpg]420To start cutting the octagon faces, I rough cut the top corners with a round rasp.
![[img src=https://tomstudwell.com/wordpress/wp-content/flagallery/oar-project/thumbs/thumbs_img_4626.jpg]420To start cutting the octagon faces, I rough cut the top corners with a round rasp.This gives me a reference point and a place to begin digging in with my drawknife.](https://tomstudwell.com/wordpress/wp-content/flagallery/oar-project/img_4626.jpg)
This gives me a reference point and a place to begin digging in with my drawknife.[img src=https://tomstudwell.com/wordpress/wp-content/flagallery/oar-project/thumbs/thumbs_img_4628.jpg]410Octagonal faces all cut into the shaft.
![[img src=https://tomstudwell.com/wordpress/wp-content/flagallery/oar-project/thumbs/thumbs_img_4628.jpg]410Octagonal faces all cut into the shaft.](https://tomstudwell.com/wordpress/wp-content/flagallery/oar-project/img_4628.jpg)
[img src=https://tomstudwell.com/wordpress/wp-content/flagallery/oar-project/thumbs/thumbs_img_4633.jpg]400The faces were then rounded over with LOTS of planing and spokeshave work.
![[img src=https://tomstudwell.com/wordpress/wp-content/flagallery/oar-project/thumbs/thumbs_img_4633.jpg]400The faces were then rounded over with LOTS of planing and spokeshave work.](https://tomstudwell.com/wordpress/wp-content/flagallery/oar-project/img_4633.jpg)
[img src=https://tomstudwell.com/wordpress/wp-content/flagallery/oar-project/thumbs/thumbs_img_4635.jpg]400The joint at the blade was left with only the square taper at this point.
![[img src=https://tomstudwell.com/wordpress/wp-content/flagallery/oar-project/thumbs/thumbs_img_4635.jpg]400The joint at the blade was left with only the square taper at this point.](https://tomstudwell.com/wordpress/wp-content/flagallery/oar-project/img_4635.jpg)
[img src=https://tomstudwell.com/wordpress/wp-content/flagallery/oar-project/thumbs/thumbs_img_4637.jpg]380Beginning to shape the blade.
![[img src=https://tomstudwell.com/wordpress/wp-content/flagallery/oar-project/thumbs/thumbs_img_4637.jpg]380Beginning to shape the blade. This was mostly done with a hand plane and straight spokeshave at this point.](https://tomstudwell.com/wordpress/wp-content/flagallery/oar-project/img_4637.jpg)
This was mostly done with a hand plane and straight spokeshave at this point.[img src=https://tomstudwell.com/wordpress/wp-content/flagallery/oar-project/thumbs/thumbs_img_4639.jpg]390Shaped to the end of the blade...
![[img src=https://tomstudwell.com/wordpress/wp-content/flagallery/oar-project/thumbs/thumbs_img_4639.jpg]390Shaped to the end of the blade...](https://tomstudwell.com/wordpress/wp-content/flagallery/oar-project/img_4639.jpg)
[img src=https://tomstudwell.com/wordpress/wp-content/flagallery/oar-project/thumbs/thumbs_img_4642.jpg]390And smoothed out by sanding.
![[img src=https://tomstudwell.com/wordpress/wp-content/flagallery/oar-project/thumbs/thumbs_img_4642.jpg]390And smoothed out by sanding.](https://tomstudwell.com/wordpress/wp-content/flagallery/oar-project/img_4642.jpg)
[img src=https://tomstudwell.com/wordpress/wp-content/flagallery/oar-project/thumbs/thumbs_img_4643.jpg]390Basic shape is complete but the round sections are still roughly faceted.
![[img src=https://tomstudwell.com/wordpress/wp-content/flagallery/oar-project/thumbs/thumbs_img_4643.jpg]390Basic shape is complete but the round sections are still roughly faceted.](https://tomstudwell.com/wordpress/wp-content/flagallery/oar-project/img_4643.jpg)
[img src=https://tomstudwell.com/wordpress/wp-content/flagallery/oar-project/thumbs/thumbs_img_4644.jpg]380View of the roughly shaped handle.
![[img src=https://tomstudwell.com/wordpress/wp-content/flagallery/oar-project/thumbs/thumbs_img_4644.jpg]380View of the roughly shaped handle.](https://tomstudwell.com/wordpress/wp-content/flagallery/oar-project/img_4644.jpg)
[img src=https://tomstudwell.com/wordpress/wp-content/flagallery/oar-project/thumbs/thumbs_img_4646.jpg]360Almost done with shaping.
![[img src=https://tomstudwell.com/wordpress/wp-content/flagallery/oar-project/thumbs/thumbs_img_4646.jpg]360Almost done with shaping.](https://tomstudwell.com/wordpress/wp-content/flagallery/oar-project/img_4646.jpg)
[img src=https://tomstudwell.com/wordpress/wp-content/flagallery/oar-project/thumbs/thumbs_img_4649.jpg]340Made a ton of this stuff!
![[img src=https://tomstudwell.com/wordpress/wp-content/flagallery/oar-project/thumbs/thumbs_img_4649.jpg]340Made a ton of this stuff!](https://tomstudwell.com/wordpress/wp-content/flagallery/oar-project/img_4649.jpg)
[img src=https://tomstudwell.com/wordpress/wp-content/flagallery/oar-project/thumbs/thumbs_img_20130815_163012_818.jpg]320Final Oars on the varnishing rack!
![[img src=https://tomstudwell.com/wordpress/wp-content/flagallery/oar-project/thumbs/thumbs_img_20130815_163012_818.jpg]320Final Oars on the varnishing rack!](https://tomstudwell.com/wordpress/wp-content/flagallery/oar-project/img_20130815_163012_818.jpg)
[img src=https://tomstudwell.com/wordpress/wp-content/flagallery/oar-project/thumbs/thumbs_img_4652.jpg]300Finished view...
![[img src=https://tomstudwell.com/wordpress/wp-content/flagallery/oar-project/thumbs/thumbs_img_4652.jpg]300Finished view...](https://tomstudwell.com/wordpress/wp-content/flagallery/oar-project/img_4652.jpg)
[img src=https://tomstudwell.com/wordpress/wp-content/flagallery/oar-project/thumbs/thumbs_img_4663.jpg]330The rope color choice was Clare's recommendation to match her beautifully decorated transom!
![[img src=https://tomstudwell.com/wordpress/wp-content/flagallery/oar-project/thumbs/thumbs_img_4663.jpg]330The rope color choice was Clare's recommendation to match her beautifully decorated transom!The rope is used to protect the wood from wearing in the oar locks. The thicker section keeps the oar from slipping too far into the oar lock.](https://tomstudwell.com/wordpress/wp-content/flagallery/oar-project/img_4663.jpg)
The rope is used to protect the wood from wearing in the oar locks. The thicker section keeps the oar from slipping too far into the oar lock.[img src=https://tomstudwell.com/wordpress/wp-content/flagallery/oar-project/thumbs/thumbs_img_4671.jpg]320The thick, square section, provides strength and a counter weight for the oars.
![[img src=https://tomstudwell.com/wordpress/wp-content/flagallery/oar-project/thumbs/thumbs_img_4671.jpg]320The thick, square section, provides strength and a counter weight for the oars.The balance point is just below the oar lock so that there is very little of the oar's weight to lift as you row.](https://tomstudwell.com/wordpress/wp-content/flagallery/oar-project/img_4671.jpg)
The balance point is just below the oar lock so that there is very little of the oar's weight to lift as you row.[img src=https://tomstudwell.com/wordpress/wp-content/flagallery/oar-project/thumbs/thumbs_img_4674.jpg]350The splines came out reasonably well.
![[img src=https://tomstudwell.com/wordpress/wp-content/flagallery/oar-project/thumbs/thumbs_img_4674.jpg]350The splines came out reasonably well. I probably could have spent a bit more time on them.](https://tomstudwell.com/wordpress/wp-content/flagallery/oar-project/img_4674.jpg)
I probably could have spent a bit more time on them.[img src=https://tomstudwell.com/wordpress/wp-content/flagallery/oar-project/thumbs/thumbs_img_4679.jpg]320Finished Oars
![[img src=https://tomstudwell.com/wordpress/wp-content/flagallery/oar-project/thumbs/thumbs_img_4679.jpg]320Finished Oars](https://tomstudwell.com/wordpress/wp-content/flagallery/oar-project/img_4679.jpg)
[img src=https://tomstudwell.com/wordpress/wp-content/flagallery/oar-project/thumbs/thumbs_img_4684.jpg]320Finished Oars
![[img src=https://tomstudwell.com/wordpress/wp-content/flagallery/oar-project/thumbs/thumbs_img_4684.jpg]320Finished Oars](https://tomstudwell.com/wordpress/wp-content/flagallery/oar-project/img_4684.jpg)
[img src=https://tomstudwell.com/wordpress/wp-content/flagallery/oar-project/thumbs/thumbs_img_4691.jpg]310Finished Oars
![[img src=https://tomstudwell.com/wordpress/wp-content/flagallery/oar-project/thumbs/thumbs_img_4691.jpg]310Finished Oars](https://tomstudwell.com/wordpress/wp-content/flagallery/oar-project/img_4691.jpg)
[img src=https://tomstudwell.com/wordpress/wp-content/flagallery/oar-project/thumbs/thumbs_img_7608.jpg]280The CHAMPS!
![[img src=https://tomstudwell.com/wordpress/wp-content/flagallery/oar-project/thumbs/thumbs_img_7608.jpg]280The CHAMPS!](https://tomstudwell.com/wordpress/wp-content/flagallery/oar-project/img_7608.jpg)
Pingback: AWESOME Father’s Day Gift!!!! | TWStud's Musings
Pingback: New woodworking skill under development | TWStud's Musings