New tool in the works!

I’ve begun a project to make a new tool – a CNC Router!   This router is based on a design published by David Steel at Solsylva.com.  The unit I’m building is 25 x 25 inch, 3 axis router.   I’ll be posting more soon, but have completed the stand and table bed so far…


Woodturning 101, a new era begins…

Well, maybe not ‘era’, right now it’s more like ‘error’…

I’ve finally begun my ‘serious’ study of woodturning and, after making several practice pieces, decided to try my hand at a ‘real’ project.  I decided not to bite off too much on my first project so, after a bit of research and soul searching, decided to make a lidded box.  And what would the box hold, you ask?

Why, toothpicks, of course!  Here it is:

I started with a nice piece of cherry cutoff, which, until now, didn’t have a proper home – I knew I’ve been saving these scraps for something!

I turned it down to a cylinder and then, turning a tenon on both ends (these are used to mount the two halves while the pieces are hollowed), separated the top and bottom pieces so they could be hollowed out.  I turned the top first since this establishes the size of the lip that needed to be cut into the bottom.  All went surprisingly well and I sanded and finished the inside before moving on to the bottom piece.  The finish, by the way, is a blend of Mineral Oil and Bees Wax – food safe.

I then ‘turned’ my attention to the bottom half and was happily hollowing out the inside until I suddenly realized that I was shaping to the same profile as the top (thinking about creating an inset, rather than a lip)!  Fortunately, I stopped JUST in time and left just enough wall thickness to provide the lip.

The next step was to cut the lip and this needed to be cut slowly so that the top is a nice tight friction fit.  All went well for about three trial cuts, as I slowly eased the size downward.  Then, for some reason I fail to understand, I took just a little bit more on the next pass and suddenly the lip was smaller than I wanted! Darn.  (Not exactly what I said)

The top fit, but it was loose, it would no longer stay in place if the box was tilted to the side.  I considered trimming off the undersized lip and trying to make another one, but, being from one piece of wood, the grain matched nicely as it was and I’d lose some of that matching if I attempted to resize the lip.  I imagined myself trying multiple passes to get it ‘just right’, each time making it shorter, and ending up with a bottom that was only tall enough for HALF toothpicks!  Sigh.  In any case, I decided to stick with the loose top…  Next time.

All in all, however, I’m pleased with the result!


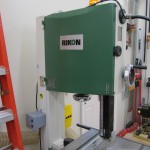
New Safety Switches added to Bandsaws

I love bandsaws.  They are extremely useful tools and probably the safest powered woodworking tool in the shop.  However, there are some nagging features that are common among most bandsaws on the market (except very expensive, feature rich saws) – they require manually tensioning and untensioning the blade.

A bandsaw has a long single loop blade (on my saws the lengths range from 71″ to 140″) which is suspended between two wheels – the driving wheel and the idler wheel.  These wheels have rubber (or urethane) covers to cushion and provide a friction surface for the blade.   Unfortunately, if you leave a blade under tension, the rubber gets flattened on one half of it’s circumference – the side under tension and the blade tends to stretch.  Conversely, if you leave the blade untensioned and forget to tension it prior to turning on the saw, you will receive a nasty surprise.  If you’re lucky, the only thing that will happen is that the blade will jump off the wheels and only ruin the blade.  If you’re unlucky then YOU might get ‘ruined’ along with the blade.

There is one other aspect of bandsaw safety that most other high power woodworking tools have already addressed – the switches used to turn on bandsaws are simply On/Off switches – you turn it on, it stays on until you manually turn it off.  Other high power equipment has a ‘magnetic’ switch, which will turn on ONLY if there is power and, if power is lost, then the magnetic switch automatically turns off.

Why does this matter?  If you live in an area that occasionally loses power (the House in the Woods, for a random example – thanks ‘Progress’ Energy) then you will find that it is very disconcerting to come back to your shop only to find a piece of equipment was accidentally left on during the last power outage.  Again, if you’re lucky then you’ve only wasted some power and a bit of wear and tear on your equipment.  I won’t speculate on the ‘unlucky’ scenario.

So, given this introduction, I’ve upgraded my two bandsaws with Safety switches.  What do they do, you ask?

First, they are magnetic switches which WILL automatically turn off if we lose power. – Check!

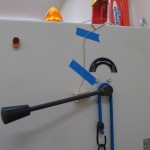
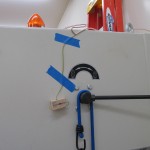
Second, they have an interlock that will prevent the saw from turning on if the Blade is untensioned!  Cool, Double Check!

Thirdly, they will light a very noticeable light when the blade is tensioned.  This reminds me to untension the blade when I’m shutting down at the end of a session.  Excellent! Triple Check!

Here are a couple of views on one bandsaw’s upgrade…

New woodworking skill under development

For some time I’ve been thinking about doing some wood carving.  I’ve messed around with curved forms to some degree and the success of the Oar building project this Summer was encouraging, but neither of these would be what I’d classify as ‘carving’.

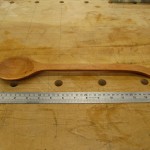
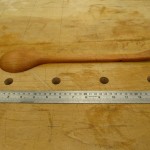
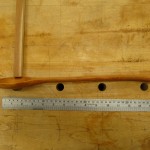
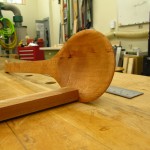
Fortunately, in between projects and home ‘moanership’ activities, I was able to try my hand at carving a salad spoon.  The wood is air dried Cherry from a stash of planks that I acquired from a local Woodmiser operator.

I’m pleased with the way this first attempt has turned out and one of these days, when I get a similar break, I’ll make the mate to this one…

Have a look…

WordPress theme: Kippis 1.12