Router Table Cabinet Complete!
I finished my new Router Table Cabinet today.
The Router Table replaces my previous table in which I had mounted my 1¾HP Bosch motor in a Jessem lift held in a platform that was mounted in a wing of my table saw. While the previous table was solid, it was lacking a miter track and its work surface was smaller than I liked. The new table uses Woodpecker’s 27×43 inch top giving me plenty of solid work surface, a miter track, and, with the cabinet, plenty of storage area for my router related tools AND the motor was replaced with a 3½HP Porter Cable motor!
Update 3/13/2013: I’ve added the router bit storage trays. The design places similar bits (straight, round-over, cove, jointing, etc.) in a single, removable tray. The tray can be pulled out like a drawer to retrieve a bit, or can be pulled out entirely to allow me to place the entire tray on the table top for bit selection. Also, an entire set of trays can be pulled out as one ‘drawer’ if I want to look through the entire set. Very convenient!
The design of the cabinet was influenced by a secondary goal, this is the first prototype for the Kitchen cabinets I plan to build for the Little House in the Village. Consequently, the false drawer front restricts a more optimum use of the space to the right and left of the router motor. Regardless, this is vastly superior to what I had before and gave me a chance to try out some of the concepts for the Kitchen cabinets.
By the way, when building the cabinet, I build the cabinet box first and then, after mounting the top, used this Router Table to route the parts for the cabinet doors. This gave me a chance to try out the Router Table right away. I like it!!!!
RouterCabinet
[img src=https://tomstudwell.com/wordpress/wp-content/flagallery/routercabinet/thumbs/thumbs_rc_0006.jpg]6000Doors open to show internal space.
[img src=https://tomstudwell.com/wordpress/wp-content/flagallery/routercabinet/thumbs/thumbs_rc_0007.jpg]6080With pullout shelving extended.
[img src=https://tomstudwell.com/wordpress/wp-content/flagallery/routercabinet/thumbs/thumbs_img_4263.jpg]5550Showing Router Bit Storage trays
Each tray can be individually slid out or an entire side of trays can be pulled out as one 'drawer'.[img src=https://tomstudwell.com/wordpress/wp-content/flagallery/routercabinet/thumbs/thumbs_img_4264.jpg]5170Router Bit Storage trays closeup
Note the complete strip of bits placed on top of of the table. Very convenient![img src=https://tomstudwell.com/wordpress/wp-content/flagallery/routercabinet/thumbs/thumbs_rc_0001.jpg]5090Here's the stack of cabinet box parts showing the cypress edging.
The edging and cabinet fronts are painted with a custom blended Milk Paint. The edging with then be top coated with wipe on water based polyurethane.[img src=https://tomstudwell.com/wordpress/wp-content/flagallery/routercabinet/thumbs/thumbs_rc_0002.jpg]4820I found some beautiful Cypress for the door panels.
Not book matched, but both panels are from the same board.[img src=https://tomstudwell.com/wordpress/wp-content/flagallery/routercabinet/thumbs/thumbs_rc_0003.jpg]4580Another view of the front.
[img src=https://tomstudwell.com/wordpress/wp-content/flagallery/routercabinet/thumbs/thumbs_rc_0004.jpg]4200Another view of the front.
New Outfeed Table and Cabinet for Workshop!
I’ve finally gotten my Outfeed table finished. The table will serve as outfeed support from the tablesaw as well as an assembly and wood sorting space. The cabinet underneath will store a large collection of tools (you know, those large ones that always come in their own carrying case…) conveniently stored on pullout shelving, as well as items generally needed for assembly, etc.
Have a look!
OutfeedCabinet
Note that the two spaces on the bottom left will house miscellaneous tools on pullout shelving.[img src=https://tomstudwell.com/wordpress/wp-content/flagallery/outfeedcabinet/thumbs/thumbs_ofc_0004.jpg]85430Finished Outfeed Cabinet
Note that the two spaces on the bottom right will house miscellaneous tools on pullout shelving. And the shelf above is for storing my Crosscut Sled.[img src=https://tomstudwell.com/wordpress/wp-content/flagallery/outfeedcabinet/thumbs/thumbs_ofc_0005.jpg]84630Finished Outfeed Cabinet
Note shelf for storing the Tablesaw Fence and my Framing Square.[img src=https://tomstudwell.com/wordpress/wp-content/flagallery/outfeedcabinet/thumbs/thumbs_ofc_0001.jpg]83640Space reserved for Outfeed Cabinet
[img src=https://tomstudwell.com/wordpress/wp-content/flagallery/outfeedcabinet/thumbs/thumbs_ofc_0002.jpg]82730Delivery of wood for Outfeed Cabinet Base
Time to start stocking the plywood!
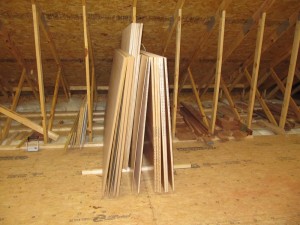
With the Sheet Goods Cutting Table repaired and the Loft all arranged, it’s time to start stocking Plywood for Kitchen cabinets, Jigs, etc..
Here we are, ready to go…
For those who might notice that this is over 1/2 ton of plywood, the plywood ‘bins’ are located directly over the supporting wall separating the Workshop and Office.
This is how I got the plywood up into the loft…
PlywoodLift
[img src=https://tomstudwell.com/wordpress/wp-content/flagallery/plywoodlift/thumbs/thumbs_ply_0002.jpg]21440All delivered to the loft!
[img src=https://tomstudwell.com/wordpress/wp-content/flagallery/plywoodlift/thumbs/thumbs_ply_0003.jpg]21160And stored in the bins!
Wood storage Loft ready for projects!
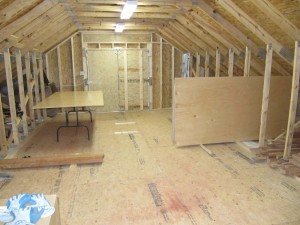
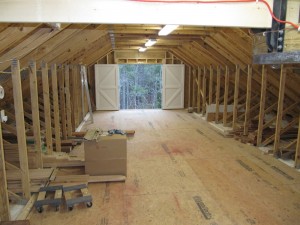
I’ve finally finished the Workshop Loft so that I can store wood in the ‘wings’. Up until now I’ve just been using the Loft subfloor for storage, but that was growing too crowded and, with the Little House in the Village Kitchen Cabinet Project coming up, I decided that I needed to finish the Loft and organize my stock of wood.
Looks pretty good to me…


