I received a question about how the back of Kate’s Chair was constructed. I decided that I’d post the ‘secret’ method that I used ![]()
I used a single piece of wood to make both rails and selected the section to maximize the grain continuity between the two sides. You can see the center line following the center of the grain pattern.
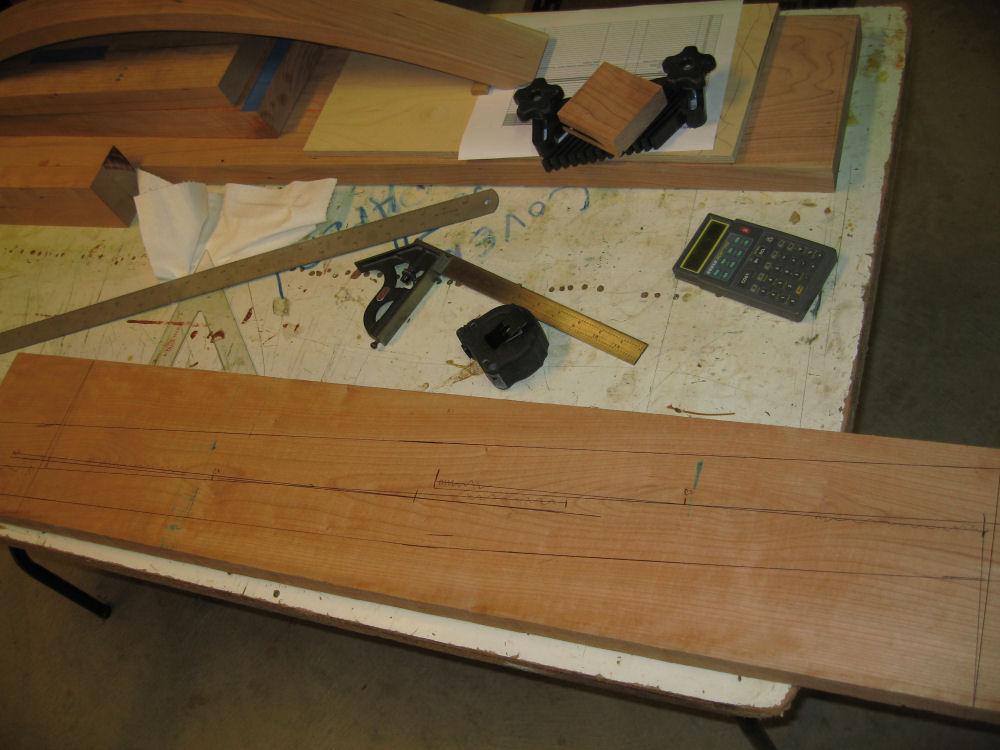
Hunk of Cherry used to make side rails for back of chair.
Close up of grain pattern.
The section sliced and laminated.
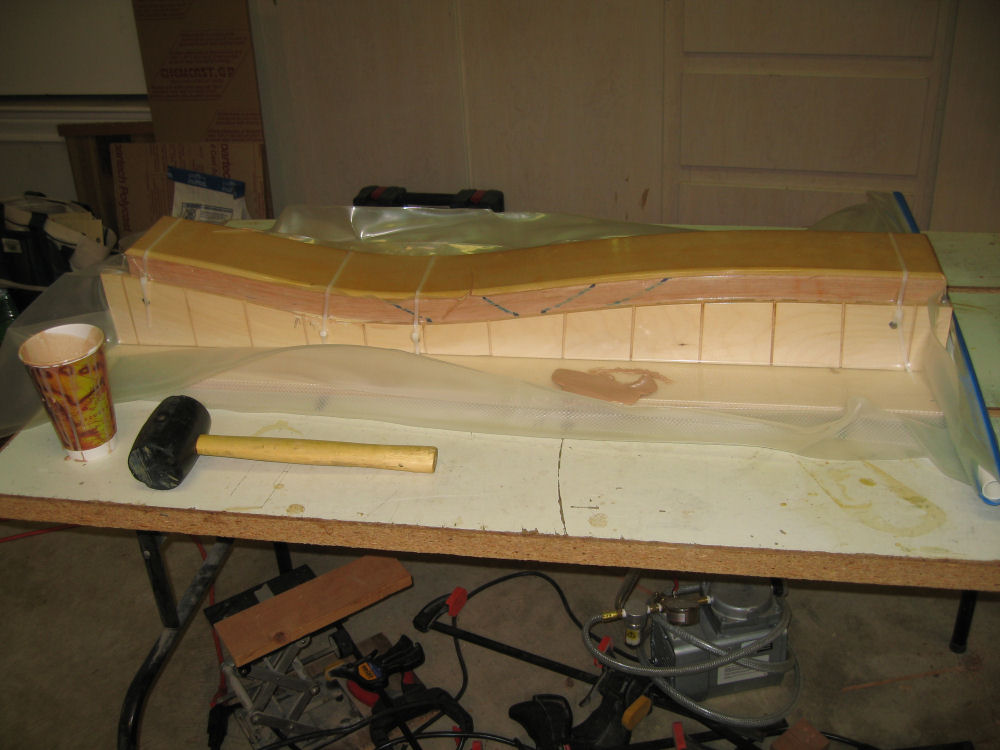
The section has been sliced into multiple thin layers, glued back together, and pressed into a vacuum bag against a form shaping the piece into the curve for the back. The diagonal lines were used to keep the pieces in order in case they were dropped before gluing. This is a trick from the old punched card days ![]()
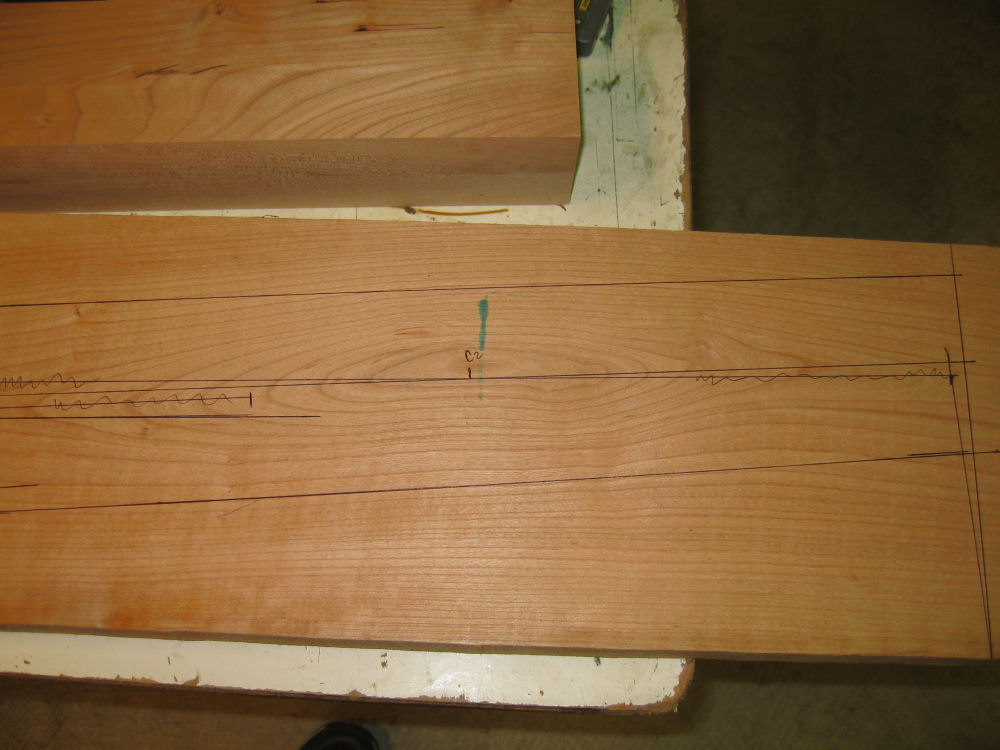
Side rails sliced into two rails and being fitted to head and bottom boards.
Note the extra slice on the side, this will be used as a guide to make the inside support form. Also note the curve of the tailboard marked on the wooden block.
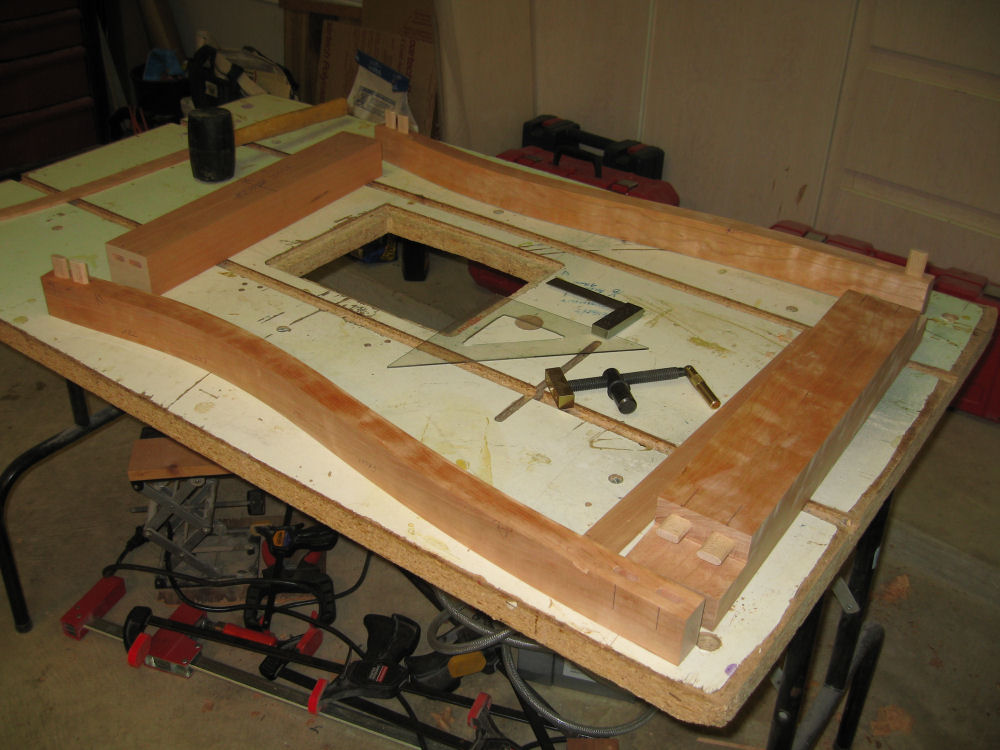
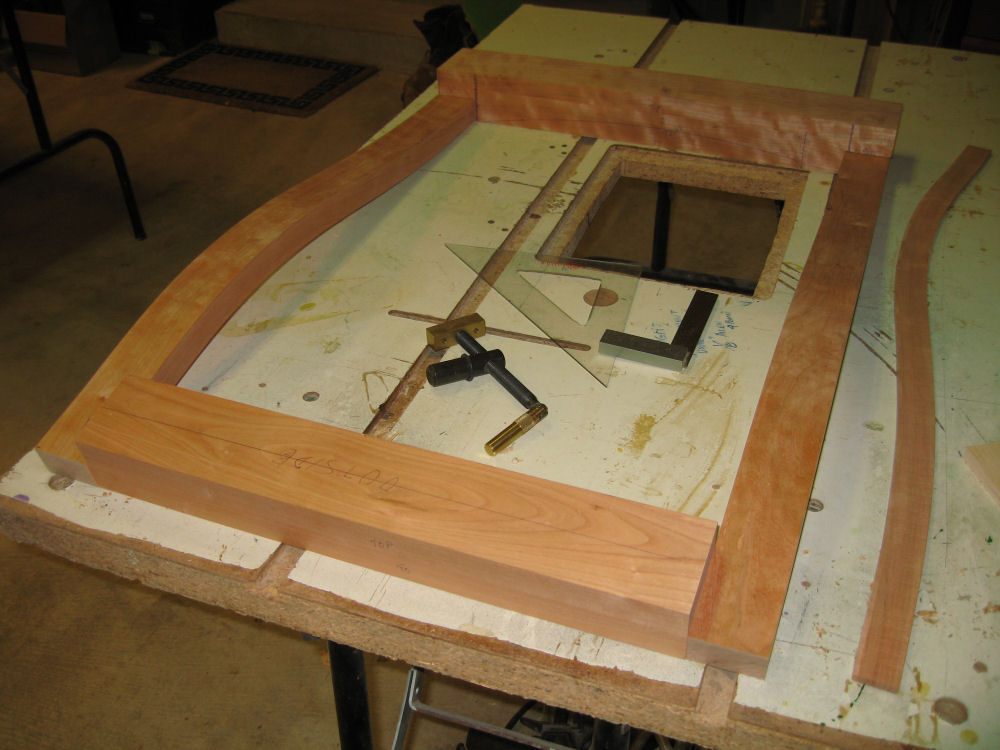
Sides with Tenons, ready for gluing back frame.
Using Domino floating tenons made this job a lot easier!
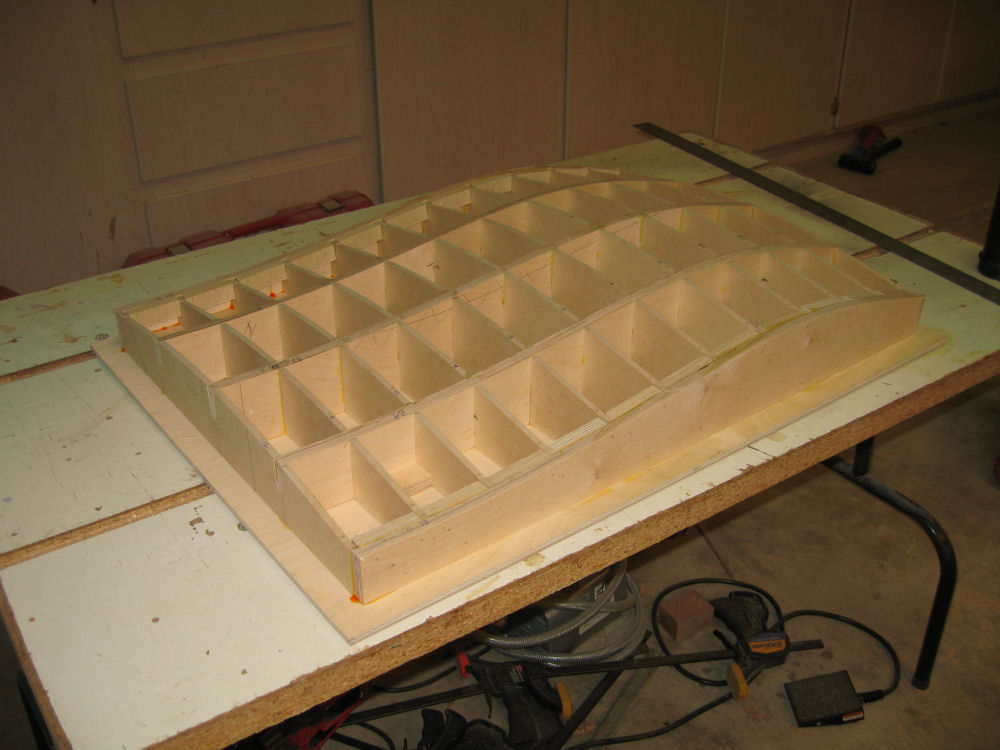
Assembled form for back support.
The support followed the curve of the rails, with the horizontal curves changing slightly from top to bottom to give lumbar support.
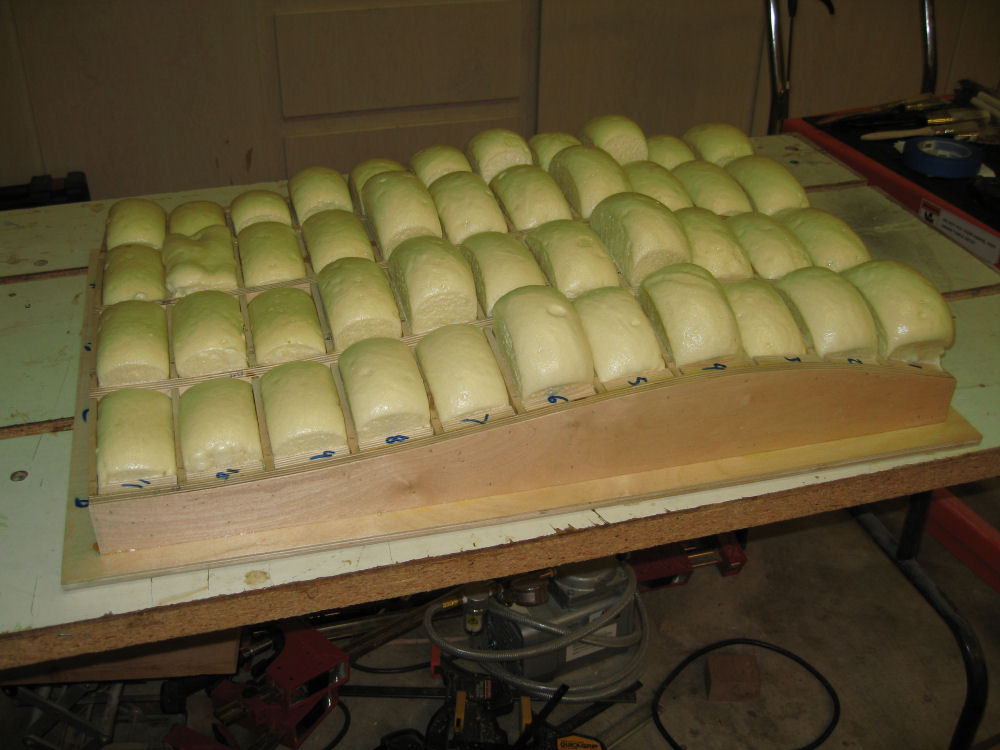
The form filled with expanding foam.
I used a stiff formulation of expanding foam to provide solid support for the fiberglass shaping.

Filled form shaved to level surface.
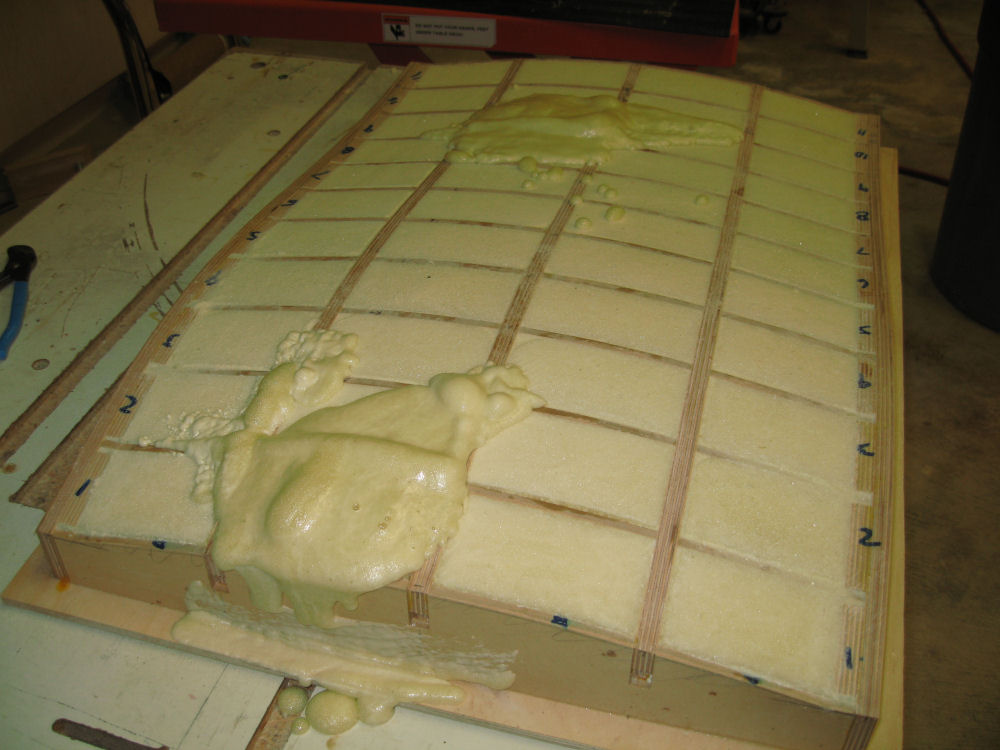
Needed a few repairs to fill some gaps.

Form covered with heat shrink covering.
This covering is used on model aircraft. It is stuck to the surface with an hot iron and then shrunk to fit tightly.

Form, all ready for fiberglass!
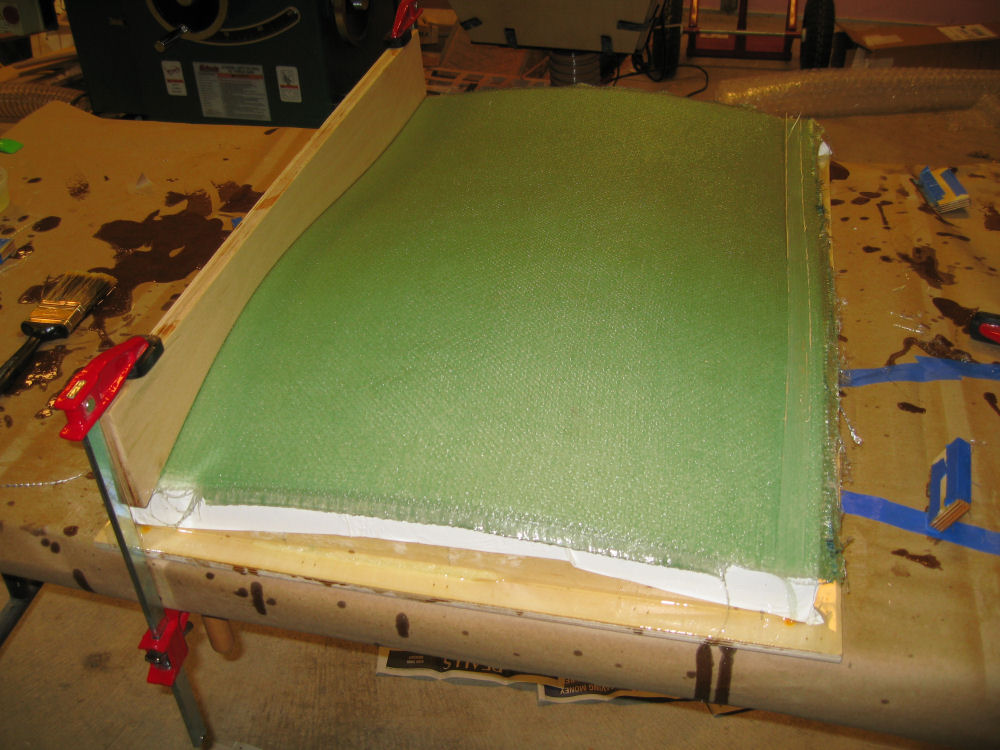
Fiberglass all cured.
Note the curved clamp on the top. This was done to squeeze the fiberglass to a uniformly flat flange that will be used to attach to the rabbet in the back frame.
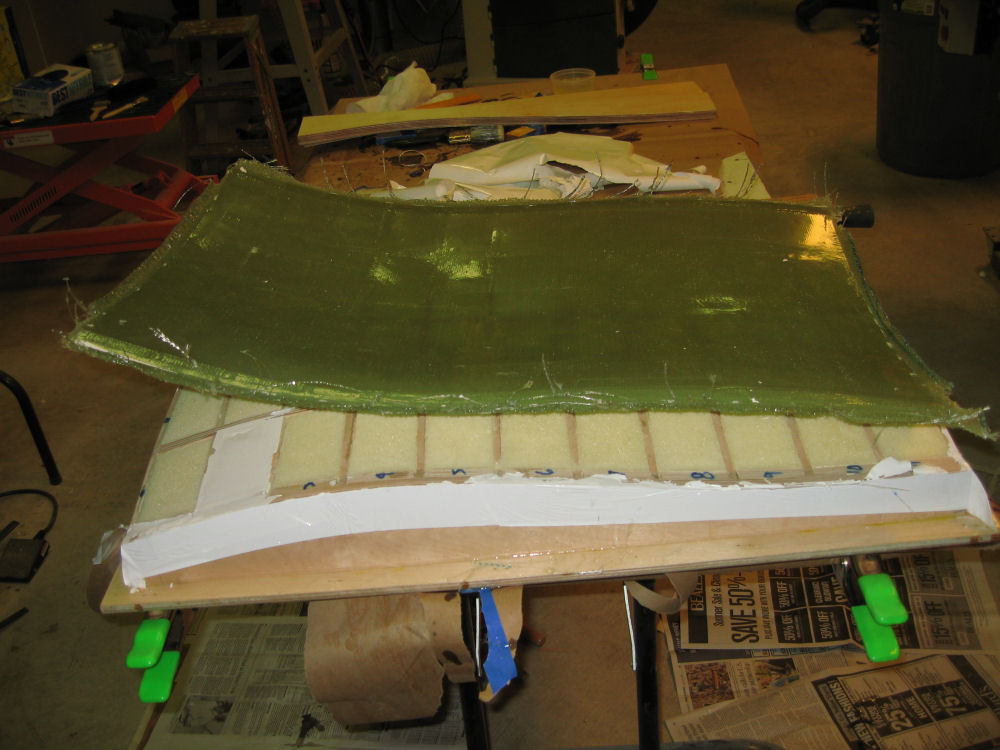
Back support removed from form.
Unfortunately, even though I used an epoxy release agent on the form, the material still stuck to the back support enough that it tore away from the form when the cured fiberglass was pulled away. It’s not a huge problem, I can easily put another cover on the form should I make another chair.
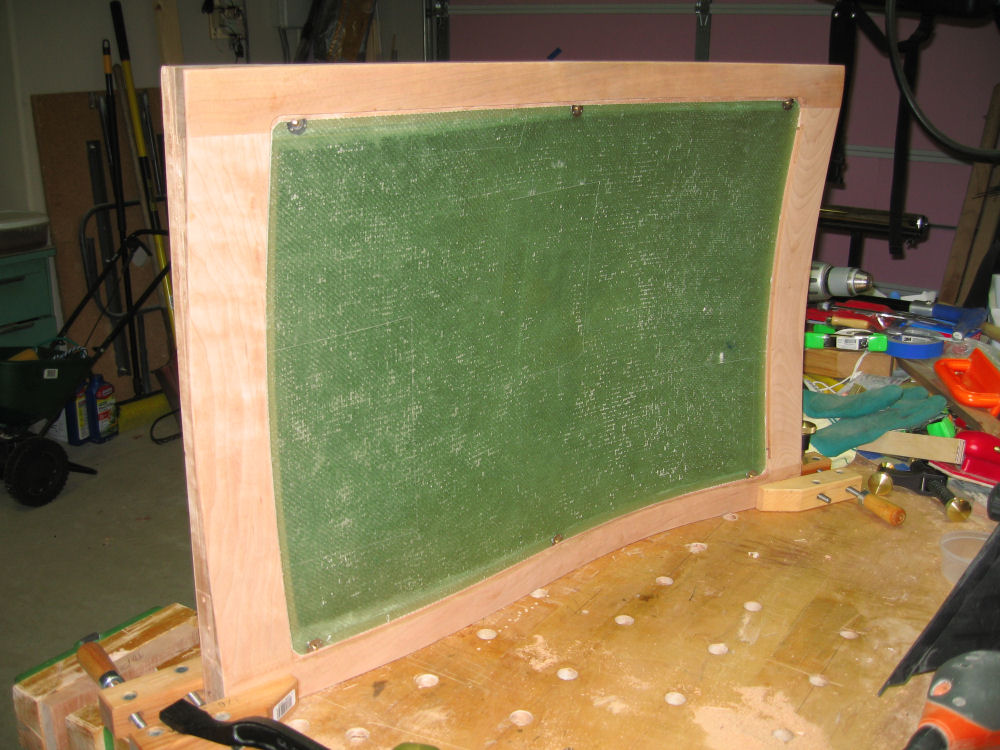
Fiberglass back support attached to the Back frame.
Note that I used tee nuts attached to the fiberglass ‘flange’. They had to be trimmed to flatten the outside to get them to fit within the rabbet but this also prevented the nuts from spinning when the screws were tightened after upholstering the back support.
That’s pretty much it! I did bring the pieces to a professional upholstery shop, I know my limitations!
Take care!
Pingback: Kate’s Chair | TWStud's Musings
Thanks for the write up Tom, this is super helpful!