The 3D printer that ‘Santa Claus’ brought to us in December, proved to be SOOOOO useful, I knew that I couldn’t live without one at the Little House in the Village (LHV)! So…
I ordered one about 8 weeks ago and it finally arrived last week! Having built the previous one, with the help of the entire family, this one was a breeze to assemble, although it did take longer in elapsed time doing it single handedly (about 5-6 hours).
I considered going with a different printer, lower cost and not a long lead time, but the quality and features (Auto calibrate being the most significant) of the Prusa convinced me to stick with a winner!
I noticed a few improvements or tweaks in the design since the previous unit telling me that the company is constantly monitoring their product and continuously making improvements – a very good sign!
So here it is:
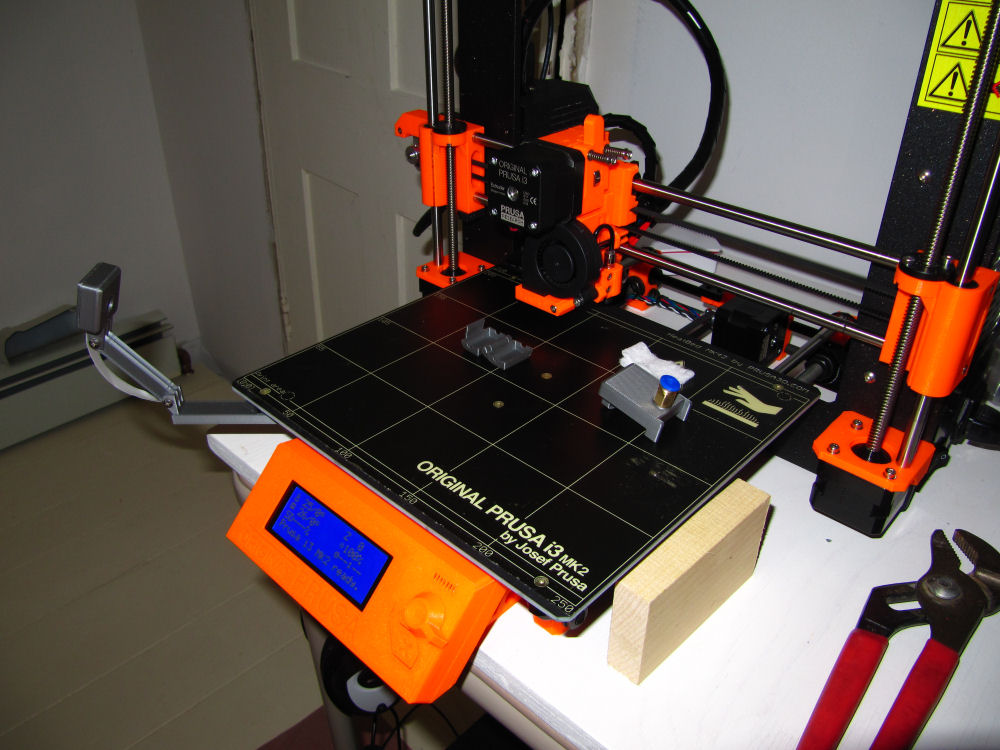
Finished Printer with miscellaneous parts. Note the mounted camera to the left.
I did make a mistake in assembly that cost me during the calibration cycle (you can see a nasty dig in the right hand side of the platen). This can be replaced, but, so far, I haven’t printed anything so wide that I would need that area of the bed. Since then I was able to realign the assembly and was able to perform a good calibration of the unit. I think this unit has much better print quality than the first one.
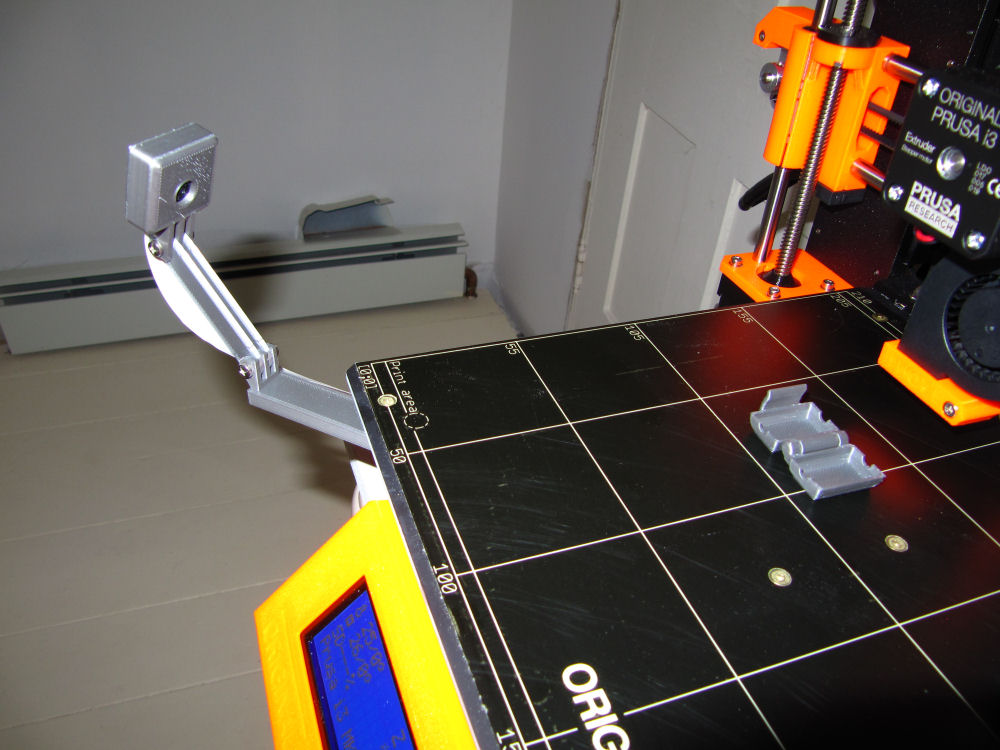
I switched cameras on this one, using the small camera designed specifically for the Raspberry Pi. The reason for this is that I discovered that the camera really needs to be mounted on the platen, otherwise the timelapse videos will drive you nuts as the workpiece keeps moving with respect to the camera. With this arrangement, the camera and workpiece have the same frame of reference and you can easily see it being ‘built’.
The camera mount came from www.thingiverse.com/thing:2113975. However I made a mistake printing this in PLA. The part connected to the platen ‘drooped’ after I printed a couple of ABS parts (which has a much hotter platen). I’ve since reprinted the one piece in ABS.
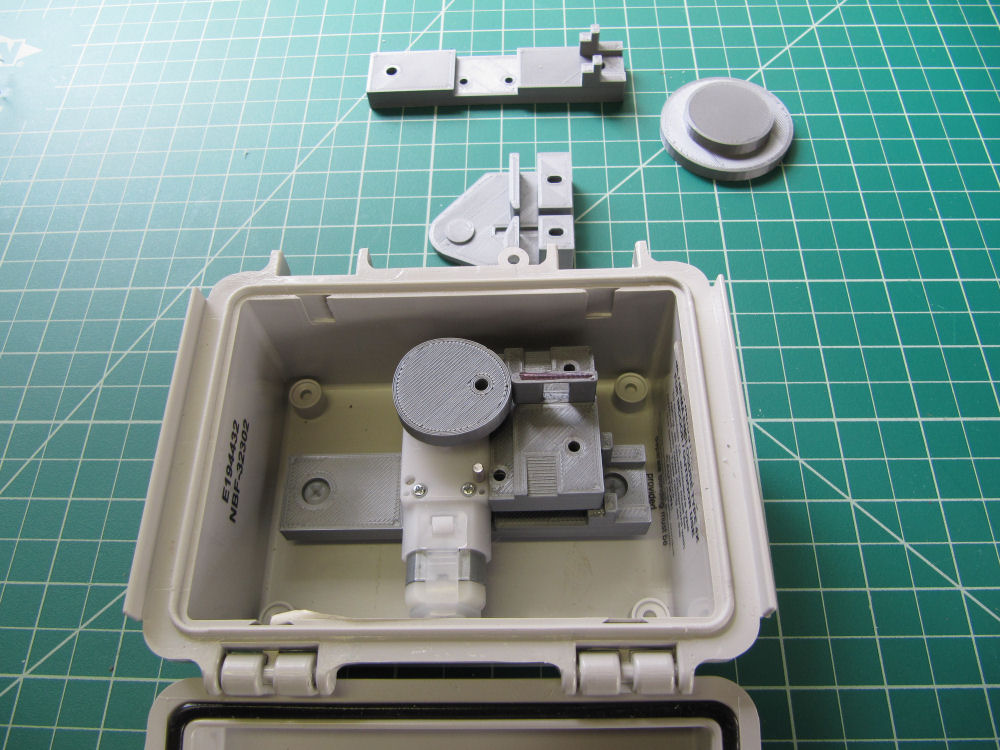
Closeup of camera (Raspberry Pi Camera V2.1) and filament dust filter enclosure. This is a hinged piece printed in a single pass.
The 3D Print server works very well with this camera:
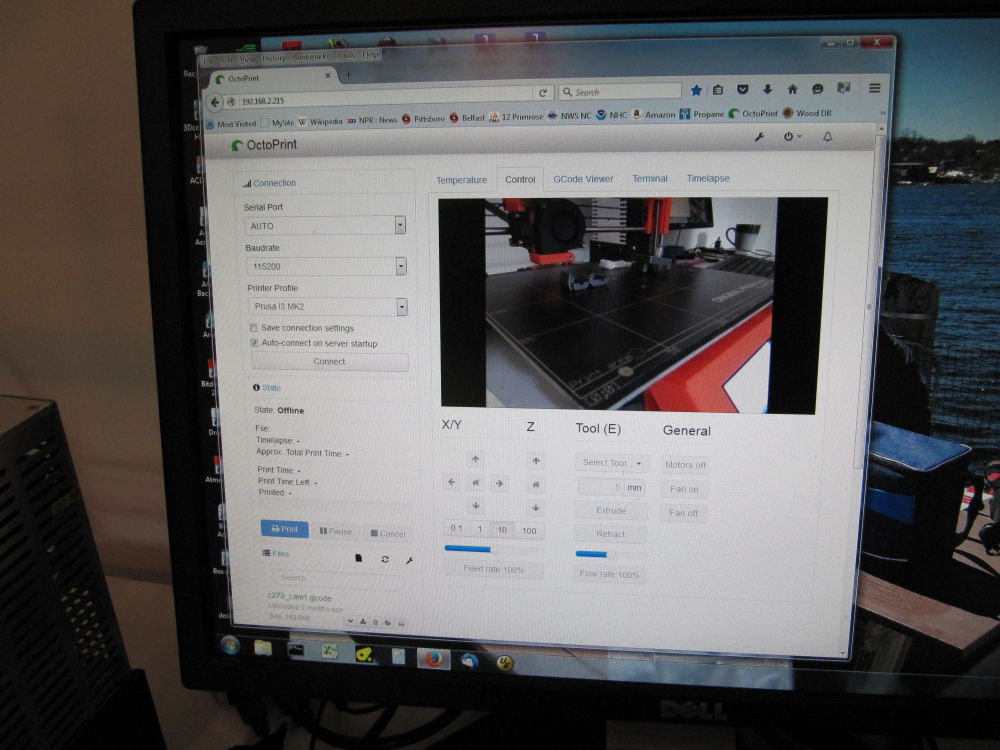
View of screen running 3D Printer server, complete with video!
Having a queue of projects and add-ons for the printer, I spent the next couple of days printing various items…
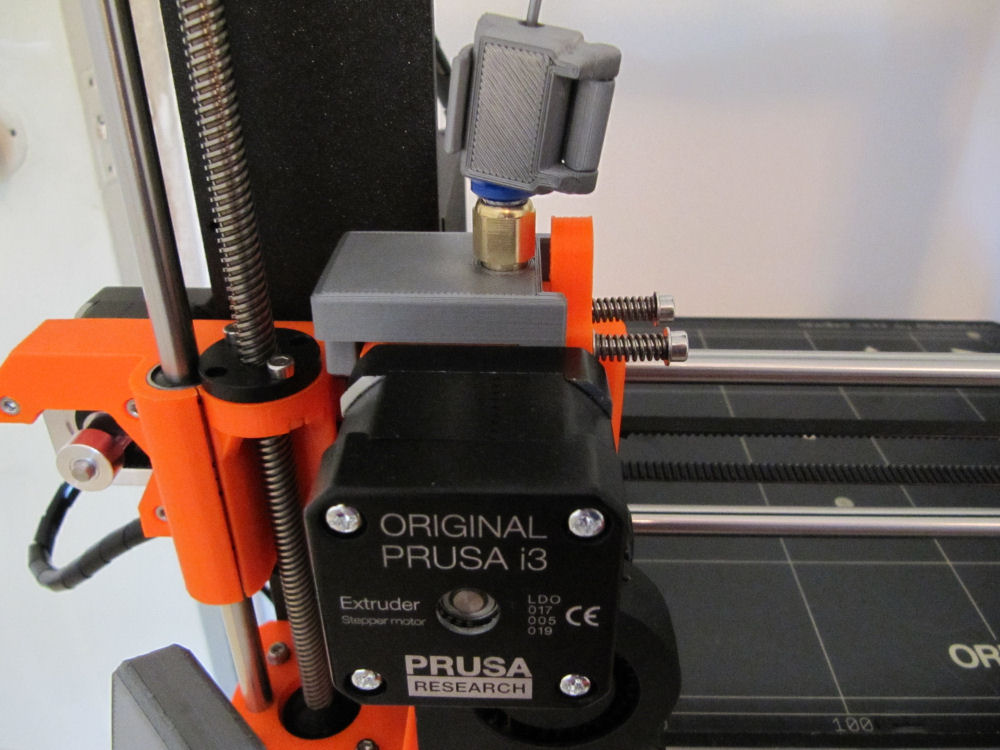
Close up of Extruder Filament guide adapter plate. Teflon tubing connects this to the filament dryer filament feed guide. Also note the filament dust filter. Normally this will be located just before the upper feed guide as the tubing will keep the filament dust free after that.

3D printed drip valve, just waiting for the PCB to control it.
Miscellaneous parts printed on the new printer. Overall the quality appears better than the printer at the House In The Woods. Probably due to better calibration and newer printer firmware.
With my limited space at LHV, I knew that the printer would be relegated to the garage/workshop, which is both dusty and humid. Humidity and 3D filaments don’t mix well – or, I should say, they mix TOO well with 3D filaments LOVING to absorb any moisture in the air. So, I needed a setup where the filament was kept in a dry spot. After some research, I discovered that Food Dehydrators are very popular mods for 3D printers and this led me to this next series of photos…
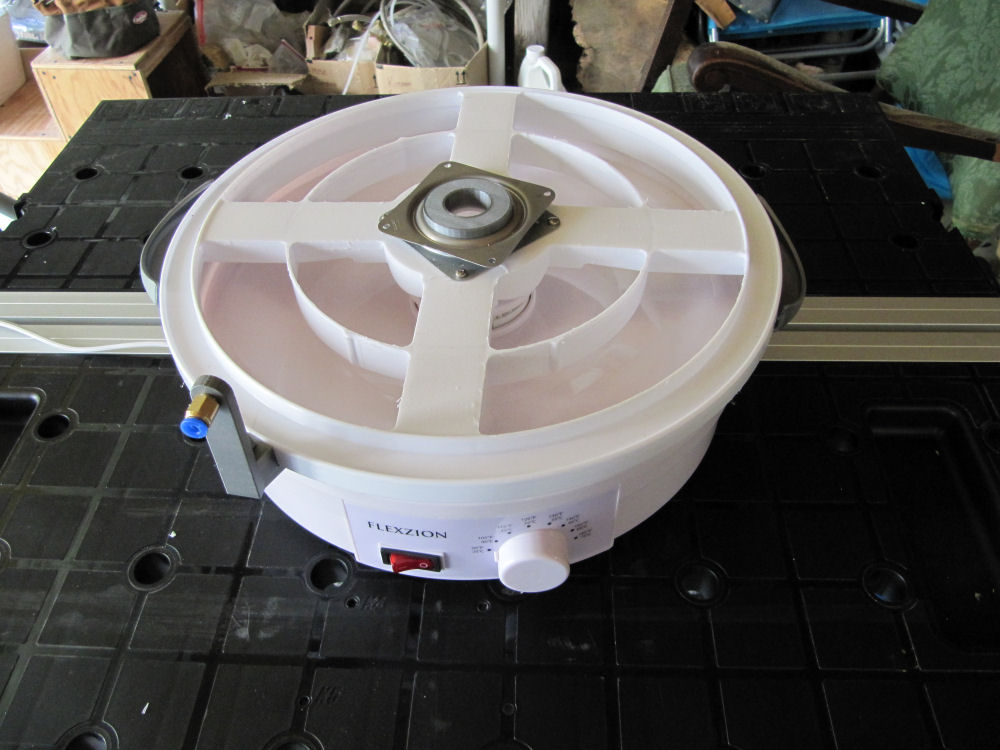
Filament dryer base (Cake Transporter) with final modifications sitting on top of unmodified Food Dehydrator. Note lazy susan bearing and 3D printed hub to keep spool aligned and turning easily.
I found a Food Dehydrator and a plastic Cake Transporter that appeared to be ‘right sized’ for this application. The Food Dehydrator was PERFECTLY sized with the cake transporter base fitting just inside the rim of the dehydrator, I didn’t need any modifications for the dehydrator base.
I was then able to cut out openings in the cake transporter base with a flush cutting router bit in my trim router. The lazy susan, used to allow the spool to spin freely, was also ‘off the shelf’ and it just took a couple of simple 3D printed add-ons to complete the dryer!
Filament dryer base (Cake Transporter) with final modifications sitting on top of unmodified Food Dehydrator. Note lazy susan bearing and 3D printed hub to keep spool aligned and turning easily.
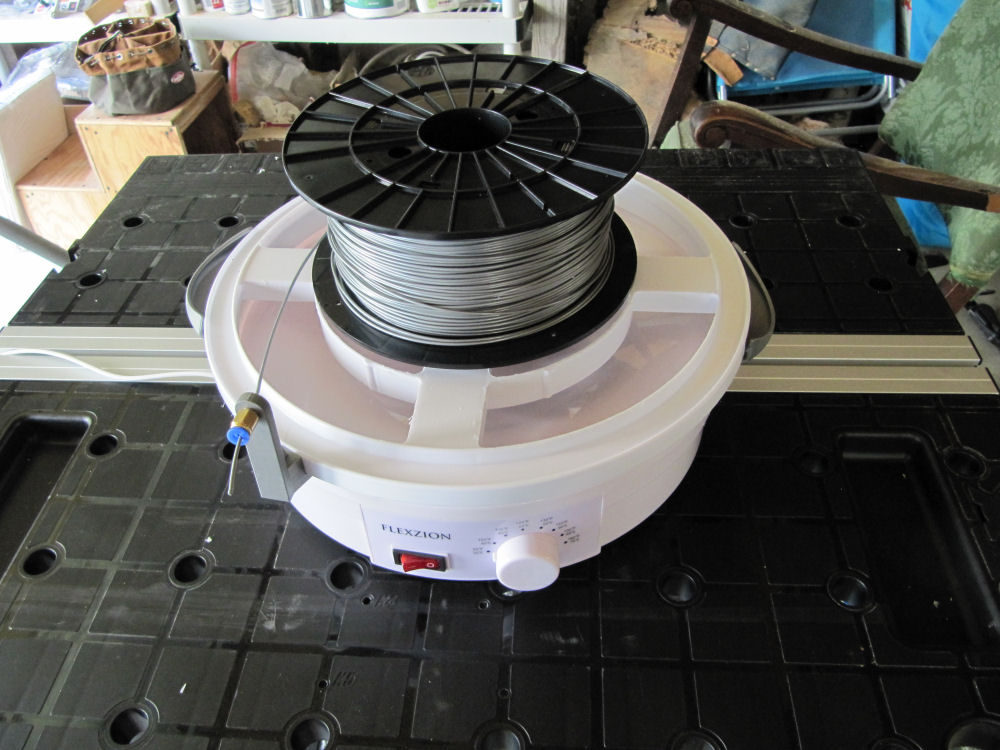
Filament Dryer with spool and filament guide. The fitting holds a teflon tube that guides the filament down to the extruder.
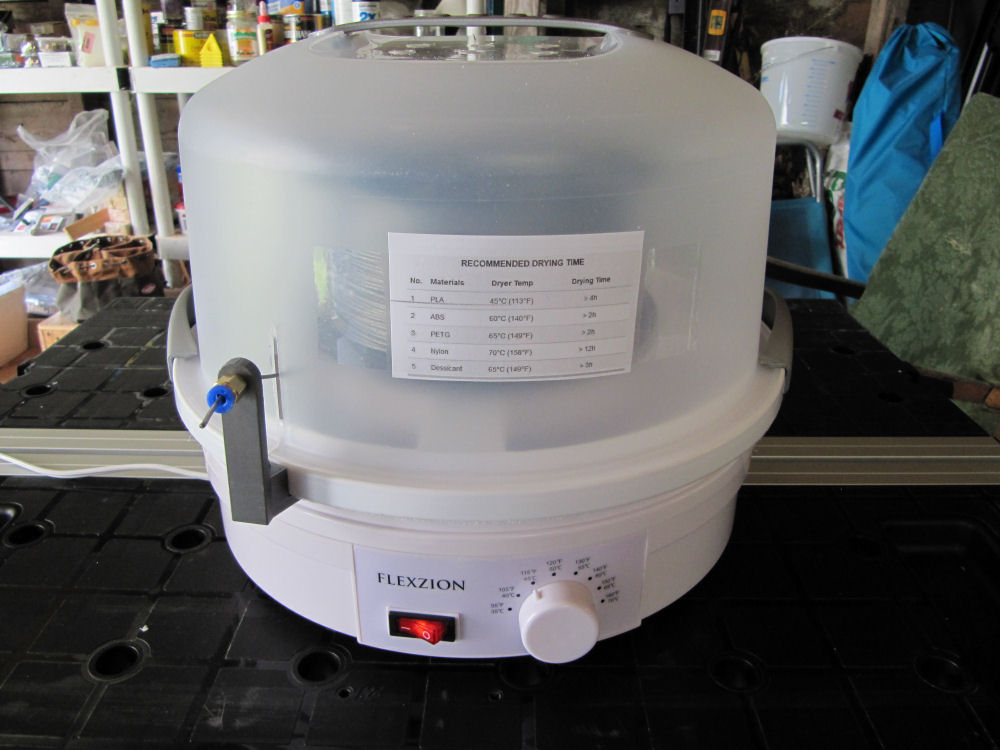
Completed Filament Dryer, drying a spool of PLA.
I’m trying a simpler enclosure (a large cardboard box) this time around, but I may go the same route as HIW as the cardboard box is a bit too rickety. We’ll see and I’ll update this when I reach a conclusion…
My God, Tom What have you gotten yourself into now? You are amazing.