Air Jets
After doing the Pottery Logo project, I realized that I need to have air jets to both cool the router bit and clear away chips. With plastic especially, but even with wood, the chips, if not cleared, will collect in the channels and create friction, and, eventually, burn the router bit (and scar the walls of the workpiece). I found some nice flexible hose components that allow you to easily guide the air to specific spots. The ‘hose’ consists of small hollow knuckles that snap together like beads and, with the friction fit, stay where you bend them.
Here is the setup I’ve installed on the Router:
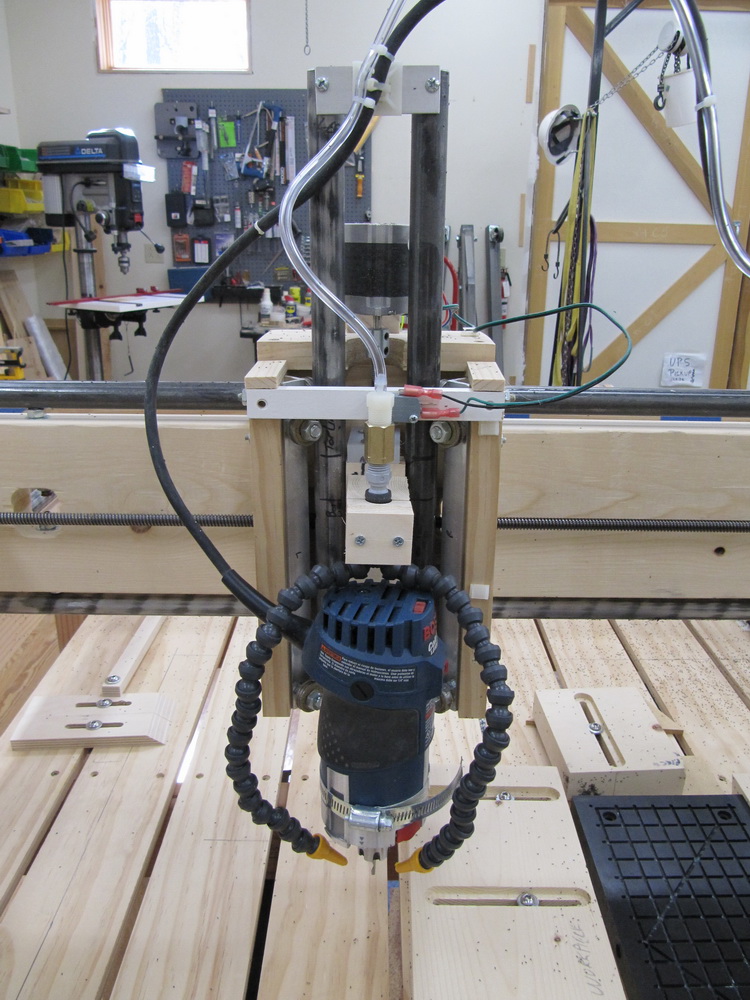
Z Gantry with new air cooling/clearing jets added.
The mounting block moves with the Z Gantry and keeps the air nozzles pointed at the router bit. I’ve supplied the air through a solenoid valve that is controlled by the CNC commands so I can turn on the air only when the ‘chips are flying’…
Vacuum Chuck
In the course of doing various projects on the router, I’ve concluded that ‘hold downs’, the devices needed to keep the workpiece in place, are the biggest nuisance of doing any CNC routing. The first problem is that they inevitably get in the way and, being in the way of a XYZ gantry, with a very sharp tool spinning at 24000 RPM, is generally not a good thing… Bad things ALWAYS happen in this case. The hold downs get in the way because they aren’t part of the model that you’re working on and are ignored in the ‘flight path’ when generating the CNC commands!
The second problem is, they don’t always hold the material flat. If you have a thin, eg 1/4″ thick, strip of wood that is 6 inches wide, holding down just on the edges is not sufficient. It will most likely bow, to some degree, in the middle. If you’re trying to engrave with a V bit and the total depth of engraving is only 0.032″, even a 0.010″ bow renders the engraving useless – there is too much width variation in the engraved lines.
So, what’s the answer to both these problems?
I’m hoping that it’s a Vacuum Chuck. A Vacuum Chuck in a device that clamps to the CNC Router floor and uses vacuum to hold down the workpiece. How well does vacuum work? Let’s see… if the chuck is 12″ x 6″, that’s 72 square inches. If the vacuum can be >10″ of mercury, that’s equivalent to 5PSI. 5 pounds per square inch x 72 square inches is a hold down power of 360 pounds! Probably ok for most things… AND the pressure is evenly applied across the entire surface of the workpiece. Consequently, that 1/4″ thick piece of wood is FLAT and stays FLAT!
Since I have the equipment to do vacuum pressing for bent laminations and that included a plexiglass block with a vacuum port, all I had to do was use the router to create air passages across the face of the block and, with the Pottery Logo Project, I had just the router bit to machine the plexiglass! Here is the result:
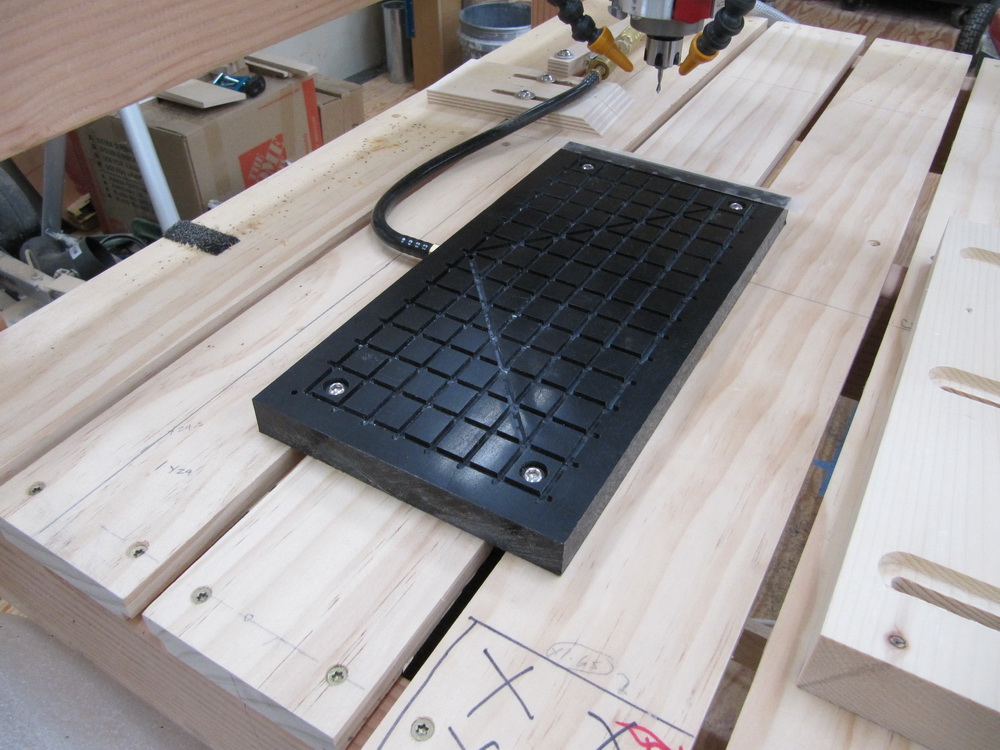
Vacuum Chuck with a mesh of air passages across it’s top. The air passages all lead to the vacuum fitting at the left, center of the plexiglass block.
With Chuck all machined, I was anxious to try it out. The first thing I did was put a piece of 1/4″ MDF on the top and turn on the vacuum. Boy, did THAT suck! Or, I should say, it didn’t suck. I was hardly able to get 5″ of vacuum (perfect vacuum is approximately 29.9″ or 14.22PSI)! Major disappointment!
After trying various things to seal the edges, thinking this was where the air was being lost, and actually sealing the edges with double sticky tape, I realized that I was losing air THROUGH the MDF! The MDF is so porous that it was actually letting air bleed through its entire surface.
Hmmmm… I looked around and noticed one of my scraps of MDF had been sprayed with Shellac. I grabbed that piece, put it on the double sticky tape and the vacuum immediately rose to 17″!!! Then, further realizing that that piece of MDF had never been sanded after the Shellac, I sanded down the ‘fuzzies’ with 600 grit sand ‘paper’ and was able to get as much as 22″ of vacuum. GREAT! That’s over 770 pounds of holding power! Now we’re talking!
This was great news, because part of the plan was to use MDF as an interface between the chuck and the workpiece if I need a ‘spoil board’. A ‘spoil board’ is a board that gets ‘spoiled’ in the process of routing a workpiece when the workpiece needs to get cut all the way through. You can safely cut through the workpiece into the spoil board and won’t dig into your CNC Router bed or, in this case, vacuum chuck. Basically the MDF spoil board will provide air passages from the chuck to the workpiece and the workpiece will hold the spoil board sandwiched to the chuck. Key is that the air passages in the spoil board need to be placed where the workpiece won’t get cut through, otherwise the vacuum will be lost and, uh, bad things will happen…
Good examples where I’m hoping to use this method is when I’m making small pieces like key fobs or coasters. I can set up a spoil board for each type of project and reuse it as often as I need.
Another thing I need to do, where this chuck will help, is in cutting up printed circuit boards (PCBs). I’ve been doing a few electronic projects recently and some of them are fairly small boards (1″x1.9″). PCB manufacturers generally try to get you to fit your board within certain fixed sizes, with the smallest size typically 5cm x 5cm (1.93″ x 1.93″). Obviously, I can fit two of these designs on to this minimum size. In the ‘old days’, when I’ve combined boards into a single PCB, I’ve used a bench shear to cut the boards. This works ok, but the boards get scuffed and slightly bent in the process. A better approach is to cut a V groove on the dividing line on both sides of the board so it can be simply snapped in two. Hmmmm, sounds like a job for a CNC router!
So, may I present, for your consideration, an MDF alignment/vacuum interface board for cutting a PCB:
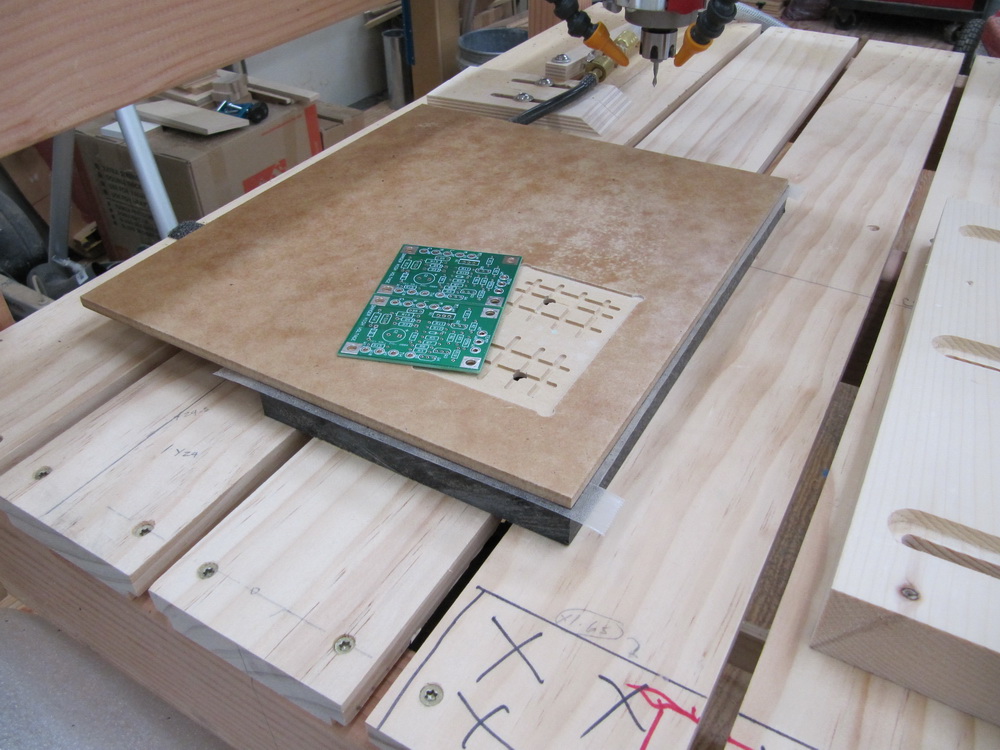
Vacuum Chuck with MDF interface providing an alignment well to machine the PCB. Note the air channels in the PCB well and the holes leading down to the chuck.
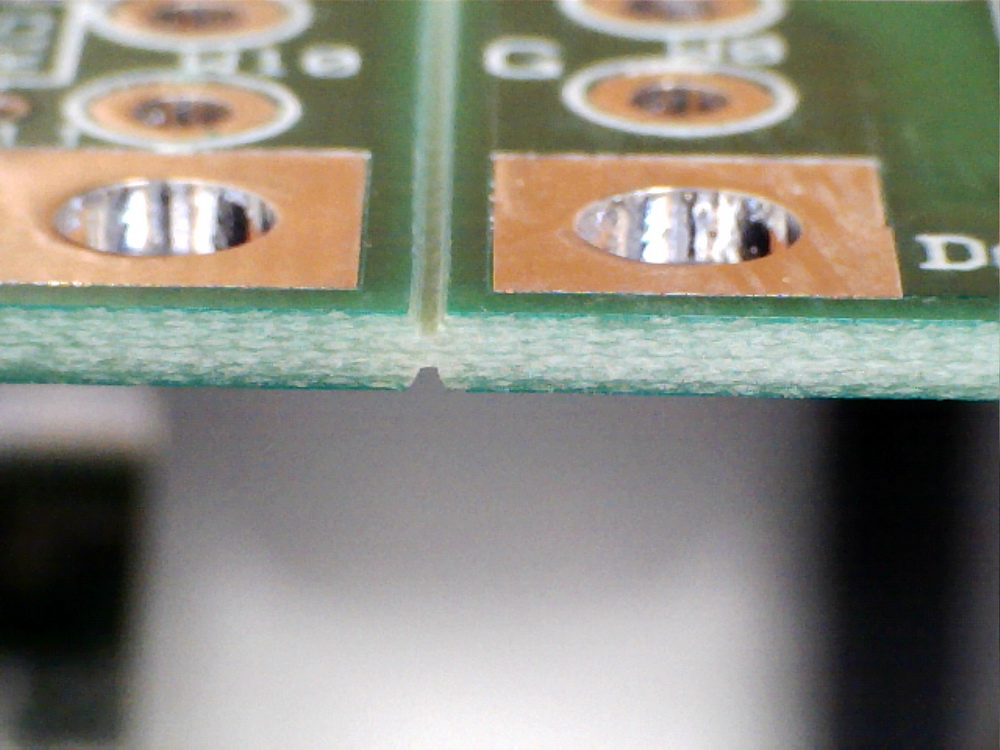
Here’s a close up of the PCB after being machined on both sides. This is perfect! Very ‘snappable’! The PCB is 1/16″ thick.
Leave a Reply