Workshop Miracles!

First Miracle: The Elves really did come and clean up the place so there is room to move around in the Workshop.  Thank you Elves…

Second Miracle: Despite all attempts by my Workshop GC to foil an inspection and approval of Electrical system[1], the Chatham County Inspector came today and ‘blessed’ the wiring so that the Power Meter can be installed AND the power turned on to ALL of the Workshop!  YAY!!!  A memorable quote from the Inspector, as he’s closely examining the inside of the Service Panel: “You could teach some of the other Electricians I have to work with how to wire a panel.”

Third Miracle: The heavy equipment was delivered by the movers today!!!  Double YAY!  Now I have a Workshop that LOOKS like a Workshop!  The Crane Hoist came in very handy in setting up the equipment.

Click to view larger image.

Half of the Workshop with Equipment

Click to view larger image.

Other half of the Workshop with Equipment

We also had the Movers move all my office boxes out of the house into the Workshop office…  This may take some time to straighten out…

Click to view larger image.

A room full of Boxes

Click to view larger image.

But I have a desk and, more importantly, a comfortable chair to fall asleep in...


Notes:

[1] My GC didn’t purposefully thwart our efforts to get the Workshop inspected.  Let’s just say, through a series of surprises, we were forced to delay Inspection a number of times…

Workshop Disaster!

The Workshop wiring and plumbing is now complete, having installed all the interior and exterior lighting and installed the unnecessary ‘through the roof’ vent required by the Inspector…

In theory[1] the GC has arranged for the Inspector to come on Tuesday to do the Final inspection.  He was also supposed to be here last Friday… Hopefully there won’t be any more surprises.  I’ll let you know.

Meanwhile, to pass the time, I decided to do a ‘little’ unpacking… OMG!!! what a MESS!

I’LL NEVER BE ABLE TO DIG MY WAY OUTTA THIS!

Click to view larger image

After unpacking only 1/3 of the boxes...

Stymied!  No workbench or floor space left!

And the movers are coming on Wednesday morning to bring all the large equipment!

Hmmmm, maybe I’ll go paint the office and hope that some nice Elves come and take this all away…


Notes:

[1] “In theory there is no difference between theory and practice.  In practice there is.” Variously attributed to Jan la van de Snepscheut, Albert Einstein, and Yogi Berra.


Drill Press Replaced!

As part of our move to NC, I decided to sell my old Drill Press and replace it with a new one.  My old Drill Press was, literally, an antique.  I purchased it in 1982 and it served me well for 30 years.  It was a solid, American made, with a cast iron body and had all original parts when I sold it.

My only real complaint about the tool was the coarse speed selection.  It only had six speeds ranging from about 300 RPM to about 5000 RPM.  With this huge range it was rare to find an ‘optimum’ speed.   Over the years, I looked at replacing the tool many times, but I could never find an ‘affordable’ replacement that offered the one feature I absolutely loved about the old one: The Quill stroke was over 6 inches.  Most “Modern” Drill Presses were providing only 4 – 4.5 inch stroke and, if you’ve ever tried to end bore a deep hole, you’ll appreciate the value of the longer stroke.

Fortunately, Delta Machinery is now selling an 18″ Drill press with a 6″ stroke AND 16 speeds, the 18-900L.  There are other numerous features that I like about this drill, but these two were the clinchers!  Let’s see… I don’t have to move my old 250lb clunker from TX to NC and I get real speed control with a larger capacity table… Did I mention Free Shipping?  Hmmm, this is a no brainer:

Here it is:

With the new Crane Hoist it was relatively easy to assemble (despite the 240lbs of machinery!)…

Crane Hoist added to Tool inventory!

A new tool has been added to the TWStud Workshop!

I’ve added a Crane Hoist rated for 1000lbs.  The height of the Crane is adjustable from 7 1/2 feet to almost 12 feet in 3 1/2″ increments. The Crane is supported by 4 steel casters and can be positioned easily anywhere within the workshop.  I’ve attached a 1/2 ton chain hoist suspended by a trolley that will easily roll the 7+ feet of the overhead beam.

Click on photo to see larger image.

New 1/2 Ton Crane Hoist

In my previous workshops all my heavy equipment were mounted on mobile bases so that I could easily rearrange the space to setup or take down groups of tools, depending on the project ‘du jour’ (or if we actually needed to use the garage space as a garage  :-)

With my new workshop, I have the luxury of leaving the equipment solidly mounted on the floor most of the time.  This makes for a much more stable platform.  However, there are times when I’ll need to rearrange equipment to deal with very large pieces (like ripping a 16 foot long hunk of Cherry) and, for this, and other miscellaneous lifting tasks (like managing a 16 foot long beam), the Crane Hoist will be perfect!

If you’d like to see how I assembled the Crane Hoist, you can visit my post, How to assemble a big ass piece of equipment by yourself.


How to assemble a big ass piece of equipment by yourself

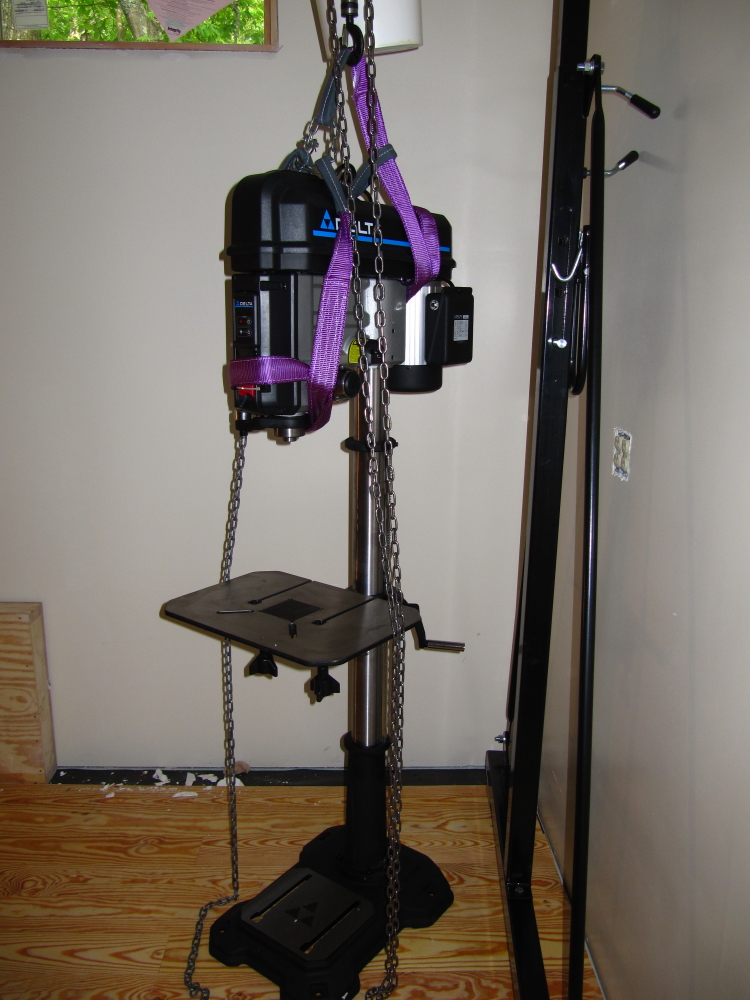
When assembling a big piece of equipment, like a Crane Hoist that weighs about 300 lbs and is over 8 feet tall and long, it helps if you either have 3 other guys to help you or you already have a Crane Hoist to help you lift and hold the pieces into position while you bolt them together.

Having neither of these things, then the next best thing is to CAREFULLY construct the pieces as sub-assemblies that you can lift and try to construct the entire item in piece wise steps.

Here is how I assembled the Crane Hoist I’ll need to assemble other Big Ass pieces of equipment in the future…

Click to see larger photo.

The Crane Hoist un-assembled. Very nicely packed!

After assembling the two ends, the tricky part was attaching the overhead I-beam to the end bases.  I could hold one base vertically in the workbench vise, but didn’t have anything solid or stable enough to hold the other base exactly the right distance from the opposite end.  Plus, trying the hold and align the long I-beam while trying to attach bolts to one end was definitely not a safe prospect.

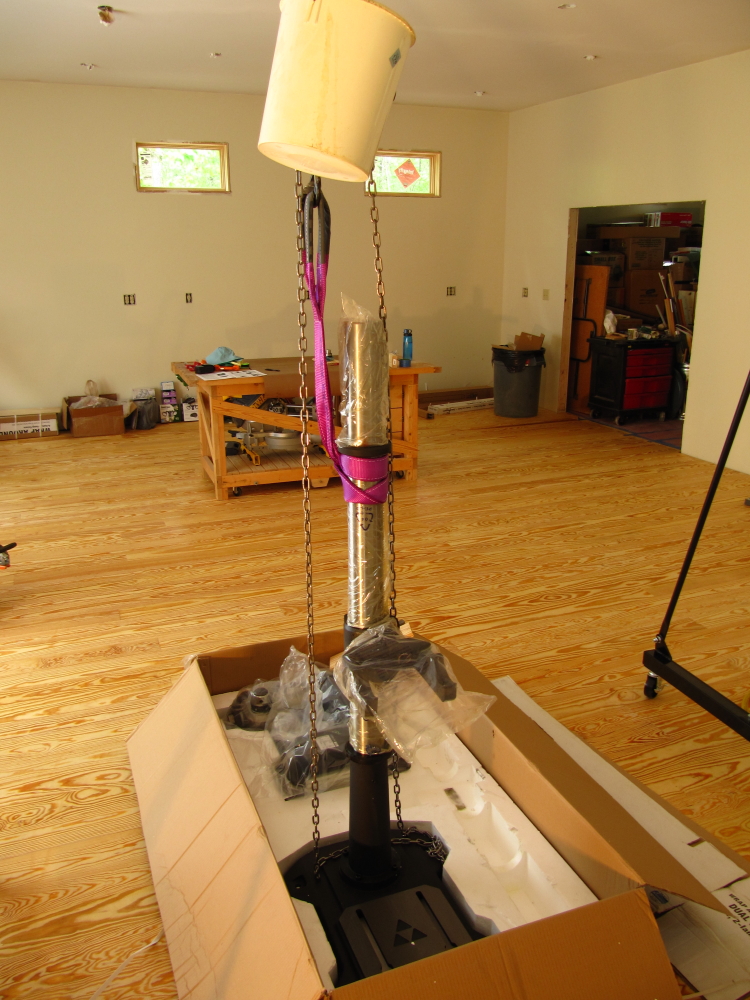
However, recognizing that the triangle formed by the I-beam and one of the bases would be solidly stable and that I could probably manage to lift HALF the weight of that sub-assembly (the other HALF of the weight would be borne by the floor and Workbench), I decided to start with this:

Click on photo to see larger view.

End Base attached to I-beam

I rested the I-beam and the top of the End Base on the Workbench to assemble these together.  Note the two F-Clamps on the left side of the Workbench.  These serve two purposes.  During this step, they keep the I-beam from sliding sideways and potentially falling off the Workbench during assembly.  They also hold a couple of blocks of wood to the bench.  These will be used in the next step…

Click on photo to view larger image.

Base and I-Beam rotated to partially standing position.

Once the I-beam and one end are assembled, the assembly can be rotated to a partially standing position.  Note that the blocks of wood, clamped to the Workbench, keep the end of the I-beam from sliding off the end of the Workbench.

With this setup stable, it was a simple matter to roll the base so that the I-beam was, once again, aligned with the length of the Workbench.  Again, note the blocks of wood keeping the I-beam from sliding off the end of the Workbench.

Click to show larger image.

Beam, Base assembly aligned with Workbench

Note that the free End Base is now held upright in the Workbench vise, ready to attach the Beam assembly.

Another view prior to assembly.  Note the F-Clamp holding the post of the Base solidly into the vise (I didn’t want any mishaps).

Click to view larger image.

End Base ready to attach to Beam, Base assembly

With this setup it was then very easy to lift up the end of the Beam and, given the rollers on the attached base, align the end of the Beam with the Base held in the vise.

Click to view larger image.

All pieces 'connected'

I only inserted one bolt and loosely attached the nut, but this was enough to provide a pivot point (all the weight was borne by the two bases, not the bolt) so…

Click to view larger image.

Ends aligned for final assembly.

I just needed to rotate the end attached to the beam until the beam was aligned with the second base, bolt it down, and…
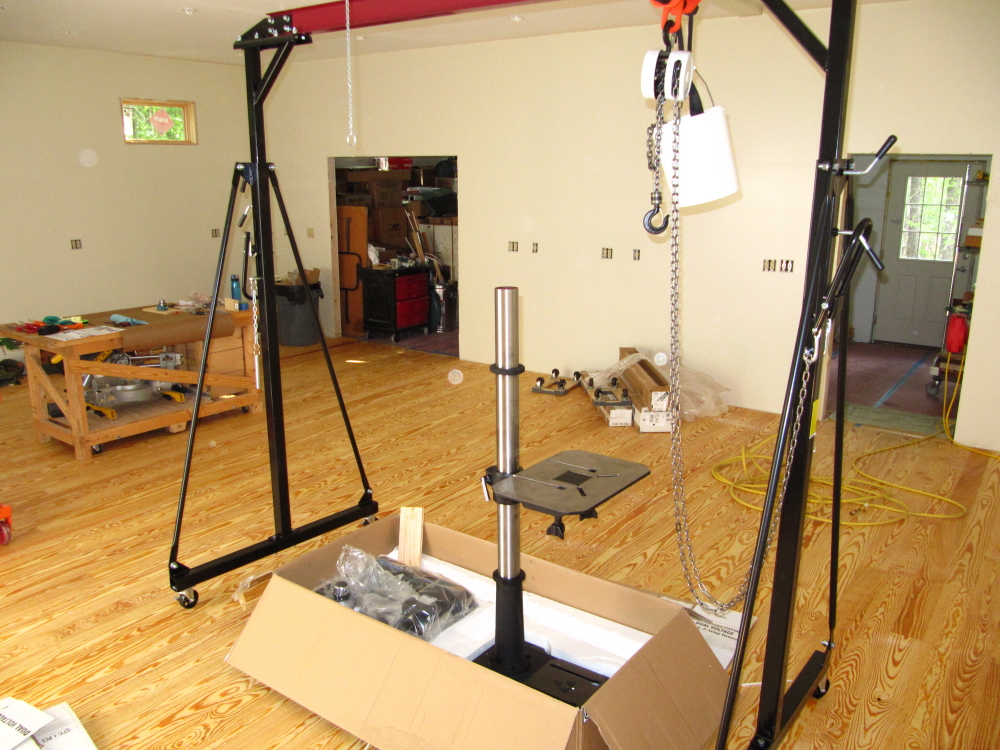
Done!

Click on photo to see larger image.

New 1/2 Ton Crane Hoist

Note Hard Hat, ready to use!

WordPress theme: Kippis 1.12