New Tool for Workshop!

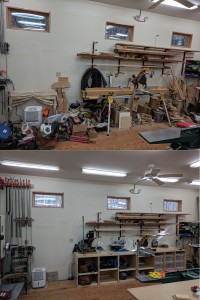
Well, this past fall I finally got around to adding the cabinets I had planned for the East Wall of my Workshop. The East Wall had become a dumping ground for pretty much anything that didn’t have a ‘home’. As you can see in the photo below, it had really gotten out of hand, but, with the new cabinets and storage, not only was it organized, I discovered that I had room for yet another tool!!!!

Click on photo to enlarge.

Before and After new cabinets for East Wall of Workshop.

Naturally, an empty space like the area on the left can not go un-filled! So…
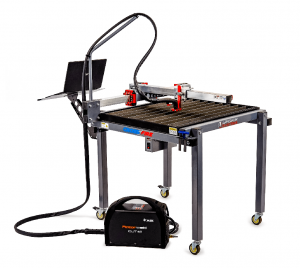
Thinking about what’s next on the workshop growth plan, I was ready to start dabbling into metal work. Lots of choices here, but, in the end, I concluded that the first place to start was the ability to cut sheets of metal into something useful. After some investigation, I discovered that a company in California, Langmuir Systems, sold a CNC Plasma Cutter kit for a reasonable price.

Click on photo to enlarge.

CrossFire CNC Plasma cutter (sold as a kit).


The table size is 23×25 inches and, with a water table, was plausible to use in a woodworking shop. The best part was that, about the time I decided that I’d get it after Christmas, Langmuir had a ‘Black Friday’ sale and I got the table for substantially less than the list price. Of course, by the time I bought all the OTHER stuff you need to make this useful and safe, it will take a long time to recover from this!
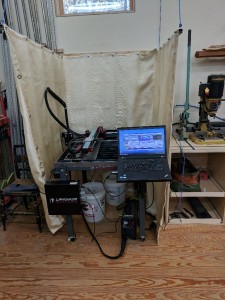
In any case, here is the resulting installation:
Click on photo to enlarge.

CNC Plasma Cutter ready to go!


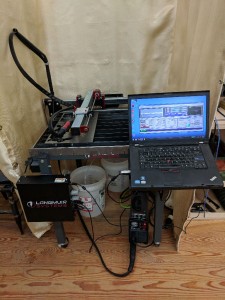
and a closer view:
Click on photo to enlarge.

Close up of CNC Plasma setup.


In case you’re wondering, the ‘curtains’ around the plasma cutter are made of fiberglass cloth. They keep the bulk of the sparks thrown off by the cutter contained and also forms a ‘room’ by which a single vent, connected to my dust collection system, can pull out the bulk of fumes produced during the cutting process.

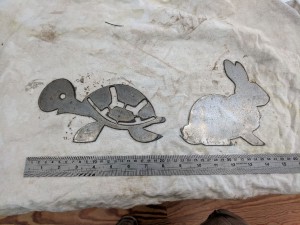
So, now that my new toy, er, tool is in place, here’s the first ‘real’ thing that I cut…

Click on photo to enlarge.

First Pass ‘artwork’ from CNC Plasma Cutter, it works!


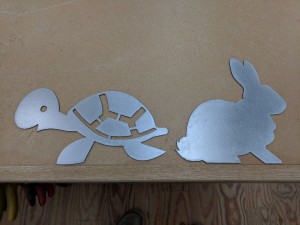
and after a bit of clean up:
Click on photo to enlarge.

Simple Yard Art cleaned up!


These two have been ‘deployed’ to our yard, the rabbit has been painted white and the turtle has been left to weather naturally, both set out as initial test cases for future yard art. Now it’s time to think about the other projects I can work on…
Christmas 2019

Won’t spend a lot of time here today, but here’s a sampling of this year’s Christmas presents that I’ve made:

Click on photo to enlarge.

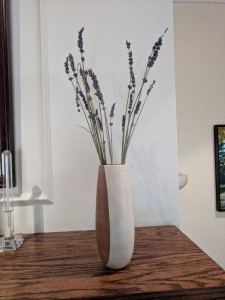
Bud Vase turned from Holly and Cherry.

Click on photo to enlarge.

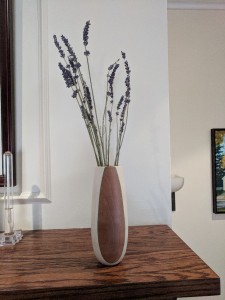
Bud Vase showing Cherry lamination.

Click on photo to enlarge.

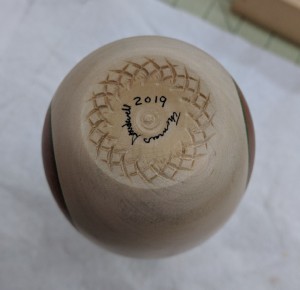
Bud Vase bottom detail.

Click on photo to enlarge.

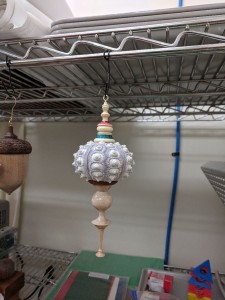
‘Sputnik’ Sea Urchin ornament.

Click on photo to enlarge.

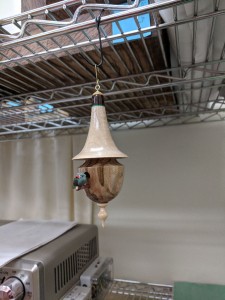
‘Dale Nish’ style Birdhouse ornament.

Click on photo to enlarge.

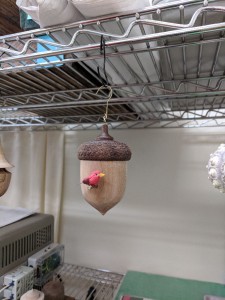
Acorn Birdhouse Ornament

Click on photo to enlarge.

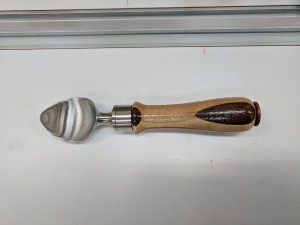
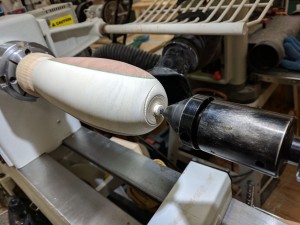
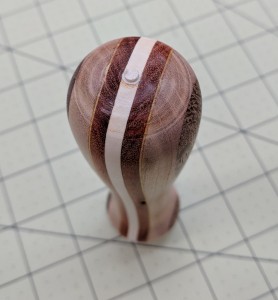
Ice Cream scoop with removable handle for dish washer cleaning.


Click on photo to enlarge.

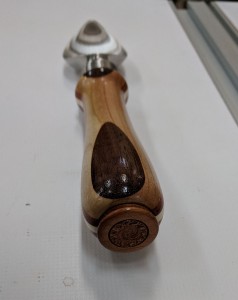
Close up of ‘button’ serendipitously added to the handle.

Click on photo to enlarge.

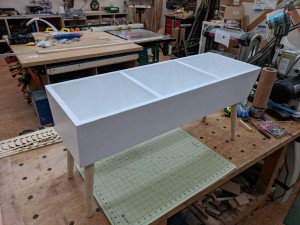
Book Bin to store our Granddaughter’s many books. Just the right height for her to reach in, pick a book, and bring to Grammy or Grandpa to read!

Outtakes

The secret to doing decent woodworking is to learn how to correct your mistakes. In the process of making some of these gifts, I made some doozies! I thought it would be interesting to show what mistakes were made and how they were corrected.

Here is the first one, and it is a doozie! When I was almost finished with the vase, I was shaping the bottom to make a nice stable base for the vase to stand on and, as I drew the tool away to examine the progress, I carelessly let the tool touch the workpiece. In an instant the spinning workpiece caught the tool and slammed it into the tool rest, making a huge dig in the side!

Click on photo to enlarge.

Major WHOOPS here! The nice smooth curve now has a nasty deep dig into it!


This vase was so far along and I had little confidence that I could fix this big gouge without significantly altering the overall curve of the piece. Fortunately, I live near a great resource, the Chapel Hill Woodturner’s Club, and I was able to go to their facility and ask Frank Penta, an extraordinarily talented woodturner, to help me. He was impressed with the vase and barely even noticed the nasty dig, which I thought totally killed the piece! I mounted the piece in the lathe and he showed me how a pro does it! The shavings coming off his tool were so light they literally floated in the air and, in no time, he had shaped the base to follow the curve and fix the piece! THANK YOU FRANK!

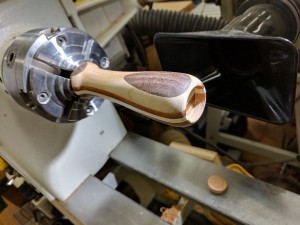
Here is the next one, while not as potentially tragic as the vase, it still left me with a case of having to fix a piece that was well on its way to something I liked, but dangerously close to being ruined!

Click on photo to enlarge.

As I was profiling the end of the handle, before removing it from the lathe, I was too heavy handed with the gouge and made the turn around the corner too close to the nicely shaped lamination on the top of the handle. Consequently I didn’t have enough room to try to fix this mess.

So… in this case, I realized without enough material to fix the end I knew I had to add more material!

Click on photo to enlarge.

So, rather than trying to turn off a shape, I thought that I could drill out the end of the turning and add more material with a plug that would give me room to shape the end nicely. You can see the nice tear drop shape on the handle that I was trying to preserve.


Click on photo to enlarge.

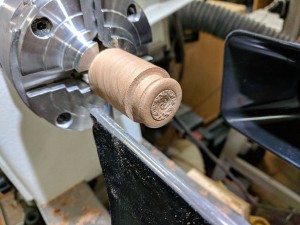
I turned a scrap of Cherry to make a plug to cover the end of the handle. I decided, since I had plenty of scrap, to experiment with adding a design to make it look as an intended added detail.


So, in this case, the ‘fix’ was actually an enhancement to the original design as it added a unique detail that looked interesting and attractive AND covered up the mess up!

Sphere turning class

I attended a workshop, hosted by the Chapel Hill Woodturner’s Club, that showed how to turn a perfect sphere on a wood lathe. At first I was interested primarily to learn the mechanics of how that could be done, but, then, after learning how to do it and seeing the beautiful, perfect, results, I was hooked! I love turning Spheres!

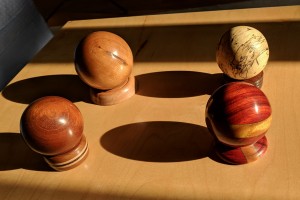
Here are some of my samples:

Click on photo to enlarge.

A collection of Spheres I turned as a result of the Sphere turning class. Left to right, the first is Mahogany, then Cherry, then, in the back is Spalted Tamarind, and finally, in the foreground is a lamination made of Paduak, yellow Mora, with a green veneer separating the woods.

The Spalted Tamarind was a gift to my wife, and the Paduak, with its single band, was a gift for my granddaughter’s first birthday.

Goblet turning workshop

I attended a special woodturning workshop showing various methods for turning goblets. The workshop was hosted by the Chapel Hill Woodturner’s Club, and taught three different methods for creating one, two, and three piece goblets.

The different approaches are useful when:
A single piece of wood is attractive as a single monolithic turning.
Two pieces are useful when you want contrasting woods or you want a level of detail in the stem that the material of the cup can’t support, for example, an off center turned stem.
Three pieces are similar to two pieces except that, with the base being separate, you can face turn that and add details like textures that might not look good in a single stem. Also, of course, it would allow three totally different pieces of wood to be used in the piece.
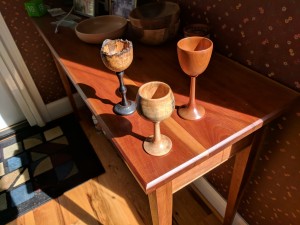
Here is what I’ve produced as a result of the workshop:

Click on photo to enlarge.

A collection of goblets I turned as a result of the Goblet turning class. The two on the right are one piece goblets, while the funky one, made of Maple Burl and dyed Walnut stem and base is a three piece goblet.

Woodturning workshop on how to texture bowls.

The local woodturning club, Chapel Hill Woodturners, hosts workshops on various woodturning topics. I went to a workshop on Texturing turnings yesterday and was amazed at what you can do with this technique. I had seen texturing tools before but was skeptical on how versatile they were.

Well! Let me tell you, with just one or two tools you can turn out some fantastic stuff (If you know what you’re doing)!

I learned that you can create quite a wide variety of patterns by controlling various factors when using the tools. The resulting pattern depends on:
1. the tool – there are a few basic tools in a range of sizes. Each tool has its own range of patterns.
2. WHERE on the workpiece the tool is applied. If close to the center of workpiece then you can make things like flowers or snowflake patterns. If placed on the out surface you can get narrow bands of patterns. If you move it while texturing then you get a wild array of patterns!
3. How fast the workpiece is turning. This will affect the texture spacing to some degree.
4. How hard and how long you apply the tool to the workpiece.
And probably a dozen other factors that I probably missed during the full day session.

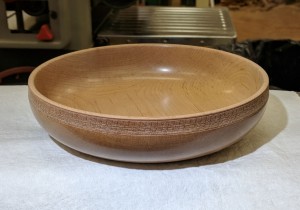
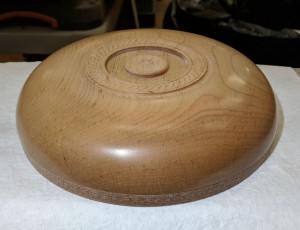
In any case, one of the things we did, besides tear up a whole bunch of wood, was to create our own bowl with whatever texture design we want. Being unsure of how reliable I could do something interesting, I was conservative and made the bowl below. But, even with this, the bowl stands out from anything I’ve made so far, so this new technique is very promising indeed!

Click to view larger image.

Side of textured bowl. A nice decorative band around the outside of the rim.
I didn’t texture the inside since I figured we might actually use this for something!

Click to view larger image.

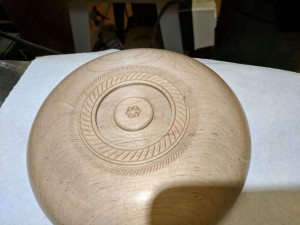
Bottom view showing the texturing on the base and the overall shape of the bowl. This was actually surprisingly easy to do, although a bit daunting as it is very easy to mess up the texturing.

Click to view larger image.

Here is the bottom detail. Even the ‘flower’ was cut with the same tool as the other two bands. It’s all a matter of how and where you hold the tool and how fast the piece is turning. It will take a while before I can do this consistently!

WordPress theme: Kippis 1.12