I’ve had my 8″ Grizzly Jointer for about 11 years and I love it. At 8″ wide and 75″ long, it does a good job of flattening practically any board I’ve thrown at it. However, the one thing I don’t enjoy is sharpening and re-aligning the long blades in the cutter head. Each blade is 8″ long and there are 4 of them. To get the best finish, all of the blades have to be perfectly aligned to each other, as well as aligned to the outfeed table bed. This process can take hours, between sharpening, aligning, checking, re-aligning, and re-checking.
Normally I don’t have to do it very often, but I’ve been using a lot of very hard wood and plywood lately and these really ‘eat’ blades. Consequently, it seems that the jointer always needed resharpening – and, because it was such a nuisance, I generally put off this step for much longer than I should have – and curse the resulting tearouts when I did push it too far.
Well, to address this problem and attempt to get an even better finish off of the jointer, I’ve bit the bullet and replaced the original cutter head with a Byrd ‘Shelix’ cutter head. As you can see, this cutter has individual carbide cutters that are arranged in a helix type of layout.
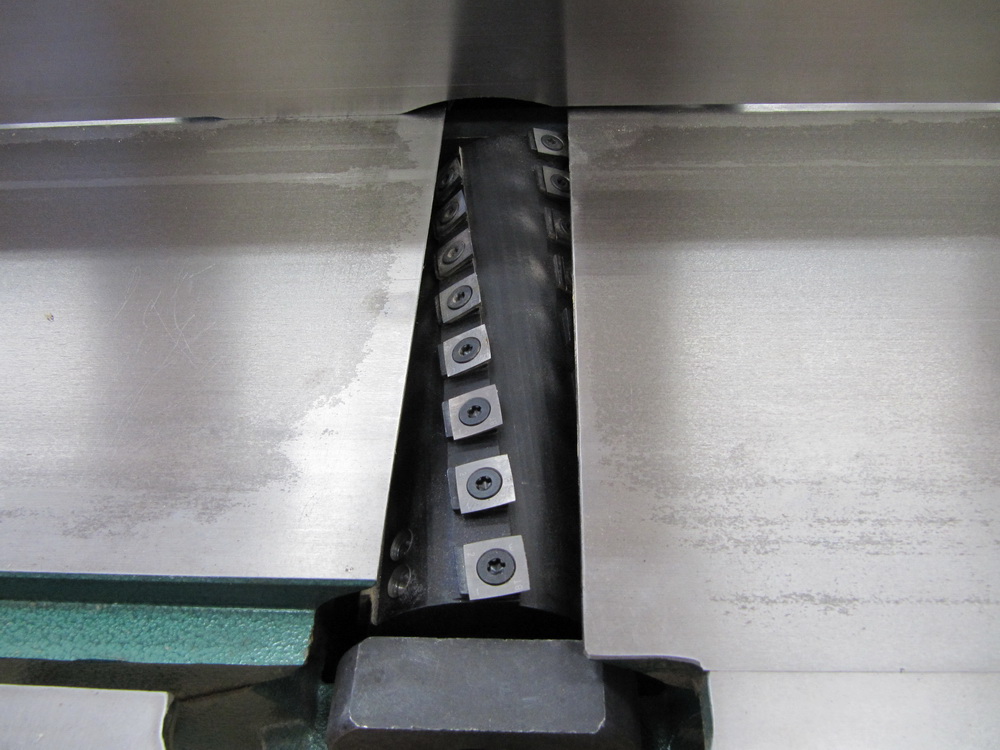
Closeup of Helix Cutter.
Each blade is slightly skewed along the helix angle to provide a shear type of cutting action. Each blade also has four cutting sides so that, as they become dull or nicked, they can be turned up to three times before replacing them. AND, since they are individual cutters, replacing a nicked or worn blade is a simple matter of unscrewing it, putting in a new one, and screwing the new one down. Of course, if ALL the blades need replacing then that has to be done 40 times! However, the way the jointer is used, it’s most likely that only a subset need to be replaced at a time. Oh, I should mention that, being Carbide, these blades will stay sharper longer that the high speed steel used in the older blades!
The installation was pretty easy. As you can see below, pulling out the old cutter only required disconnecting the belts to the motor, pulling back the infeed and outfeed tables, and lifting the cutter assembly out of the unit. The bearings were a bit of a struggle since they are a tight fit to the cutter shaft. A wheel puller helped pull them off the old cutter and a couple of hardwood ‘tools’ and a hammer was all that I needed to install the bearings on the new cutter head.
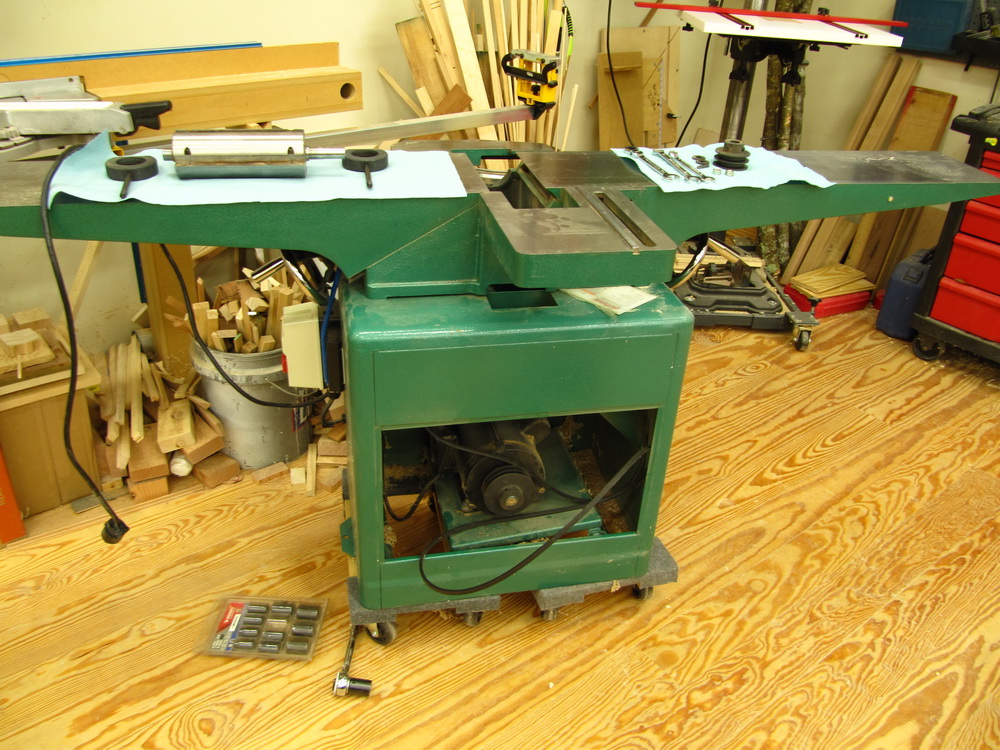
Jointer, with old cutter removed. I lifted the jointer (all 400 lbs of it!) onto dollies so I could move it around during the rework.
Here is the result of using the new cutter head on some reasonably figured maple. The surface was very smooth although there are some burnish lines in the surface from the individual cutters. There is no noticeable depth to the lines and a quick pass with 220 grit sander removed them entirely. This maple always had SOME tearout with the previous cutter. There is none with this cutter!
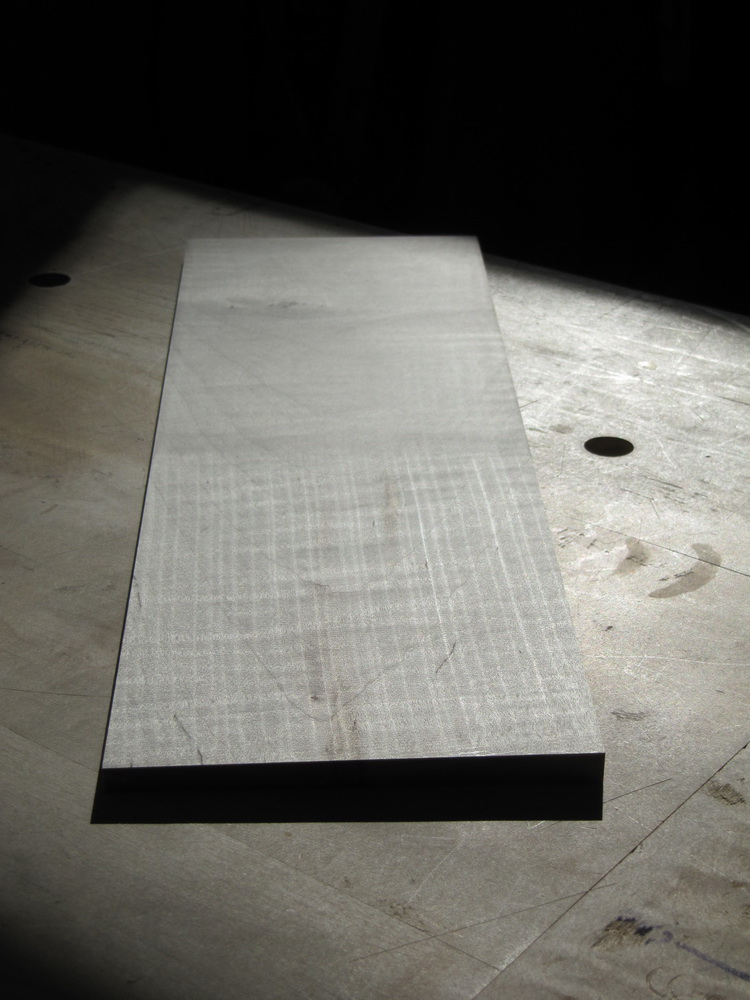
Figured Hard Maple, after face jointing with 1/2 of it sanded to remove the burnish lines.
Leave a Reply