I’m working on a Buffet/Sideboard cabinet for our kitchen at the House in the Woods and, because it has four side by side inset doors, have decided to use Knife Hinges to mount the doors. Knife Hinges are very discreet, barely visible and allow the two center doors to be mounted back to back, without a center post.
The tricky part about Knife Hinges is that each blade of the hinge must be precisely mortised into the top and bottom rails and the top and bottom edge of the doors and there is no adjustment for positioning (unless you make the mortise oversized). The blade is flush with the wood surface and the only part that is exposed is the pivot. Each pivot has a spacer which precisely defines the top and bottom gaps for the inset door. For appearances sake, the right and left gap of each door should match the top and bottom gaps. Therefore, the door is sized to fit the opening with this small gap at each edge of the door.
With the hinges I’ve purchased (5/16″ Brusso hinges) the spacer is 0.048″, halfway between 1/32″ and 1/16″. This means that the hinge positions for the right and left hinges must be precisely 0.048″ from the right and left legs, respectively AND, even more tricky, the center two hinges must be positioned 0.024″ from the center of the rail AND must precisely line up with the corresponding mortise on the opposite rail.
WHEW!
As I thought about what technique to use to make these mortises in the quarter sawn oak rails I realized that each mortise is identical to each other. Some are mirrored, but the dimensions are identical. Further, trying to chop out a mortise with a 0.048″ end wall or a pair of mortises with a 0.048″ wall between them, I knew that chopping with a chisel wasn’t an option. That meant the best way was probably routing.
My first thought was to use my CNC Router to make a jig for a hand held router, but then, after a flash of light! I knew how to make these mortises!
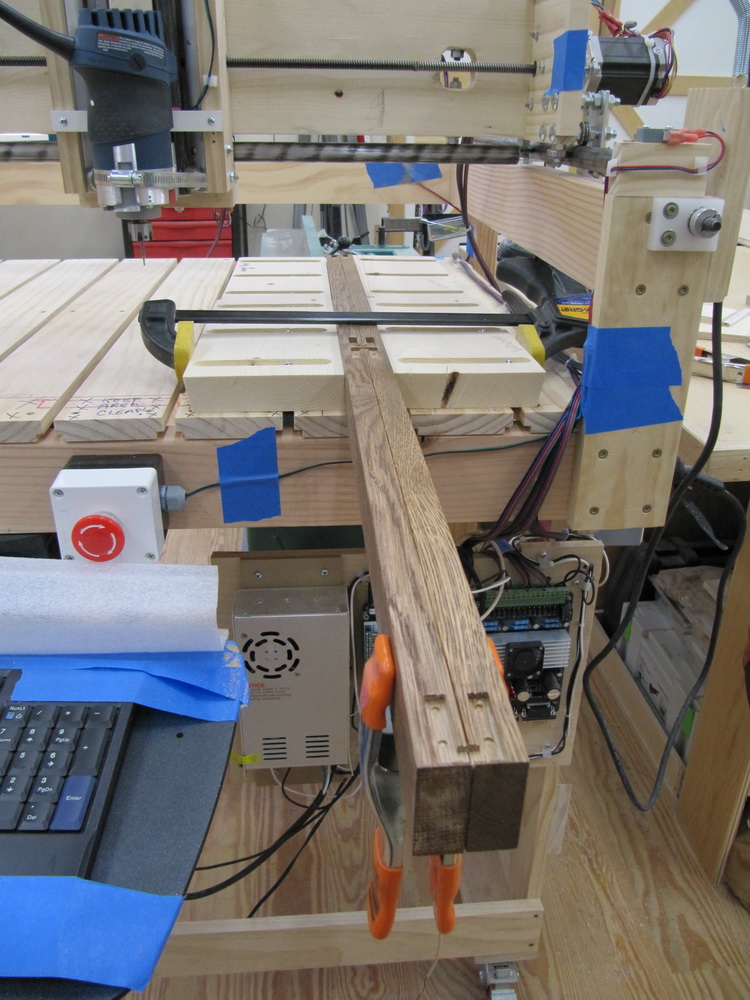
The rails are 40 1/2″ long so I couldn’t cut all mortises in one pass (the CNC router is limited to 24″ of travel). However, since the mortises on the top and bottom are identical but mirrored, it would be easy to design the pattern to cut TWO mortises at once with the two rails clamped together face to face!
Further, with the two rails perfectly aligned, the top and bottom mortises would be perfectly aligned. AND if I took shallow passes on the cutting, then there was a good chance that the thin end and center wall could be maintained. Finally, the FOUR center mortises could all be cut in one pass so the hardest alignment should be easy.
So, here ya go…

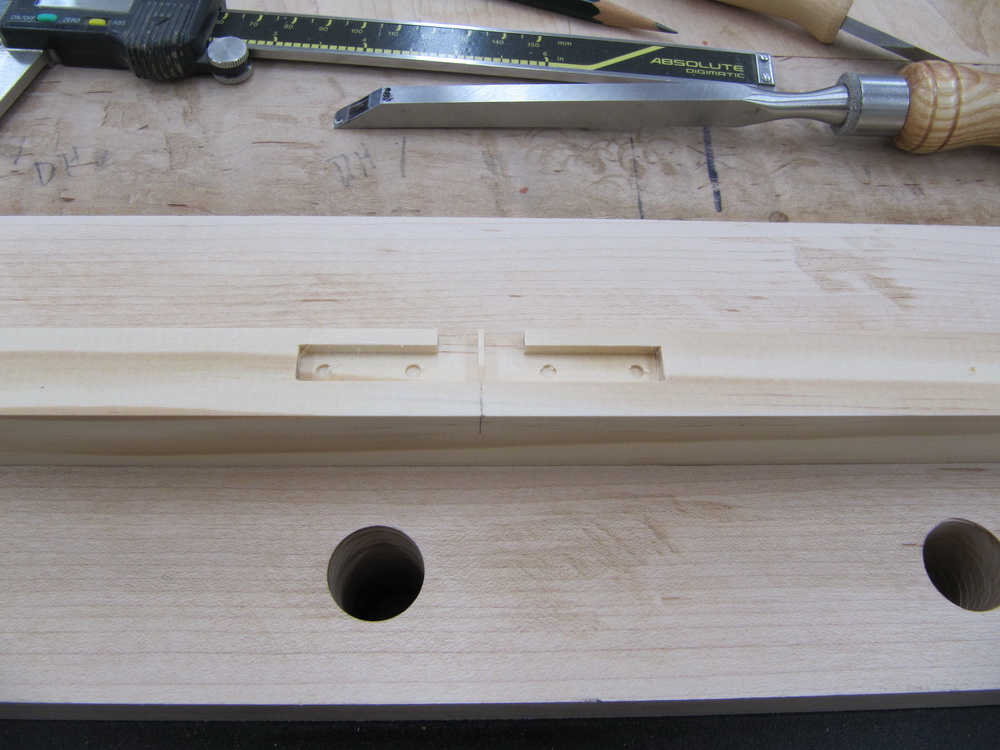
Here is the prototype, just to make sure the pattern and technique would work.
You can see the center mortises precise cut in the two rails. Here is the fitting of the hinges to the mortises:
To fit the rectangular hinge, I needed to trim the 1/32″ radius corners.

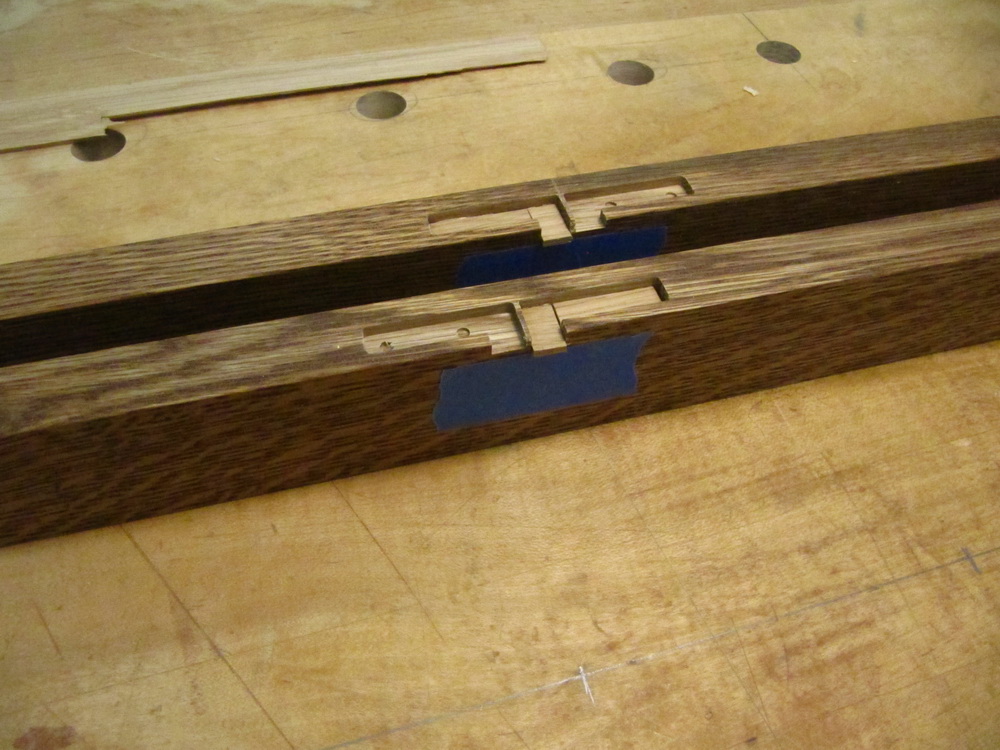
Here are the two hinges mounted back to back. The spacing is exactly 0.048″!!!
Now it was time to do the REAL rails! Here are the oak rails (with first coat of tinted oil) with all the mortises cut.
All eight mortises have been cut. Unfortunately, I messed up cutting the center mortises!!!
When I set up the rails to cut the center mortises, I reloaded the CNC program and forgot to tell the CNC software that the cutting bit was already mounted. When I began the alignment to the center of the rails, the software tried to move the router lower than the bit would allow and I needed to realign the bit after it got pushed in slightly. Unfortunately, I didn’t tighten the collet well enough and, while routing the first set of center mortises, the bit slipped and cut the mortise about 0.088″ deeper than it should have! Pooh (this is what I said at the time, I’m sure of it…)
Ok, the secret to ‘fine’ woodworking is knowing how to cover your mistakes…
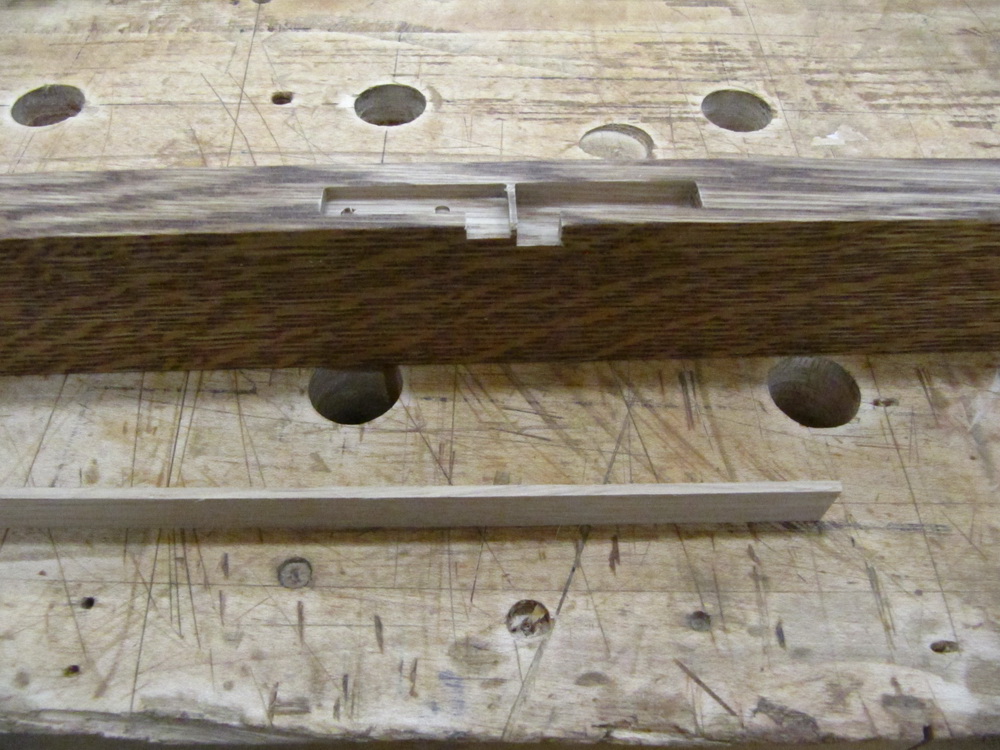
The two center mortises, one deeper than the other. In the foreground you can see a piece of oak that I machined to exactly 0.088″ thick…
Here are the two mortises repaired with the fillers. All mortises are back to the same depth and, after the glue dries, the excess will be trimmed off and stained. No one will ever know ;-)
To make the hinge mortises in the doors, the CNC router would be difficult since the mortise is cut into the ends of the 18 3/4″ stiles and I’d have to jury rig some kind of reliable mount with most of the door hanging under the modified CNC base plate – Yuck!
Instead, I used the CNC router to make a routing template that could be clamped to the door and hand routed with the trim router. Here is the jig I made.
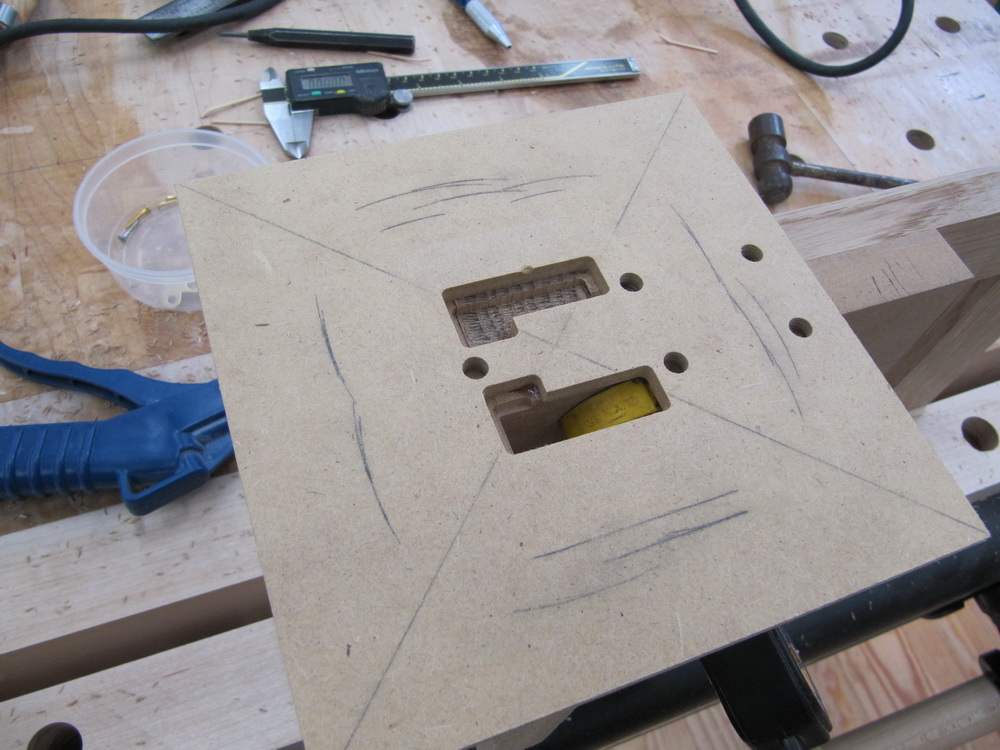
The CNC router cut the 1/4″ MDF sheet with mirrored openings for the top and bottoms of the doors. The extra holes were used to temporarily screw 1/4″ bolts used as guide pins to align the center clamping block. This gave me a reference edge for the face of the door and allowed the guide to be perfectly aligned when clamped.
Here are some underside views of the Jig.

Under side of the jig with slot for clamp.
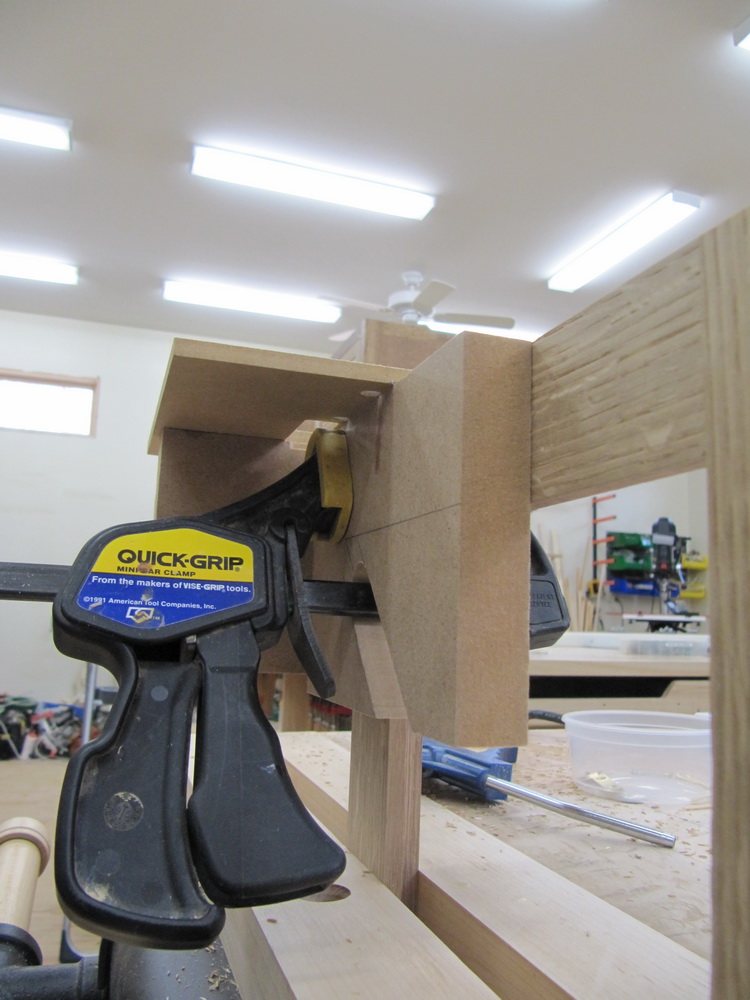
Here is the jig clamped to a door.
Finally, here is the result of mortising the door with hinge inserted into mortise.
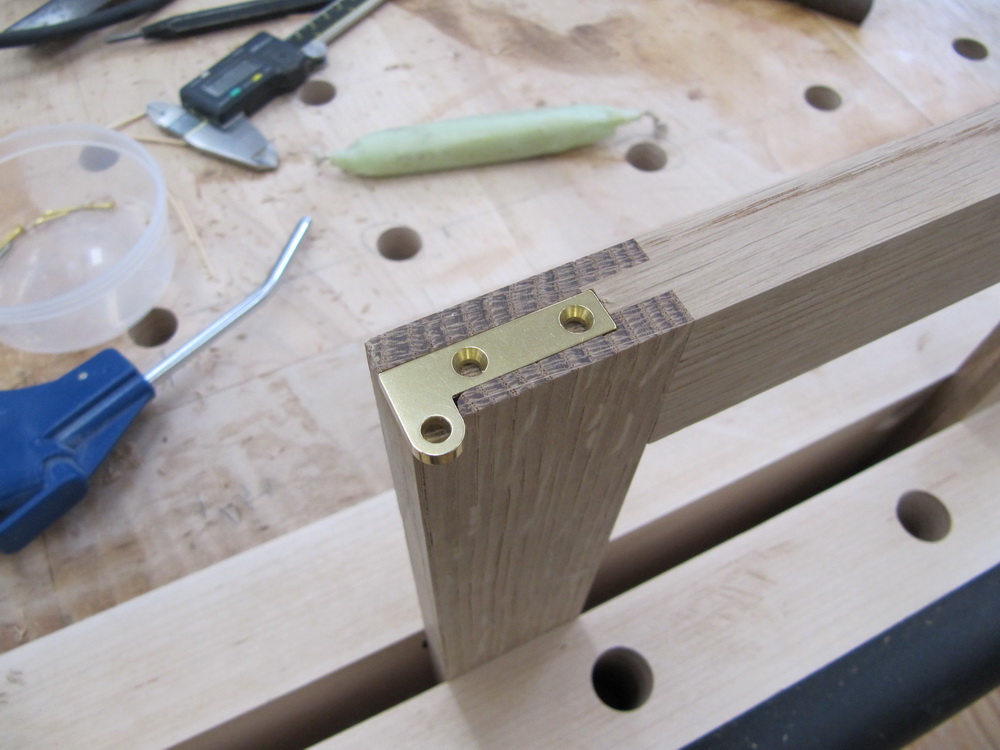
Finished Mortise with hinge inserted.
Leave a Reply