With my Woodworking equipment now moved into the shop and positioned in their permanent locations, it’s time to add the 120V and 220V receptacles to the middle of the floor. I had planned to temporarily use extension cords, connected to the surrounding wall outlets until I was ‘settled in’, but the 220V extension cord hasn’t been unpacked yet so…
Time to make the floor mounted receptacle support.
Now I had lots of choices for mounting the receptacle boxes:
- I could go utilitarian and use angle iron – Too ugly and tough to get rid of sharp edges that tend to wreck shins.
- I could use surface mount boxes – too expensive and I’d have to cut large holes in my nice new floor.
- I could mount the electrical boxes directly on to the floor – hmmm, sort of ugly and takes up a lot of floor space. Easiest to do, however.
- Or… being a woodworker, I could make some out of wood!
Yes, this last one appealed to me. However, I soon found out that, with the shop only partially unpacked, it was a very interesting case of using tools and techniques modified by ‘what was available’.
The choice of wood was easy, the task didn’t warrant an expensive wood and I have plenty of flooring cutoffs I had saved. This would complement the flooring and ya can’t beat the price!
Task 1 was to use my thickness planer to mill off the ridges on the underside of the flooring. While the thickness planer is one of the tools that requires a floor mounted receptacle, it runs on 120V so an extension cord worked just fine. The planer stand hadn’t been assembled yet, but I used my trusty hydraulic lift cart as a temporary stand. This task was completed in short order yielding 8 pieces of 5/8″ uniform thickness.
The next step was to rip these to remove the tongue and groove. Since the Table Saw required the 220V Extension cord, it was time to get my 18″ bandsaw back into action. This made sense anyway since the ‘design’ called for using the BS to cut some curves.
Getting the BS ready took a little more time than expected. Sitting idle for more than ten months apparently allowed the saw dust in the blade guide bearings to ‘settle in’ an some of the bearings wouldn’t turn at all while the remaining turned with some effort. Fortunately, soaking in Mineral Spirits cleaned out the gum and the saw dust and I was able to recover these.
Then I was reminded of a ‘fix’ I had installed in the BS when I first got it – the top wheel bracket fit too loosely in its guide and I had installed some shims to keep the wheel from wobbling. I guess moving the equipment dislodged the shims and I had to ‘re-invent’ the ‘fix’ before I could use the saw. Finally, after much searching, I was unable to locate the guide for the BS fence. Kerry serendipitously found a cutting guide clamp that fit well enough on the saw to provide a reliable and relatively easy to use fence.
So, within minutes (after hours of messing around, looking for stuff) I had 8 uniformly wide boards, ready for final dimensioning. 4 of the boards were merely cut to length on my Miter saw – a key tool all along.
The remaining 4 boards had to be cut with a matched curved profile. This was the fun part. Finally a bit of woodworking…
I rough cut the first one using a template I printed from my Sketchup model of the mount. I simply taped a cut out of the paper template to the board. Once I had the rough cut, I used my Oscillating Edge Belt/Spindle Sander to smooth and even the edges and curves. I was pleased that I hadn’t lost my touch and was able to finish the curves easily.
Using this first board as the template, I marked the remaining three boards and rough cut these on the BS. At this point I would have normally used the first board as a routing pattern on my router table and gotten exact matches on all four pieces. However, since the ‘old’ router table had been mounted on the wing of the Table Saw and was removed to tuck a portion of the jointer under the TS wing AND the ‘new’ router table hasn’t been built yet… I decided to try my skill at matching the pieces using the sander. Again, with a light touch, taking my time, I was able to get a good match between two pairs of boards and I was ready to assemble and, finally, get power to the Table Saw.
So here are the results…
-
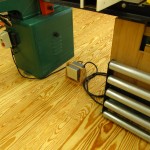
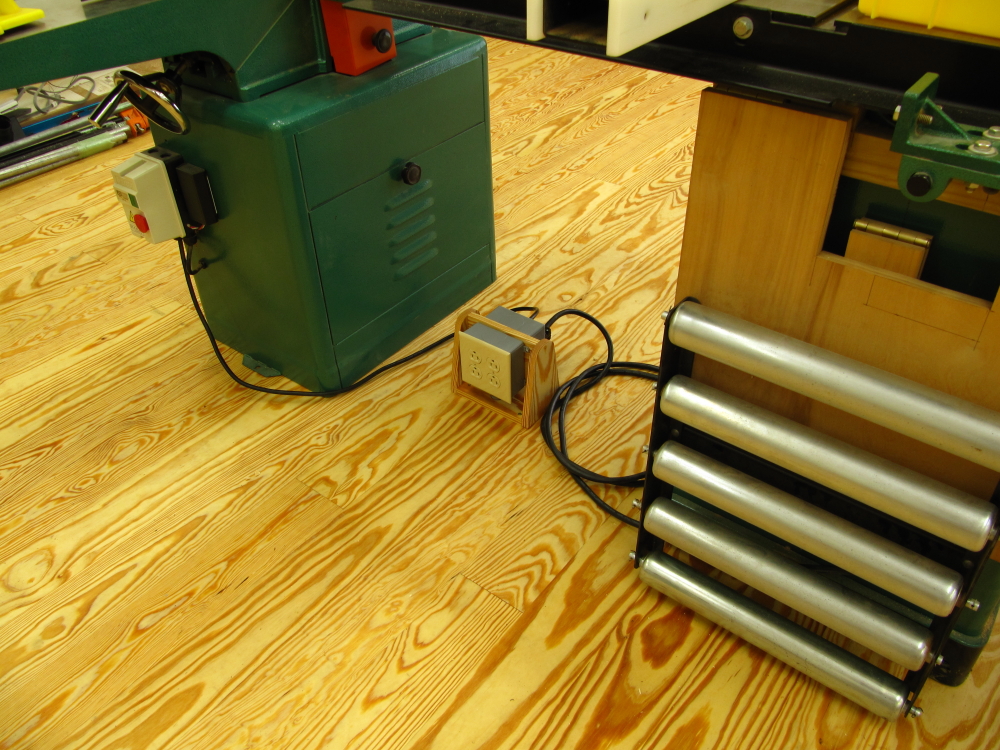
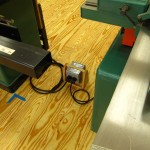
- Floor mounted power between the jointer and table saw. Plenty of 120V power!
-
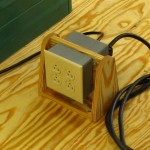
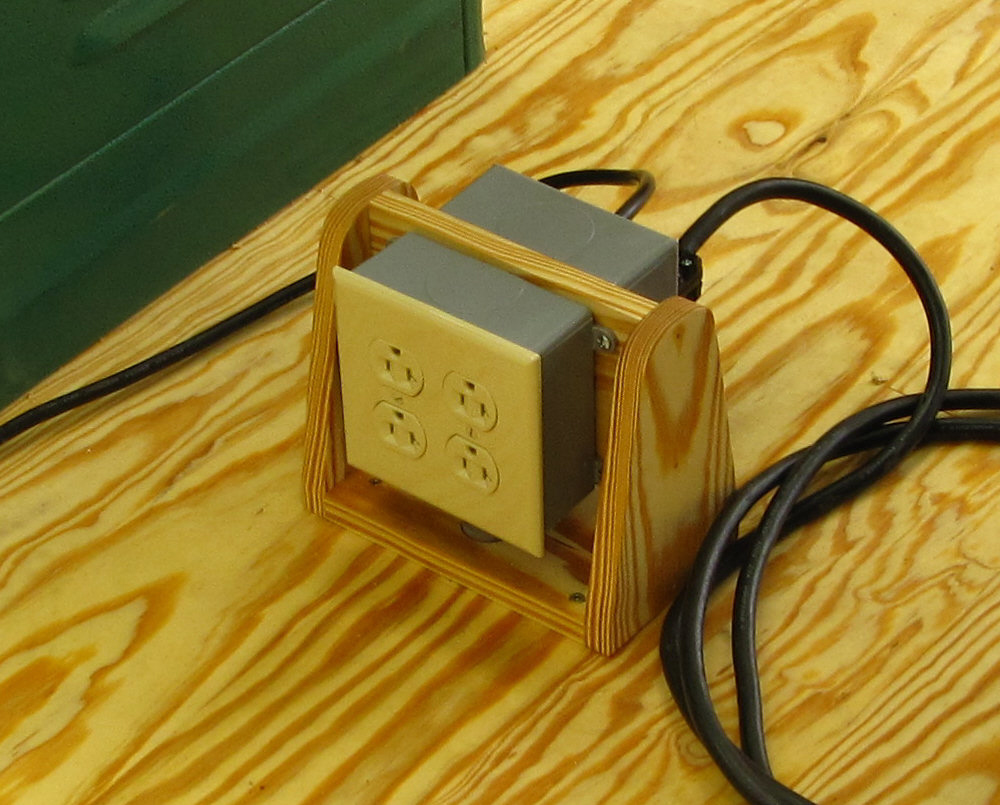
- Close up of Floor Mounted Receptacle
-
- View from the 220V side. Power for both Jointer and Table Saw.

Now I have power to the Jointer and Table Saw so that I can easily and accurately rip those boards I need to make the receptacle mount… Oh wait, that’s already done. Hmmmm, maybe I’ll rip the last piece of flooring for the office…
Leave a Reply