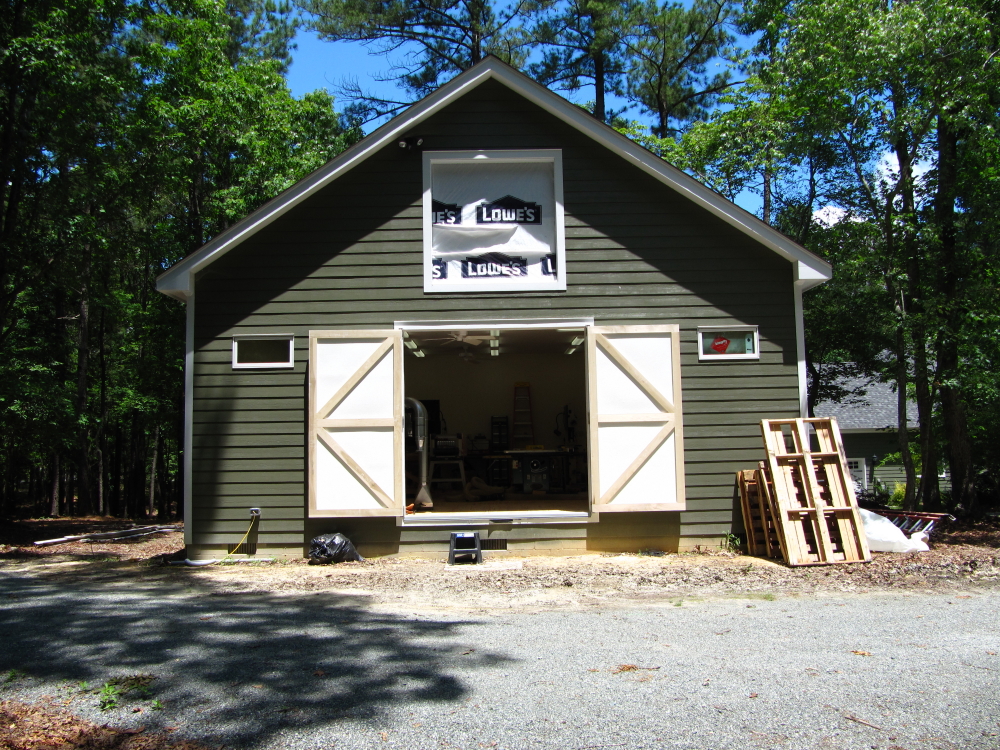
After getting enough infrastructure and tools in the Workshop, I was able to tackle building the large doors for the Loading Dock. The rough opening is 9 feet by 9 feet and I wanted these substantial enough to provide sufficient security yet be insulated so that they don’t represent a large heat load (energy efficient). The results are installed!
-
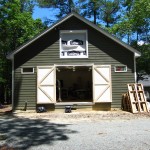
- Doors open to a lovely North Carolina Spring Day!
-

- Doors closed due the to “Isolated Thundershower” that was only a few minutes away.
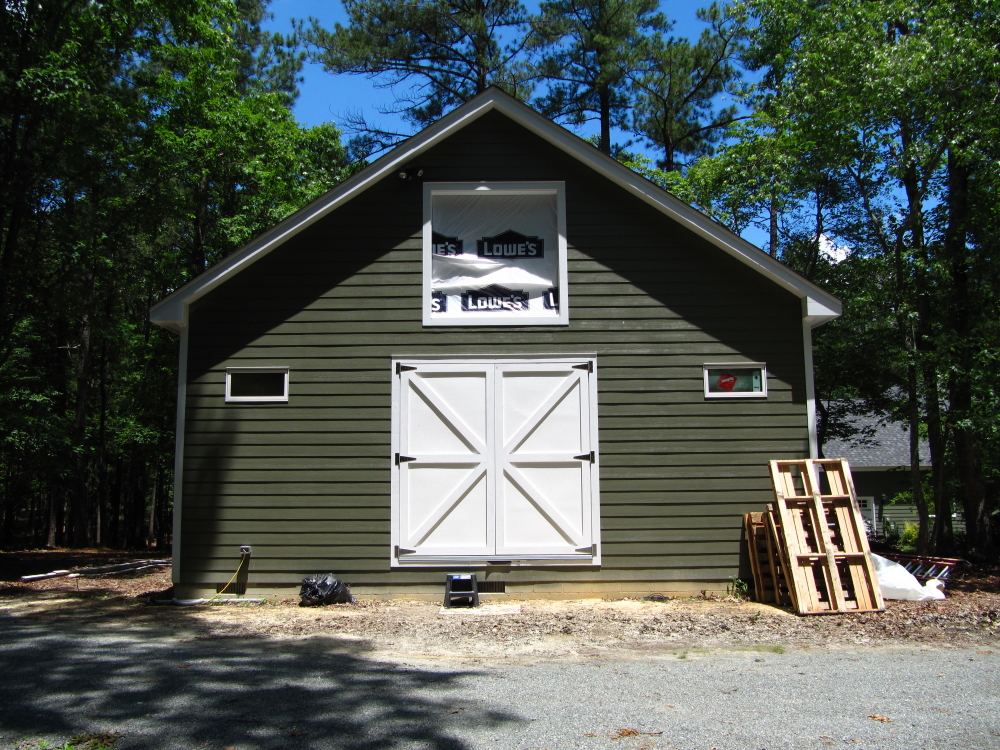
The doors weigh about 175-200lbs each with 3 10″ stainless steel hinges on each door. Kerry and I had a ‘fun‘ time moving these doors around the workshop as they were assembled, primed, installed, and taken down again to ‘trim’.
If you’re interested in the assembly sequence, visit the slideshow below…
WorkshopDoors
[img src=https://tomstudwell.com/wordpress/wp-content/flagallery/workshopdoors/thumbs/thumbs_wsd_0001.jpg]1110Delivery of about 150 board feet of raw wood for the doors.
[img src=https://tomstudwell.com/wordpress/wp-content/flagallery/workshopdoors/thumbs/thumbs_wsd_0002.jpg]820Ready to begin processing.
I had to 'rearrange' the workshop to make room for processing 10-12 foot boards. Note extension conveyors leading into and out of Jointer.[img src=https://tomstudwell.com/wordpress/wp-content/flagallery/workshopdoors/thumbs/thumbs_wsd_0003.jpg]760Wood partially processed.
Making progress - reduced the wood to a lot of sawdust![img src=https://tomstudwell.com/wordpress/wp-content/flagallery/workshopdoors/thumbs/thumbs_wsd_0004.jpg]760All ready to begin subassemblies.
I used floating tenons to hold each of the four layers together.[img src=https://tomstudwell.com/wordpress/wp-content/flagallery/workshopdoors/thumbs/thumbs_wsd_0005.jpg]710Assembly of the first door has begun.
Note inner and outer layers. Outer layer has crossbuck design for rigidity and inner layer has hollow for insulation. You can see the other two layers queued up for assembly.[img src=https://tomstudwell.com/wordpress/wp-content/flagallery/workshopdoors/thumbs/thumbs_wsd_0006.jpg]660Another view of the first two layers.
[img src=https://tomstudwell.com/wordpress/wp-content/flagallery/workshopdoors/thumbs/thumbs_wsd_0007.jpg]630Three layers assembled and first layer of insulation installed.
Inside layer of insulation uses 1/2" rigid foam board. Overall I used slightly less than 1 1/2" of insulation for an R factor of about 7.5.[img src=https://tomstudwell.com/wordpress/wp-content/flagallery/workshopdoors/thumbs/thumbs_wsd_0009.jpg]610All filled up!
[img src=https://tomstudwell.com/wordpress/wp-content/flagallery/workshopdoors/thumbs/thumbs_wsd_0010.jpg]610Now we install the FRP panels that protect the insulation and provide low maintenance.
[img src=https://tomstudwell.com/wordpress/wp-content/flagallery/workshopdoors/thumbs/thumbs_wsd_0011.jpg]590Both FRP panels in place, waiting for the final Cross Buck outer layer.
[img src=https://tomstudwell.com/wordpress/wp-content/flagallery/workshopdoors/thumbs/thumbs_wsd_0012.jpg]590Here we are! Doors wide open to NC Spring air!
[img src=https://tomstudwell.com/wordpress/wp-content/flagallery/workshopdoors/thumbs/thumbs_wsd_0013.jpg]560Closed up, preparing for the rainstorm that came 15 minutes later.
[img src=https://tomstudwell.com/wordpress/wp-content/flagallery/workshopdoors/thumbs/thumbs_wsd_0014.jpg]560View from the inside of the workshop. No more plastic sheeting!
[img src=https://tomstudwell.com/wordpress/wp-content/flagallery/workshopdoors/thumbs/thumbs_wsd_0008.jpg]620Next is the 3/4
Note one side is filled, the foreground side still waiting for the next piece.
![[img src=https://tomstudwell.com/wordpress/wp-content/flagallery/workshopdoors/thumbs/thumbs_wsd_0001.jpg]1110Delivery of about 150 board feet of raw wood for the doors.](https://tomstudwell.com/wordpress/wp-content/flagallery/workshopdoors/wsd_0001.jpg)
[img src=https://tomstudwell.com/wordpress/wp-content/flagallery/workshopdoors/thumbs/thumbs_wsd_0002.jpg]820Ready to begin processing.
![[img src=https://tomstudwell.com/wordpress/wp-content/flagallery/workshopdoors/thumbs/thumbs_wsd_0002.jpg]820Ready to begin processing.I had to 'rearrange' the workshop to make room for processing 10-12 foot boards. Note extension conveyors leading into and out of Jointer.](https://tomstudwell.com/wordpress/wp-content/flagallery/workshopdoors/wsd_0002.jpg)
I had to 'rearrange' the workshop to make room for processing 10-12 foot boards. Note extension conveyors leading into and out of Jointer.[img src=https://tomstudwell.com/wordpress/wp-content/flagallery/workshopdoors/thumbs/thumbs_wsd_0003.jpg]760Wood partially processed.
![[img src=https://tomstudwell.com/wordpress/wp-content/flagallery/workshopdoors/thumbs/thumbs_wsd_0003.jpg]760Wood partially processed. Making progress - reduced the wood to a lot of sawdust!](https://tomstudwell.com/wordpress/wp-content/flagallery/workshopdoors/wsd_0003.jpg)
Making progress - reduced the wood to a lot of sawdust![img src=https://tomstudwell.com/wordpress/wp-content/flagallery/workshopdoors/thumbs/thumbs_wsd_0004.jpg]760All ready to begin subassemblies.
![[img src=https://tomstudwell.com/wordpress/wp-content/flagallery/workshopdoors/thumbs/thumbs_wsd_0004.jpg]760All ready to begin subassemblies.I used floating tenons to hold each of the four layers together.](https://tomstudwell.com/wordpress/wp-content/flagallery/workshopdoors/wsd_0004.jpg)
I used floating tenons to hold each of the four layers together.[img src=https://tomstudwell.com/wordpress/wp-content/flagallery/workshopdoors/thumbs/thumbs_wsd_0005.jpg]710Assembly of the first door has begun.
![[img src=https://tomstudwell.com/wordpress/wp-content/flagallery/workshopdoors/thumbs/thumbs_wsd_0005.jpg]710Assembly of the first door has begun. Note inner and outer layers. Outer layer has crossbuck design for rigidity and inner layer has hollow for insulation. You can see the other two layers queued up for assembly.](https://tomstudwell.com/wordpress/wp-content/flagallery/workshopdoors/wsd_0005.jpg)
Note inner and outer layers. Outer layer has crossbuck design for rigidity and inner layer has hollow for insulation. You can see the other two layers queued up for assembly.[img src=https://tomstudwell.com/wordpress/wp-content/flagallery/workshopdoors/thumbs/thumbs_wsd_0006.jpg]660Another view of the first two layers.
![[img src=https://tomstudwell.com/wordpress/wp-content/flagallery/workshopdoors/thumbs/thumbs_wsd_0006.jpg]660Another view of the first two layers.](https://tomstudwell.com/wordpress/wp-content/flagallery/workshopdoors/wsd_0006.jpg)
[img src=https://tomstudwell.com/wordpress/wp-content/flagallery/workshopdoors/thumbs/thumbs_wsd_0007.jpg]630Three layers assembled and first layer of insulation installed.
![[img src=https://tomstudwell.com/wordpress/wp-content/flagallery/workshopdoors/thumbs/thumbs_wsd_0007.jpg]630Three layers assembled and first layer of insulation installed.Inside layer of insulation uses 1/2" rigid foam board. Overall I used slightly less than 1 1/2" of insulation for an R factor of about 7.5.](https://tomstudwell.com/wordpress/wp-content/flagallery/workshopdoors/wsd_0007.jpg)
Inside layer of insulation uses 1/2" rigid foam board. Overall I used slightly less than 1 1/2" of insulation for an R factor of about 7.5.[img src=https://tomstudwell.com/wordpress/wp-content/flagallery/workshopdoors/thumbs/thumbs_wsd_0009.jpg]610All filled up!
![[img src=https://tomstudwell.com/wordpress/wp-content/flagallery/workshopdoors/thumbs/thumbs_wsd_0009.jpg]610All filled up!](https://tomstudwell.com/wordpress/wp-content/flagallery/workshopdoors/wsd_0009.jpg)
[img src=https://tomstudwell.com/wordpress/wp-content/flagallery/workshopdoors/thumbs/thumbs_wsd_0010.jpg]610Now we install the FRP panels that protect the insulation and provide low maintenance.
![[img src=https://tomstudwell.com/wordpress/wp-content/flagallery/workshopdoors/thumbs/thumbs_wsd_0010.jpg]610Now we install the FRP panels that protect the insulation and provide low maintenance.](https://tomstudwell.com/wordpress/wp-content/flagallery/workshopdoors/wsd_0010.jpg)
[img src=https://tomstudwell.com/wordpress/wp-content/flagallery/workshopdoors/thumbs/thumbs_wsd_0011.jpg]590Both FRP panels in place, waiting for the final Cross Buck outer layer.
![[img src=https://tomstudwell.com/wordpress/wp-content/flagallery/workshopdoors/thumbs/thumbs_wsd_0011.jpg]590Both FRP panels in place, waiting for the final Cross Buck outer layer.](https://tomstudwell.com/wordpress/wp-content/flagallery/workshopdoors/wsd_0011.jpg)
[img src=https://tomstudwell.com/wordpress/wp-content/flagallery/workshopdoors/thumbs/thumbs_wsd_0012.jpg]590Here we are! Doors wide open to NC Spring air!
![[img src=https://tomstudwell.com/wordpress/wp-content/flagallery/workshopdoors/thumbs/thumbs_wsd_0012.jpg]590Here we are! Doors wide open to NC Spring air!](https://tomstudwell.com/wordpress/wp-content/flagallery/workshopdoors/wsd_0012.jpg)
[img src=https://tomstudwell.com/wordpress/wp-content/flagallery/workshopdoors/thumbs/thumbs_wsd_0013.jpg]560Closed up, preparing for the rainstorm that came 15 minutes later.
![[img src=https://tomstudwell.com/wordpress/wp-content/flagallery/workshopdoors/thumbs/thumbs_wsd_0013.jpg]560Closed up, preparing for the rainstorm that came 15 minutes later.](https://tomstudwell.com/wordpress/wp-content/flagallery/workshopdoors/wsd_0013.jpg)
[img src=https://tomstudwell.com/wordpress/wp-content/flagallery/workshopdoors/thumbs/thumbs_wsd_0014.jpg]560View from the inside of the workshop. No more plastic sheeting!
![[img src=https://tomstudwell.com/wordpress/wp-content/flagallery/workshopdoors/thumbs/thumbs_wsd_0014.jpg]560View from the inside of the workshop. No more plastic sheeting!](https://tomstudwell.com/wordpress/wp-content/flagallery/workshopdoors/wsd_0014.jpg)
[img src=https://tomstudwell.com/wordpress/wp-content/flagallery/workshopdoors/thumbs/thumbs_wsd_0008.jpg]620Next is the 3/4
![[img src=https://tomstudwell.com/wordpress/wp-content/flagallery/workshopdoors/thumbs/thumbs_wsd_0008.jpg]620Next is the 3/4Note one side is filled, the foreground side still waiting for the next piece.](https://tomstudwell.com/wordpress/wp-content/flagallery/workshopdoors/wsd_0008.jpg)
Note one side is filled, the foreground side still waiting for the next piece.
Leave a Reply