Christmas 2020

In keeping with tradition, here are a selection of photos of things I made as Christmas presents this year, starting with the ornaments…

Click on photo to enlarge.

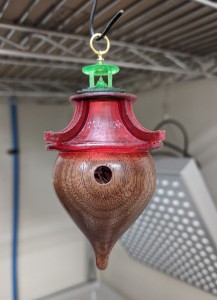
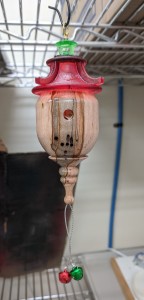
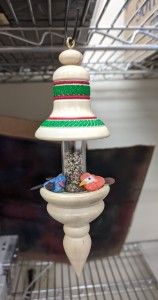
Bird Feeder Ornament, feeding those hungry birds in the winter! Wood is native Holly. Design inspired by work done by Frank Penta.

Click on photo to enlarge.

Bird is nesting inside and, of course, that IS a Christmas Tree inside the top of the Pagoda roof.

Click on photo to enlarge.

Look closely, you can see the bird nesting inside.

Next, the ‘usual’ collection of gifts…

Click on photo to enlarge.

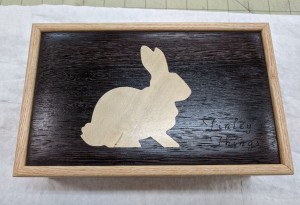
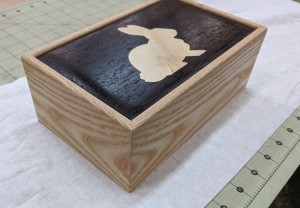
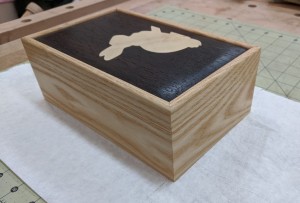
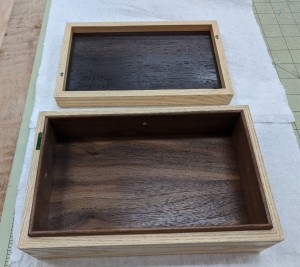
Box to keep Finley’s Things. Sides are Ash, top is Wenge with Holly Inlay.

Click on photo to enlarge.

Front Corner showing grain matching.

Click on photo to enlarge.

Back corner showing grain matching.

Click on photo to enlarge.

Lift the lid and you’ll find Walnut lining with a surprise! Random tracks from an SD card will play every time the lid is opened. Currently the tracks are recorded animal and insect sounds.

Click on photo to enlarge.

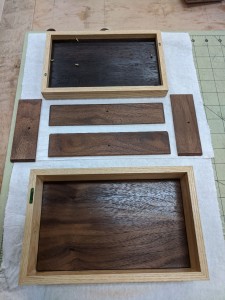
The liner is removable including the false bottom.

Click on photo to enlarge.

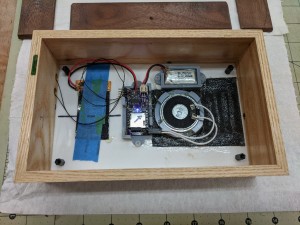
With the false bottom removed, the custom electronics, including the SD card, is accessible. Note the wireless Charging circuit on the left side. This will keep the battery charged without wires when the box is placed on its stand.

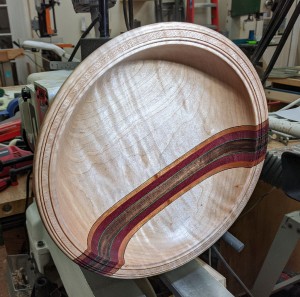
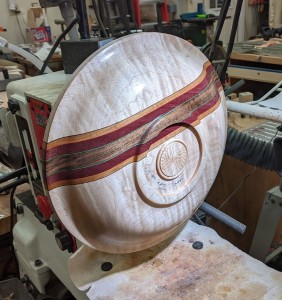
For Kerry, I made a large, shallow bowl I’ve been wanting to make for some time. I had to wait until I had refined my Woodturning skills enough to have the confidence to take it on. I’m pleased with the result:

Click on photo to enlarge.

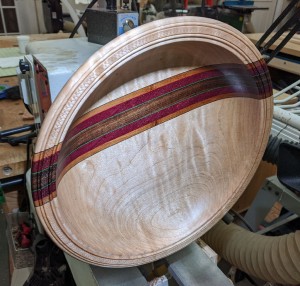
Large Bowl for Kerry

Click on photo to enlarge.

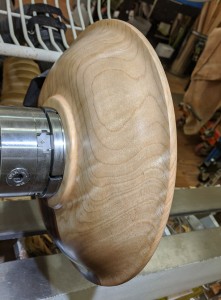
Showing back side of bowl after buffing.

Click on photo to enlarge.

Here’s the bowl right after turning the bottom first. Note texturing inside the foot.

Click on photo to enlarge.

Bowl right after turning the inside. Freshly oiled with Walnut Oil, it will need to cure for a few days before final buffing.

Click on photo to enlarge.

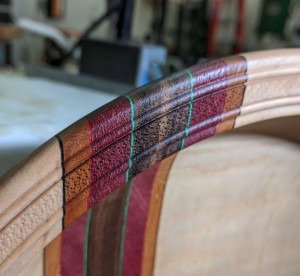
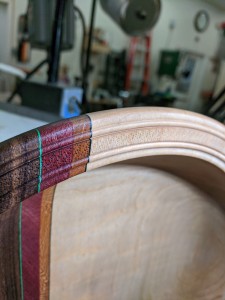
Bowl Rim detail.

Click on photo to enlarge.

Bowl Lamination Detail. The woods are Cherry, Purple Heart, and Walnut with dyed veneers between the layers.

Click on photo to enlarge.

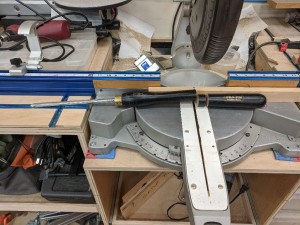
Finally, here is how you deal with overly long handles on your turning tools. I couldn’t get enough sweep with the original handle to turn the inside of Kerry’s bowl. Solution? Cut it off! I’ve since replaced the wooden handle with an adjustable Aluminum handle. Much better!

and have to make some Yard Art!

Click on photo to enlarge.

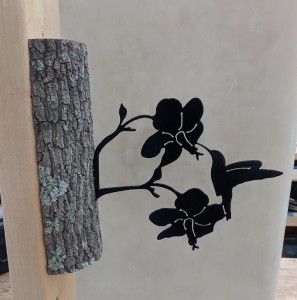
Yard art for Kate & Paul’s place.

Click on photo to enlarge.

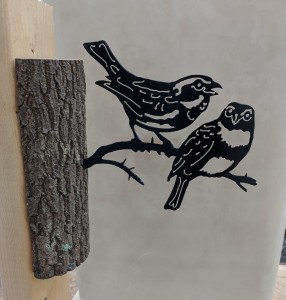
Some yard art I made for Clare and Finley’s house.

New Kitchen Range, crappy installation…

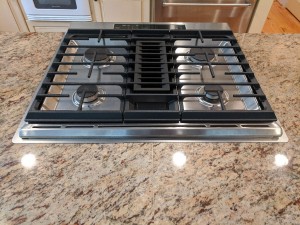
We replaced our 14 year old range with a new Kitchen Aid dual fuel ‘Slide In’.  We like the range, but the installer didn’t do a very good job ‘sliding’ it into place!

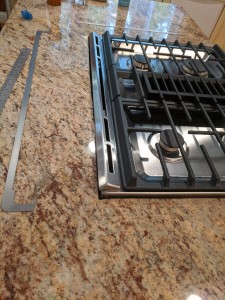
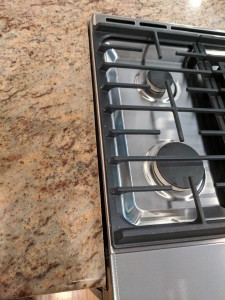
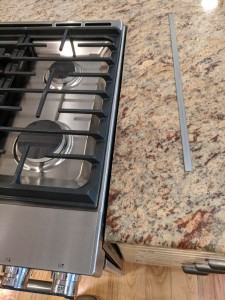
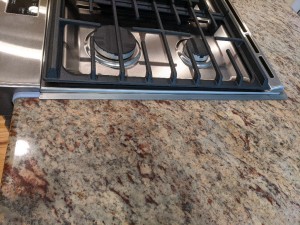
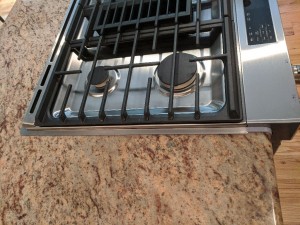
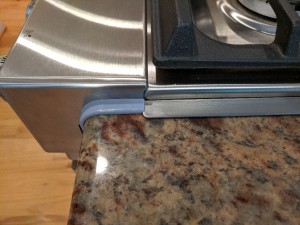
The original range had a rim that covered up the gaps in the granite counter top and the new range apparently assumed that the opening would be a perfect fit.  As you can see, it sucks!

Click on photo to enlarge.

Back Gap, note how uneven it is…

Click on photo to enlarge.

Left Gap is pretty wide.

Click on photo to enlarge.

Right Gap

The back was really a nuisance because the installer had to chop out more of the granite since the new range was deeper than the old one.  The guy who cut it probably didn’t know his ‘fine’ work would be showing!

After complaining to the installer, he told us, “No problem.  For $100 we could buy a ‘trim kit’ from Kitchen Aid.”

Well, after researching the ‘trim kit’ we discovered that it was nothing more than some aluminized plastic stick-on strips that virtually everyone who bought it complained about it.

Ordinarily this would be a show stopper as we didn’t want this sucky look in our home.  However, it seems that ‘someone’ near and dear just so happens to have a CNC Plasma cutter that scoffs at practically any metal placed on it!

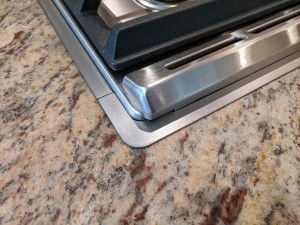
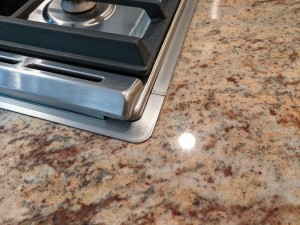
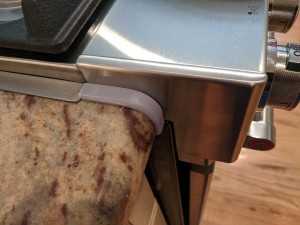
So…, after a bit of measuring and design, I was able to cut three trim pieces out of 20Ga stainless steel, stick them down with 3M VHB tape, and, as a bonus, used my new 3D Resin printer to print trim caps that blended the trim around the countertop’s bullnose rim.

Here is the result:

Click on photo to enlarge.

Back Trim Installed

Click on photo to enlarge.

Right Trim Piece Installed

Click on photo to enlarge.

Left Trim Installed

Click on photo to enlarge.

Right Corner Trim Closeup

Click on photo to enlarge.

Left Corner Trim Closeup

Click on photo to enlarge.

Right Bullnose Cap Close Up

Click on photo to enlarge.

Left Bullnose Cap Closeup

The plan is that Kerry will paint the 3D Printed caps so that they blend in with the colors of the countertop.

So, in closing, when life gives you crappy installations, turn to your nearest Maker Shop!


New 3D printer for the shop!

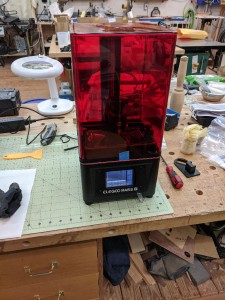
I’ve got a new 3D Printer for the shop and I’m really excited about the possibilities. The printer is an Elegoo Mars Pro:

Click on photo to enlarge.

New 3D Printer, busy printing the next thing!


The printer is a ‘resin’ type printer where the print bed is moved (rather than a print head) and is dipped into a vat of resin that is cured using Ultraviolet light.  The pattern to be cured is generated by a high resolution LCD under the vat and selectively passes through UV light from below.  The print bed is then raised to the next position and the next layer is projected on to the last.  It’s a slow process, but very high resolution and, I’m hoping, without the printing gaps that you get with a ‘FDM’ type 3D printer.

The print volume is small, only 4.5×2.56×5.9 inches, but almost all of my printing is smaller than this.  Interestingly, with this type of printer the time it takes to print is entirely determined by the height of the object and the layer thickness, while a conventional 3D printer the time it takes to print is a function of the volume of the printed object and the resolution of the extruder.  Hence, in a lot of cases, the print time will be shorter with this type of printer, especially on complex objects.

So, what have I done since I unpacked this yesterday?

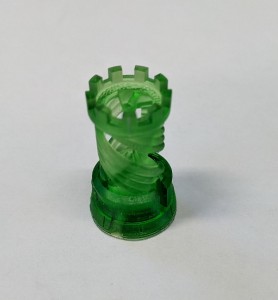
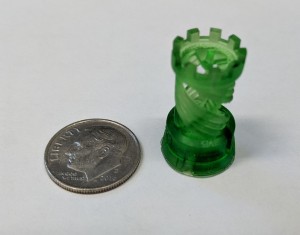
Included with the printer was a sample design file of a mythical WatchTower.  I printed it in a Green Translucent resin purposefully keeping it small to test the resolution:

Click on photo to enlarge.

WatchTower complete with Spiral Staircase in the middle of it.

To give you some idea of the size of this tower, try this on:

Click on photo to enlarge.

WatchTower with some perspective added.

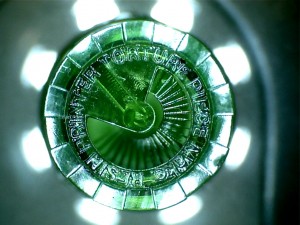
Finally, here is a closeup of the walkway at the top of the tower:

Click on photo to enlarge.

Bird’s Eye view of the watchtower. You can see the stairs descending and the printing on the walkway. Those letters are approximately 150 microns thick…


Yard Art for the House In The Woods

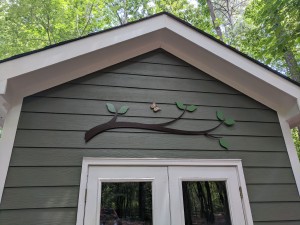
I finally got around to using my CNC Plasma Cutter to make some art for our yard.  The first item is something I’ve wanted to do since realizing that this tool would be able to do this.  As some may recall, we created a stylized branch to decorate the panels in our “Throwaway” Buffet Cabinet.  We like the artwork so much we’ve wanted to replicate it.

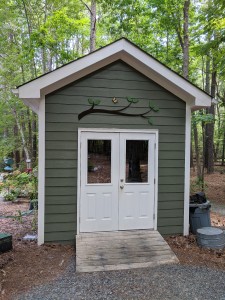
Here is the replica, mounted on our Garden Shed:
Click on photo to enlarge.

New decoration for our garden shed.

And a closer view:
Click on photo to enlarge.

Here’s a closer view of the branch and ButterFly

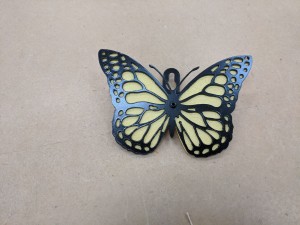
And finally the Butterfly:
Click on photo to enlarge.

Closeup of Butterfly

Details of how this was made are down below.

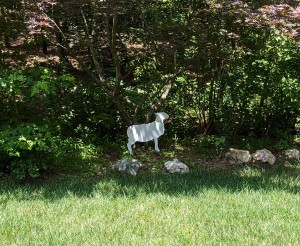
The other recent addition to the Yard is some livestock to entertain our Granddaughter when she comes to visit.
Click on photo to enlarge.

Here is the Sheep looking longingly at the front lawn…

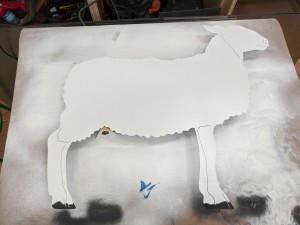
Closeup of the Sheep:
Click on photo to enlarge.

Sheep painted.

The two large pieces, the Sheep and, especially, the Stylized Branch, both required some special cutting techniques because both of them were too large to fit on the CNC Plasma Table.  The table can only cut  23″ in one direction and 25″ in the other.  The good news is that the table is open on the ends of the 23″ axis so, theoretically (see Note [1] below), I could cut something as long as will fit in my Workshop.

However, this required multiple steps in both processing the artwork and the cutting process. Each step allowed me to cut a region of the metal, the cutting was paused while I re-positioned and aligned the steel for the next cut, and then cutting was resumed at the next section with the software offsetting the coordinates to match the new position.  The alignment is critical as the cut line is only about 0.050″ wide so any error in positioning would, at best, leave a jog in the cut line, or, worse, an uncut section of steel that would need manual cutting and fixing.

The sheep was used to test and prove the process.  It could have been done by limiting the size to 23″, but using a full sheet gave me a bigger sheep and tested the process.

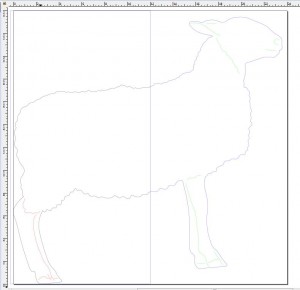
The first step was to rework the art work:
Click on photo to enlarge.

Maximized Sheep Artwork, rotated and scaled to fit 24×24 piece of steel.

You can see the split line between the two halves of the drawing.  That’s where the art work needed to be separated into to independent groups.  Note that the art work has internal cuts and they had to be separated into the two different cut phases as well.

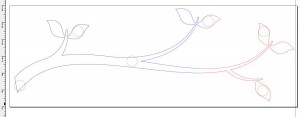
Using the Sheep project to refine the process turned out to be a wise decision as I learned enough from the Sheep project to do the Stylized branch, which required three sections over a 72 piece of steel, and 4 joints.
Click on photo to enlarge.

Branch Artwork showing three sections and mounting hole locations.

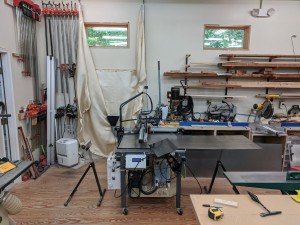
Cutting a 6 foot long piece of steel also required some re-arrangement of my workshop, not only to make room for the workpiece but also to provide support for the portions of steel that were on either side of the table during the cut.   It also concerned me that my Plasma cutter, which is normally kept in a little alcove surrounded by fiberglass welding blankets where most of the sparks are contained by the blankets, would now be out in the open during all the cuts with sparks flying in all directions!  As a precaution I put my fire extinguisher right at my side during the whole operation!

Here is the setup prior to cut:
Click on photo to enlarge.

I had to rearrange my workshop to manage a 6 foot long piece of steel!

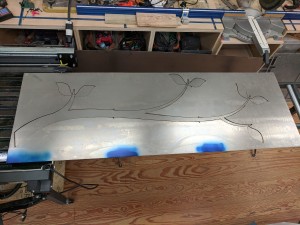
And here is the result after the cut:
Click on photo to enlarge.

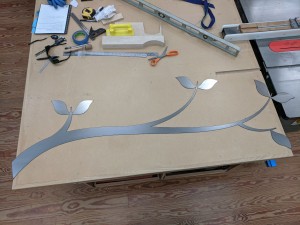
And here is the finished cut. Notice the lead in and lead out cuts at the joint of each section.

And the final piece cleaned up and ready to paint.
Click on photo to enlarge.

Branch ready for painting!

All in all, the cutting went very well with probably no more than 1/32″ misalignment in the worst case.  As a result of this project, I’m confident that I can reliably do larger pieces still!


Notes:

[1] “In theory there is no difference between theory and practice. In practice there is.” Variously attributed to Jan la van de Snepscheut, Albert Einstein, and Yogi Berra.
Fun Furniture Project

For those of you who know my Granddaughter know that her BFF is a Rabbit named “Meow”.  They go everywhere together, do everything together.  One day, as my granddaughter was sitting at our dinner table, I noticed that Meow was leaning against a salt shaker, patiently waiting for us to finish eating.  Unfortunately for Meow, she had no support whenever someone needed salt.  I realized that Meow, too, needed a seat at the table.

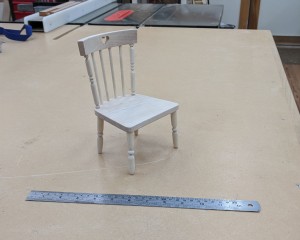
Hence a project, that my granddaughter and I could build together, was born.  Behold, Meow’s Chair:

Click to view larger photo.

Meow’s Chair

I made the pieces and then my granddaughter inserted each one into the appropriate spot after I applied glue.  Soon the chair was done and it fit perfectly for Meow!  Needless to say, everyone was happy with the result!

WordPress theme: Kippis 1.12