I finally got around to using my CNC Plasma Cutter to make some art for our yard. The first item is something I’ve wanted to do since realizing that this tool would be able to do this. As some may recall, we created a stylized branch to decorate the panels in our “Throwaway” Buffet Cabinet. We like the artwork so much we’ve wanted to replicate it.
Here is the replica, mounted on our Garden Shed:
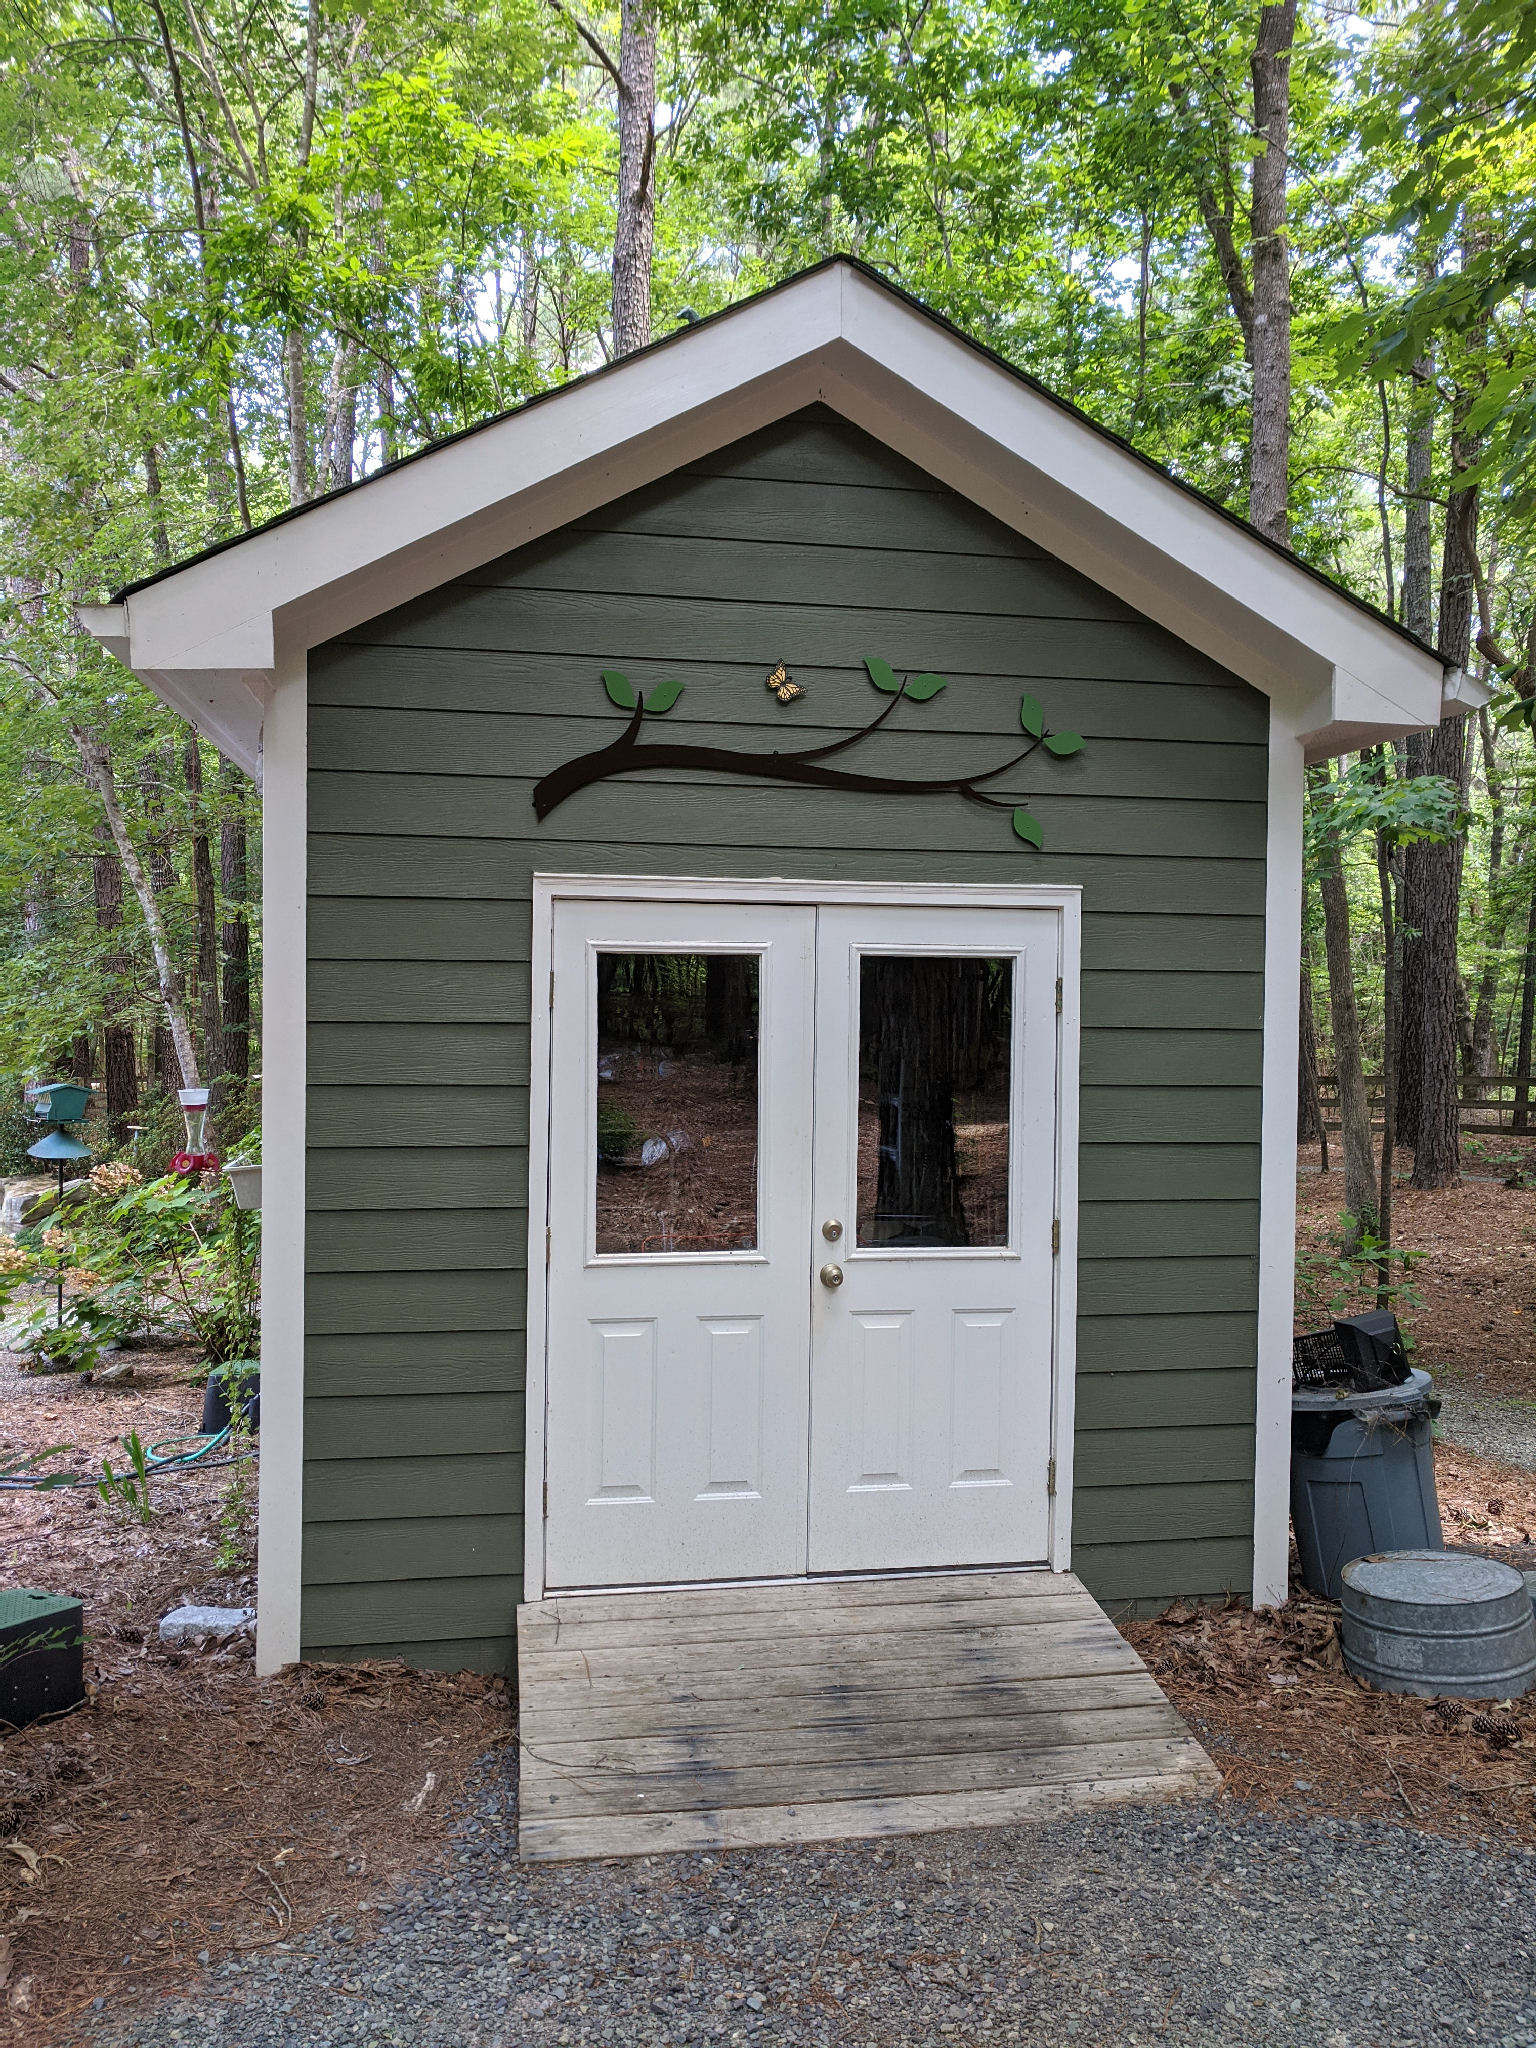
New decoration for our garden shed.
And a closer view:

Here’s a closer view of the branch and ButterFly
And finally the Butterfly:
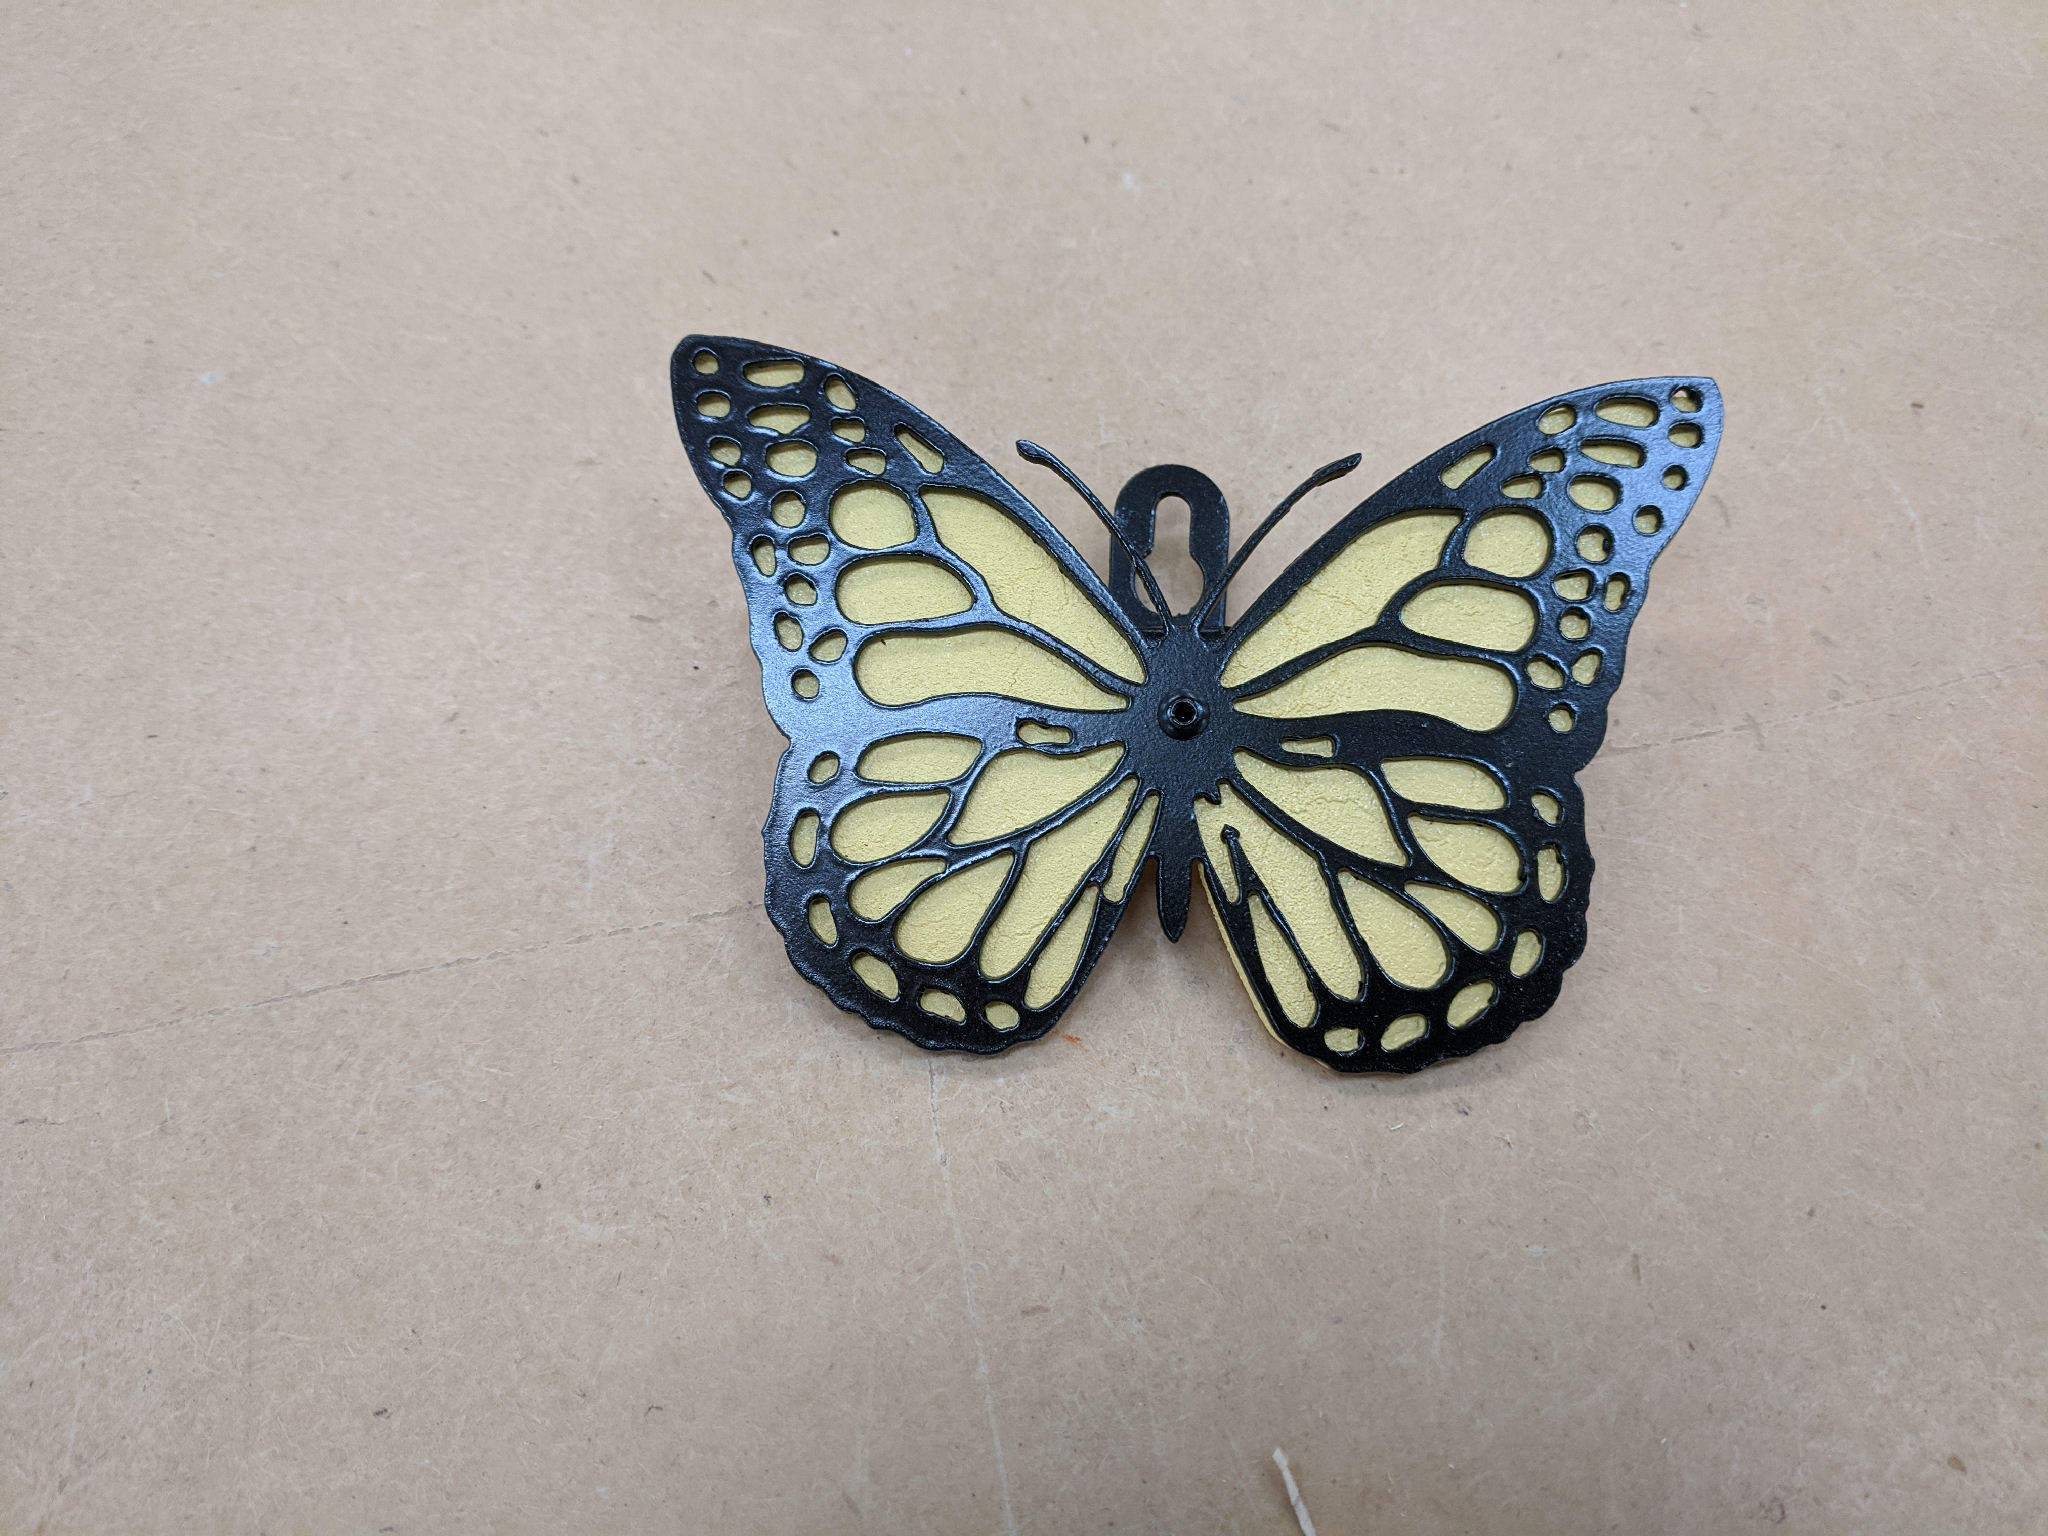
Closeup of Butterfly
Details of how this was made are down below.
The other recent addition to the Yard is some livestock to entertain our Granddaughter when she comes to visit.
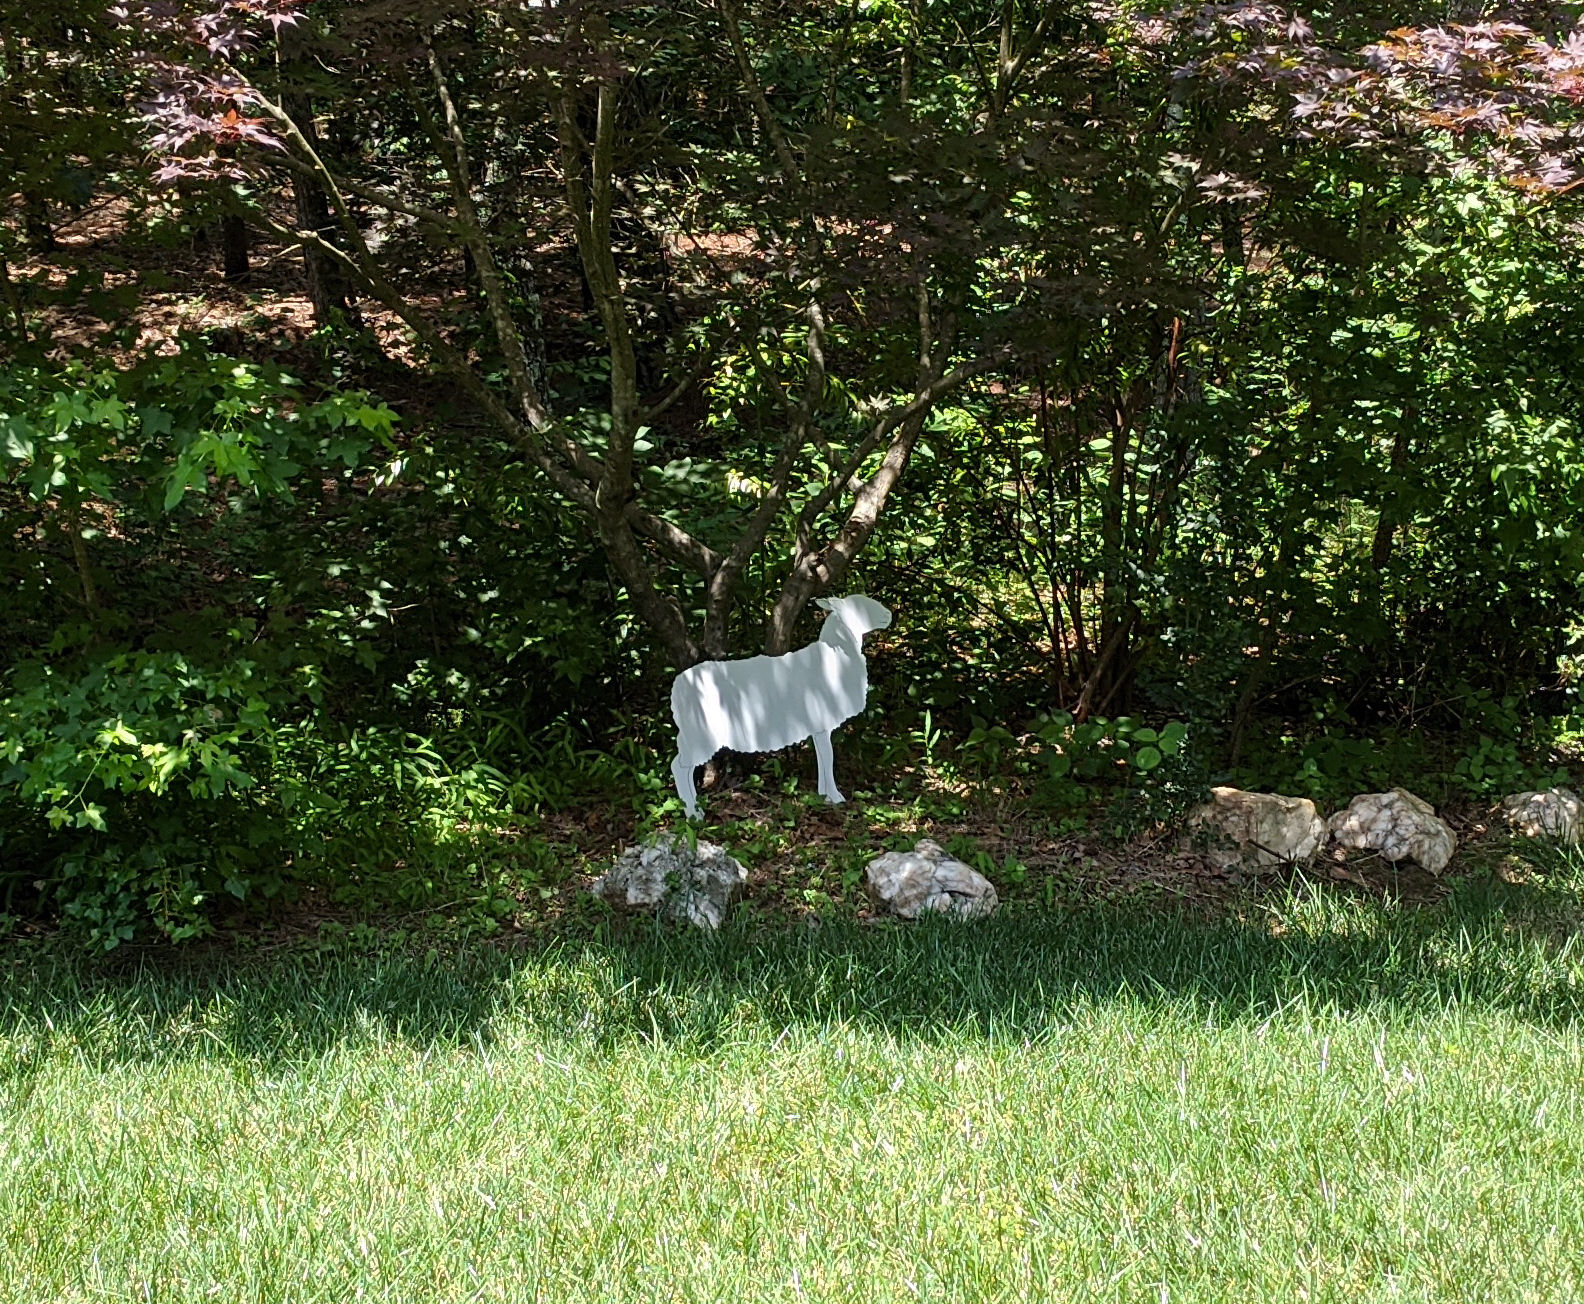
Here is the Sheep looking longingly at the front lawn…
Closeup of the Sheep:

Sheep painted.
The two large pieces, the Sheep and, especially, the Stylized Branch, both required some special cutting techniques because both of them were too large to fit on the CNC Plasma Table. The table can only cut 23″ in one direction and 25″ in the other. The good news is that the table is open on the ends of the 23″ axis so, theoretically (see Note [1] below), I could cut something as long as will fit in my Workshop.
However, this required multiple steps in both processing the artwork and the cutting process. Each step allowed me to cut a region of the metal, the cutting was paused while I re-positioned and aligned the steel for the next cut, and then cutting was resumed at the next section with the software offsetting the coordinates to match the new position. The alignment is critical as the cut line is only about 0.050″ wide so any error in positioning would, at best, leave a jog in the cut line, or, worse, an uncut section of steel that would need manual cutting and fixing.
The sheep was used to test and prove the process. It could have been done by limiting the size to 23″, but using a full sheet gave me a bigger sheep and tested the process.
The first step was to rework the art work:
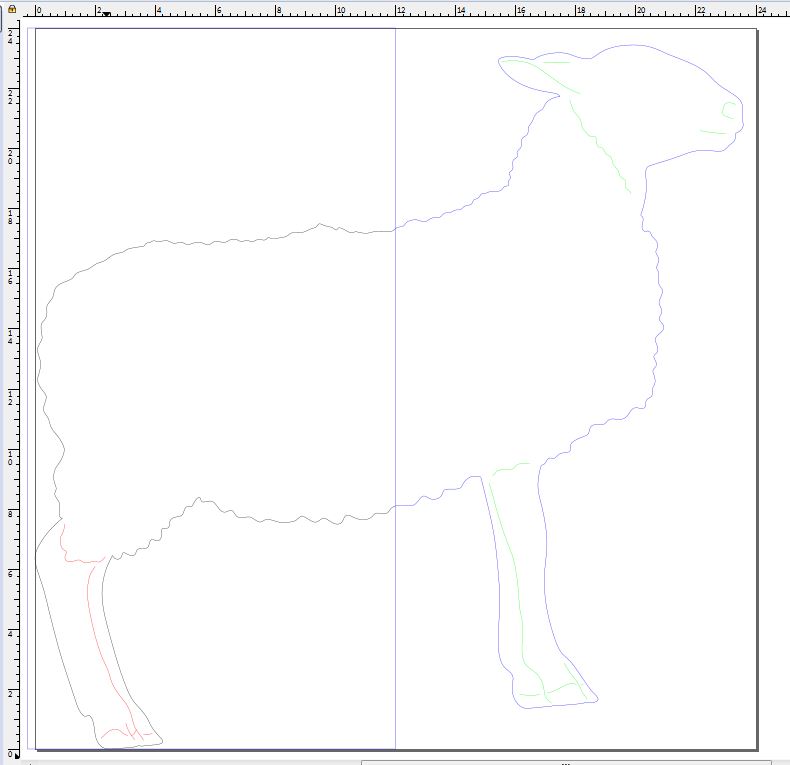
Maximized Sheep Artwork, rotated and scaled to fit 24×24 piece of steel.
You can see the split line between the two halves of the drawing. That’s where the art work needed to be separated into to independent groups. Note that the art work has internal cuts and they had to be separated into the two different cut phases as well.
Using the Sheep project to refine the process turned out to be a wise decision as I learned enough from the Sheep project to do the Stylized branch, which required three sections over a 72 piece of steel, and 4 joints.
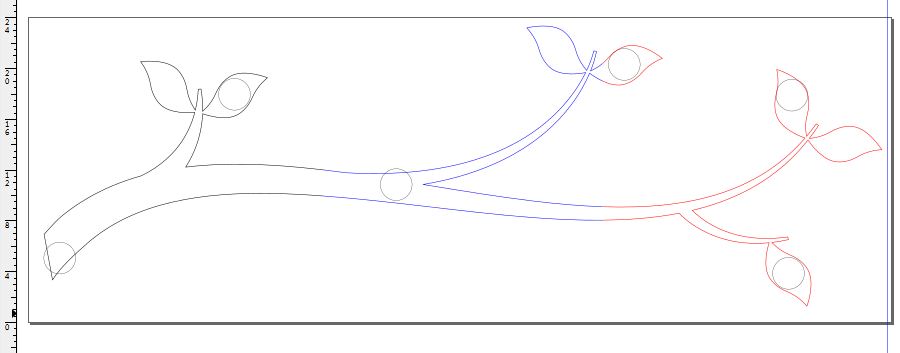
Branch Artwork showing three sections and mounting hole locations.
Cutting a 6 foot long piece of steel also required some re-arrangement of my workshop, not only to make room for the workpiece but also to provide support for the portions of steel that were on either side of the table during the cut. It also concerned me that my Plasma cutter, which is normally kept in a little alcove surrounded by fiberglass welding blankets where most of the sparks are contained by the blankets, would now be out in the open during all the cuts with sparks flying in all directions! As a precaution I put my fire extinguisher right at my side during the whole operation!
Here is the setup prior to cut:

I had to rearrange my workshop to manage a 6 foot long piece of steel!
And here is the result after the cut:
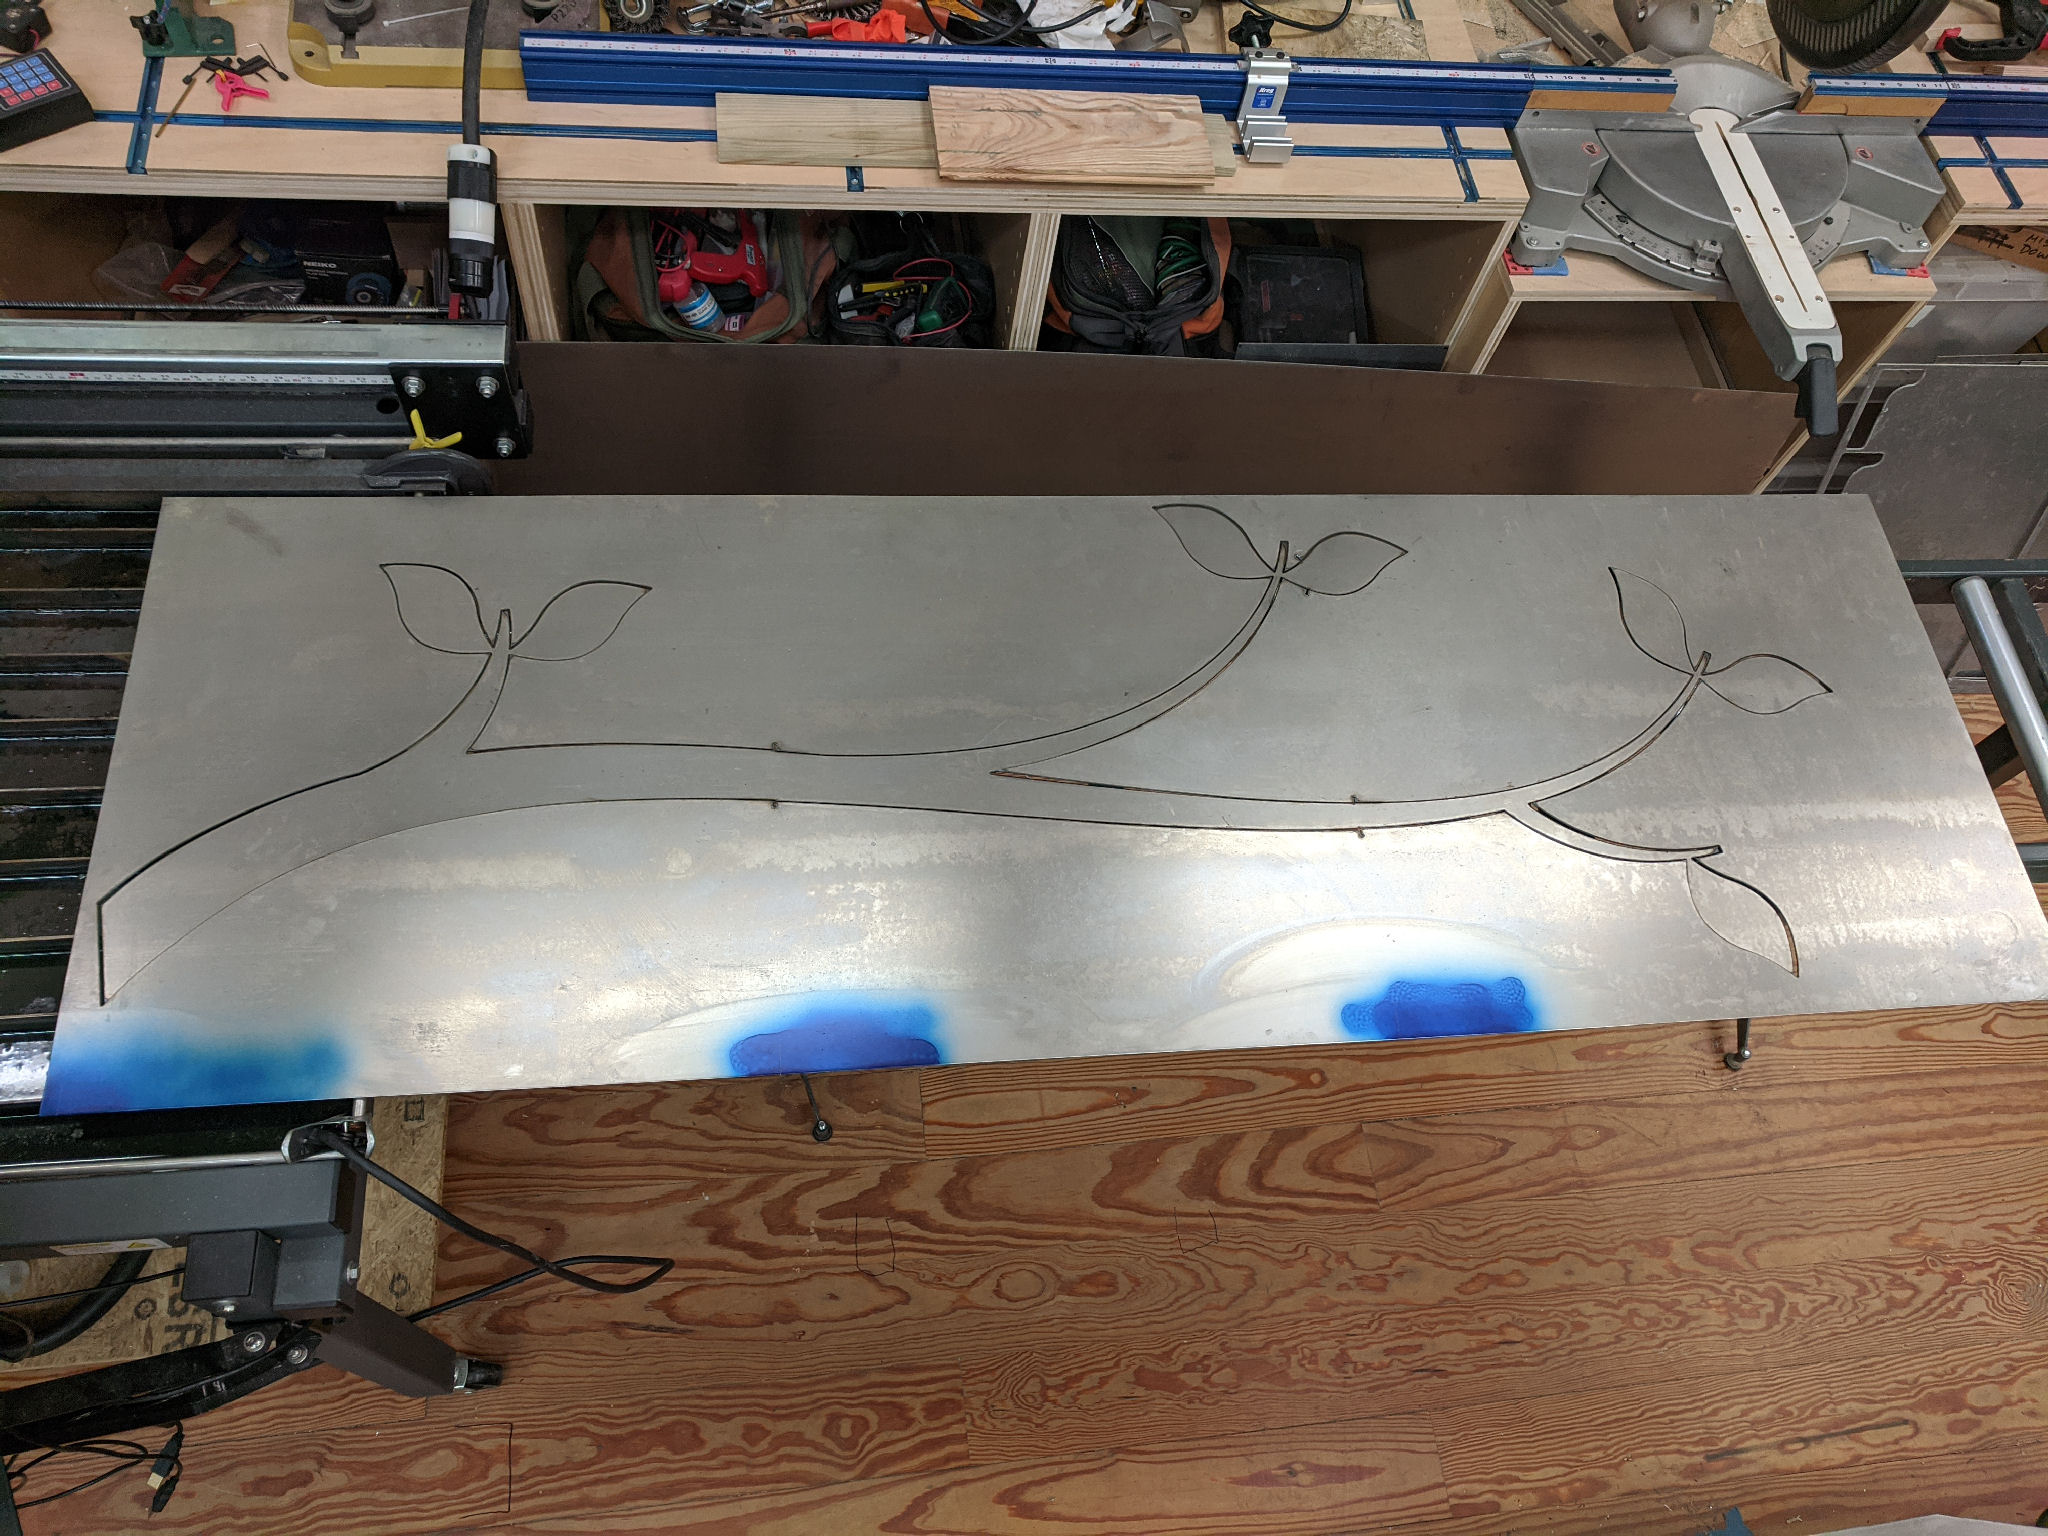
And here is the finished cut. Notice the lead in and lead out cuts at the joint of each section.
And the final piece cleaned up and ready to paint.
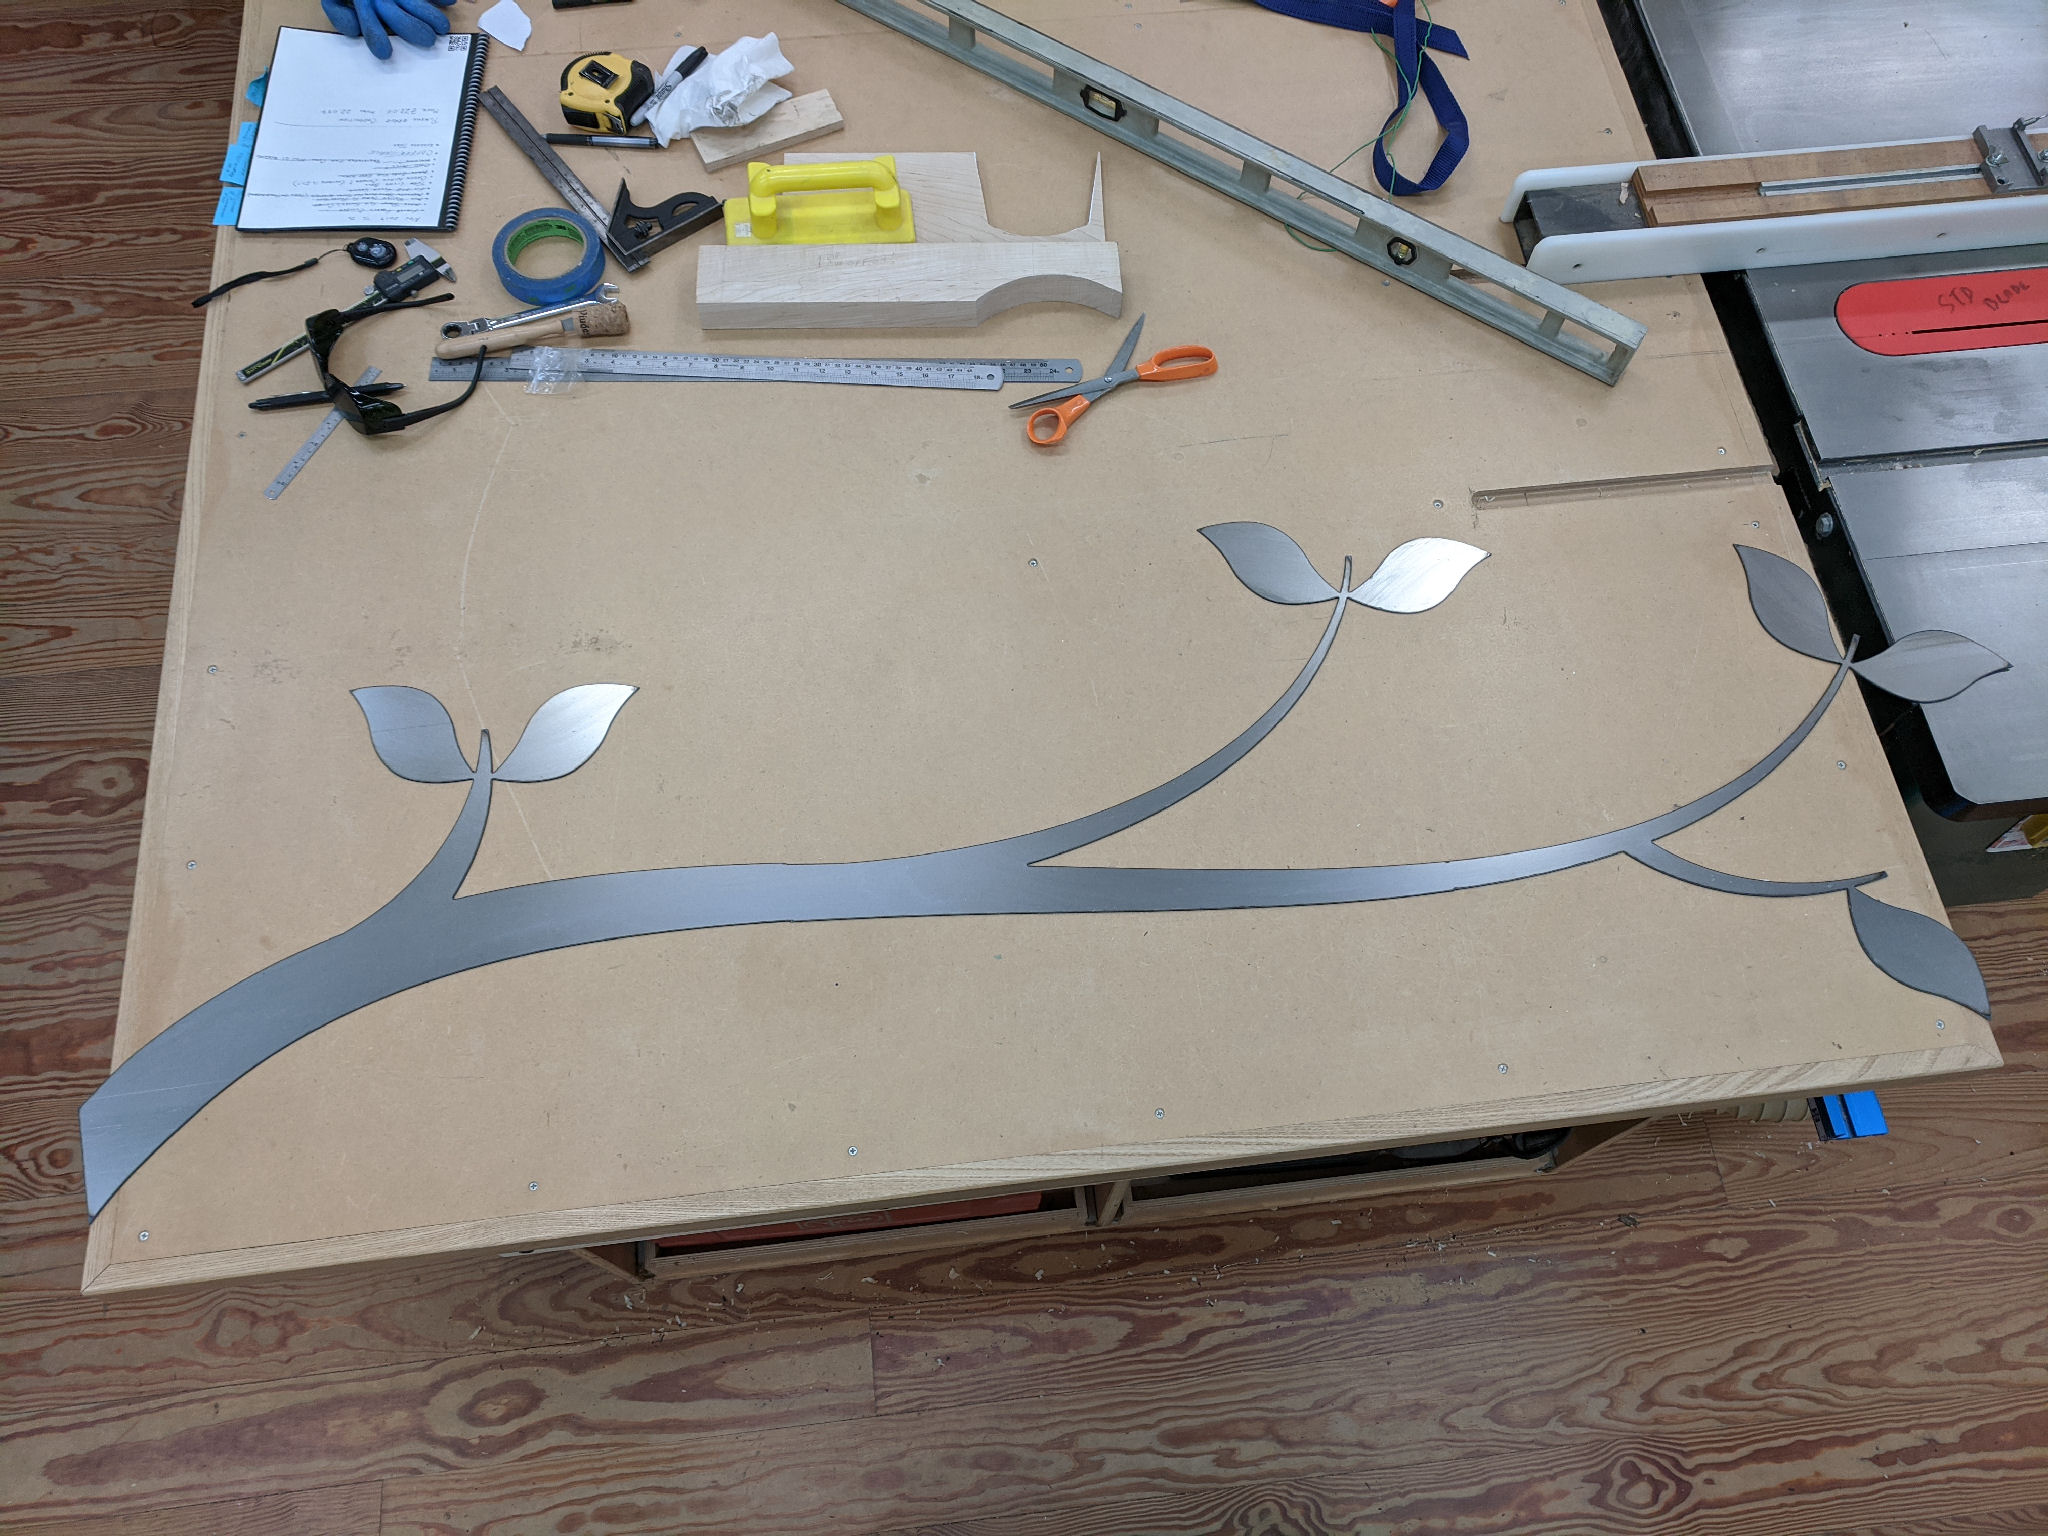
Branch ready for painting!
All in all, the cutting went very well with probably no more than 1/32″ misalignment in the worst case. As a result of this project, I’m confident that I can reliably do larger pieces still!
Notes:
[1] “In theory there is no difference between theory and practice. In practice there is.” Variously attributed to Jan la van de Snepscheut, Albert Einstein, and Yogi Berra.
Leave a Reply