I’m visiting The Little House in the Village (LHV) for a few days and have made some progress on getting it closer to “Comfortably Liveable”.
Most noteworthy is recommissioning the heating system after its Winter “Break“. Here is the LHV heating system:

Heating system for the Little House in the Village. This is an LPG Condensing Boiler that heats the house and produces hot water on demand.
Surprisingly, the system started up without a major hitch and I was able to get the Kickspace Heaters in the Bathroom and the Kitchen fully operational. They had been giving me problems when I first installed them, but I suspect this (and other issues) were due to my ‘innovative’ tweaking of one of the boiler’s default parameters (maximum heating temperature). Restoring the default allowed the boiler to operate optimally.
I also discovered, to our relief, that the ‘adventure’[1] we had over the Winter did not leave any damage (other than a few drain holes in the kitchen ceiling).
I also managed to complete the final wiring for the two hallways and front entrance light. It is a welcome sight to see the front porch light when I return from a night in the Village. It is also a relief to be able to turn on the hallway light so I don’t have to stumble around in the dark any more.
Given the success of these early tasks, I then set sight on one of the major conveniences I hoped to enable. I had hoped to install the Bathroom Vanity with a secondary, but possibly more important, goal of moving the temporary Bathroom sink to the Kitchen (so we can do dishes and have water on the first floor). Unfortunately my first efforts in this task were not so successful.
The Vanity is a piece of furniture that I had designed and fabricated in Texas in 2010. We brought the pieces to The LHV in the Fall of 2010 with the idea that I would assemble it and install it on that trip. We managed to get the pieces to the LHV, but ran out of time to assemble it and it has been sitting in the LHV garage since then.
Uh, to say that the LHV garage is humid might be a bit of an understatement. Consequently, as I took the dry fit assembly apart today, I was not too surprised to discover that the floating tenons had swelled to the point that it was extremely difficult to remove the tenons from the pieces. It was very clear that the fit was way too tight to try to glue up the whole assembly. I spent several minutes trying to decide how best to dry out the tenons. My buddy, Jay, was willing to put them on his woodstove or offered to loan me a heat gun. It was in discussing alternatives with Jay that I concluded that putting the tenons in an oven, set to something less than boiling temperature, would dry out the tenons in the most risk free way.
Fortunately, I was able to connect with our great neighbors, Phil and Mary, and they very generously agreed to let me use their oven to ‘cook’ my ‘biscuits’. So we cooked them at 175 degrees for an hour and then, bringing them home (and being too late to try to assemble the Vanity today), I placed them in front of the Kickspace heater, turned up the heat a little, and I’ll let them dry over night. Here’s how they look as they get a nice warm breeze blowing over them…

Tenons for Bathroom Vanity. Drying in front of the Kitchen Kickspace Heater.
I sampled a couple of the tenons and it appears that this might work and I might be able to assemble the Vanity tomorrow. I’ll keep you posted…
Notes:
[1] The ‘Adventure’ is a topic for another posting. Suffice it to say that it involved a surprising and unnecessary amount of water under freezing conditions.


![[img src=https://tomstudwell.com/wordpress/wp-content/flagallery/workshopdoors/thumbs/thumbs_wsd_0001.jpg]1110Delivery of about 150 board feet of raw wood for the doors.](https://tomstudwell.com/wordpress/wp-content/flagallery/workshopdoors/wsd_0001.jpg)
![[img src=https://tomstudwell.com/wordpress/wp-content/flagallery/workshopdoors/thumbs/thumbs_wsd_0002.jpg]820Ready to begin processing.I had to 'rearrange' the workshop to make room for processing 10-12 foot boards. Note extension conveyors leading into and out of Jointer.](https://tomstudwell.com/wordpress/wp-content/flagallery/workshopdoors/wsd_0002.jpg)
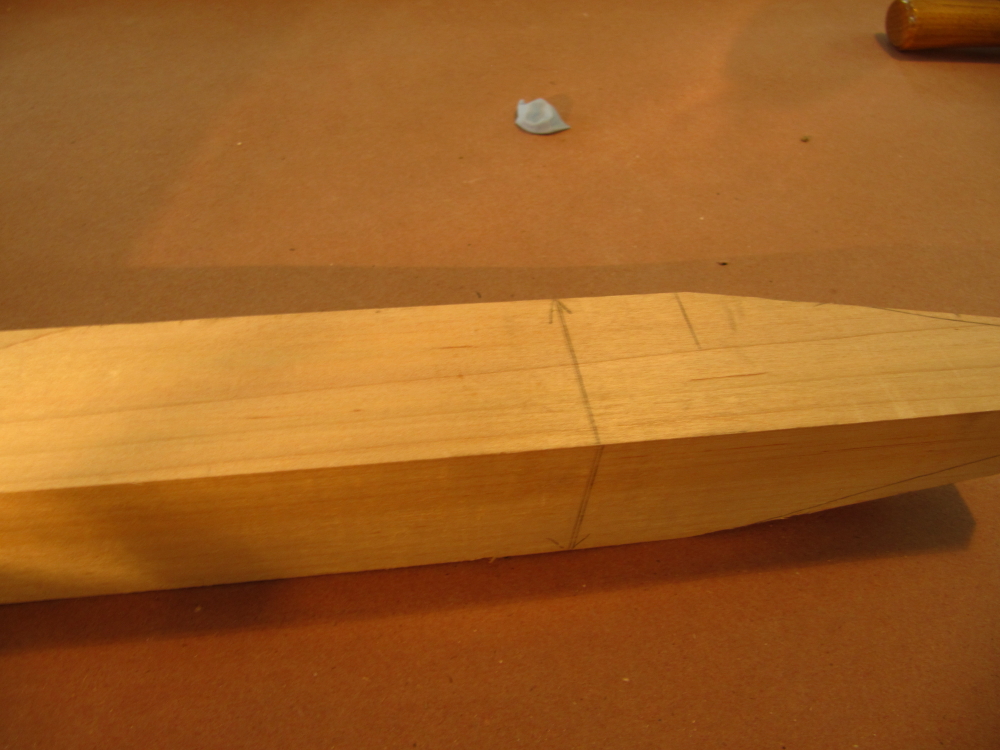
![[img src=https://tomstudwell.com/wordpress/wp-content/flagallery/workshopdoors/thumbs/thumbs_wsd_0003.jpg]760Wood partially processed. Making progress - reduced the wood to a lot of sawdust!](https://tomstudwell.com/wordpress/wp-content/flagallery/workshopdoors/wsd_0003.jpg)
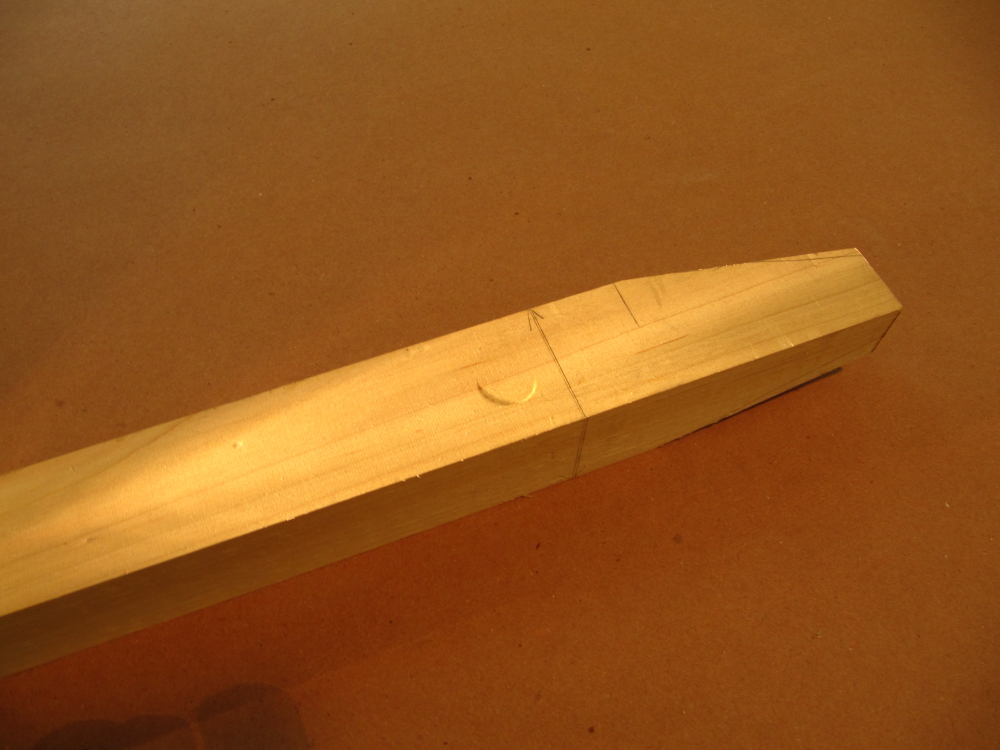
![[img src=https://tomstudwell.com/wordpress/wp-content/flagallery/workshopdoors/thumbs/thumbs_wsd_0004.jpg]760All ready to begin subassemblies.I used floating tenons to hold each of the four layers together.](https://tomstudwell.com/wordpress/wp-content/flagallery/workshopdoors/wsd_0004.jpg)
![[img src=https://tomstudwell.com/wordpress/wp-content/flagallery/workshopdoors/thumbs/thumbs_wsd_0005.jpg]710Assembly of the first door has begun. Note inner and outer layers. Outer layer has crossbuck design for rigidity and inner layer has hollow for insulation. You can see the other two layers queued up for assembly.](https://tomstudwell.com/wordpress/wp-content/flagallery/workshopdoors/wsd_0005.jpg)
![[img src=https://tomstudwell.com/wordpress/wp-content/flagallery/workshopdoors/thumbs/thumbs_wsd_0006.jpg]660Another view of the first two layers.](https://tomstudwell.com/wordpress/wp-content/flagallery/workshopdoors/wsd_0006.jpg)
![[img src=https://tomstudwell.com/wordpress/wp-content/flagallery/workshopdoors/thumbs/thumbs_wsd_0007.jpg]630Three layers assembled and first layer of insulation installed.Inside layer of insulation uses 1/2" rigid foam board. Overall I used slightly less than 1 1/2" of insulation for an R factor of about 7.5.](https://tomstudwell.com/wordpress/wp-content/flagallery/workshopdoors/wsd_0007.jpg)
![[img src=https://tomstudwell.com/wordpress/wp-content/flagallery/workshopdoors/thumbs/thumbs_wsd_0009.jpg]610All filled up!](https://tomstudwell.com/wordpress/wp-content/flagallery/workshopdoors/wsd_0009.jpg)
![[img src=https://tomstudwell.com/wordpress/wp-content/flagallery/workshopdoors/thumbs/thumbs_wsd_0010.jpg]610Now we install the FRP panels that protect the insulation and provide low maintenance.](https://tomstudwell.com/wordpress/wp-content/flagallery/workshopdoors/wsd_0010.jpg)
![[img src=https://tomstudwell.com/wordpress/wp-content/flagallery/workshopdoors/thumbs/thumbs_wsd_0011.jpg]590Both FRP panels in place, waiting for the final Cross Buck outer layer.](https://tomstudwell.com/wordpress/wp-content/flagallery/workshopdoors/wsd_0011.jpg)
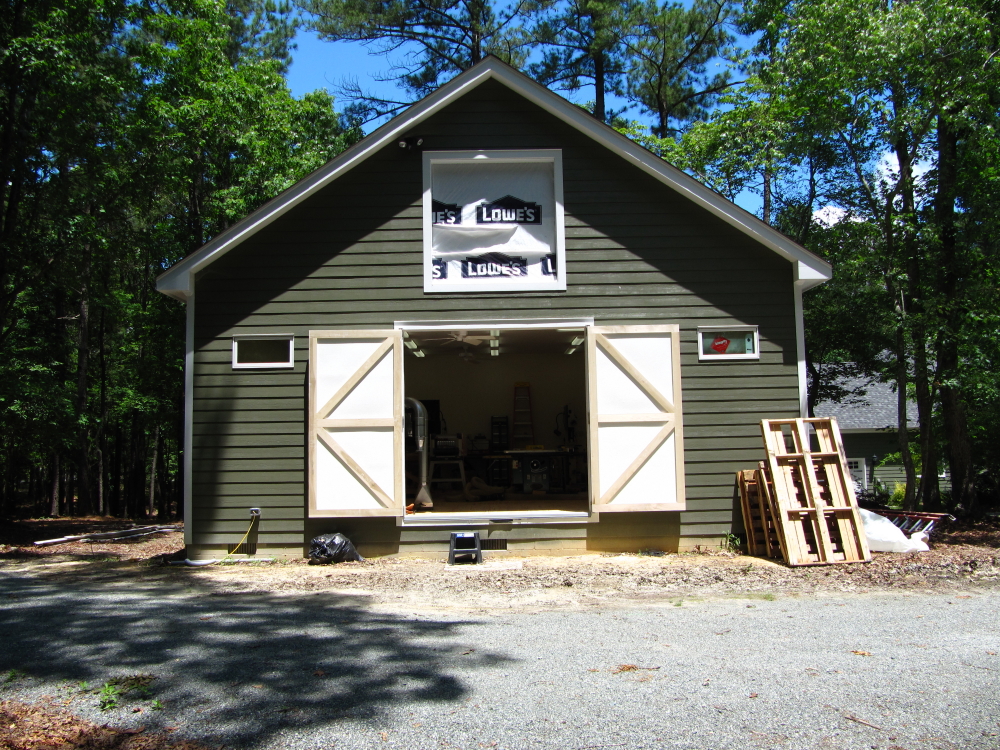
![[img src=https://tomstudwell.com/wordpress/wp-content/flagallery/workshopdoors/thumbs/thumbs_wsd_0012.jpg]590Here we are! Doors wide open to NC Spring air!](https://tomstudwell.com/wordpress/wp-content/flagallery/workshopdoors/wsd_0012.jpg)
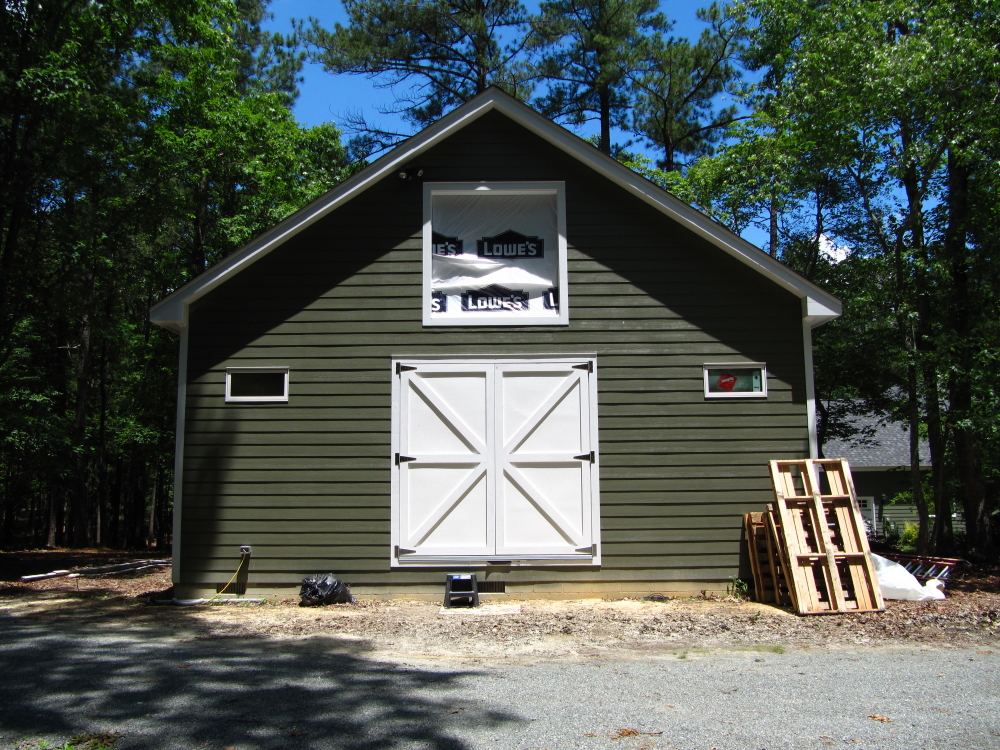
![[img src=https://tomstudwell.com/wordpress/wp-content/flagallery/workshopdoors/thumbs/thumbs_wsd_0013.jpg]560Closed up, preparing for the rainstorm that came 15 minutes later.](https://tomstudwell.com/wordpress/wp-content/flagallery/workshopdoors/wsd_0013.jpg)
![[img src=https://tomstudwell.com/wordpress/wp-content/flagallery/workshopdoors/thumbs/thumbs_wsd_0014.jpg]560View from the inside of the workshop. No more plastic sheeting!](https://tomstudwell.com/wordpress/wp-content/flagallery/workshopdoors/wsd_0014.jpg)
![[img src=https://tomstudwell.com/wordpress/wp-content/flagallery/workshopdoors/thumbs/thumbs_wsd_0008.jpg]620Next is the 3/4Note one side is filled, the foreground side still waiting for the next piece.](https://tomstudwell.com/wordpress/wp-content/flagallery/workshopdoors/wsd_0008.jpg)